
A Pass Relevance Location Profile is a named group of relevant locations that you can link to a Pass Template. Instead of adding the same GPS locations to every Pass Template one at a time, you build the profile once and reuse it. When a customer’s device is detected near any location in the profile, a message appears on their lock screen for Apple Wallet Passes; Google Wallet Passes show a predefined message.
Both pages described below are in the Pass Design drop-down in the main navigation. The individual locations themselves are managed on the Pass Relevance Locations page, and you need at least one location there before a profile can have anything assigned to it.
Pass Relevance Location Profiles #
The Pass Relevance Location Profiles page lists every profile in your account. Use the search box at the top left to search by profile name, and Clear Search Results to return to the full list. The Create Pass Relevance Location Profile button at the top right opens the profile builder.
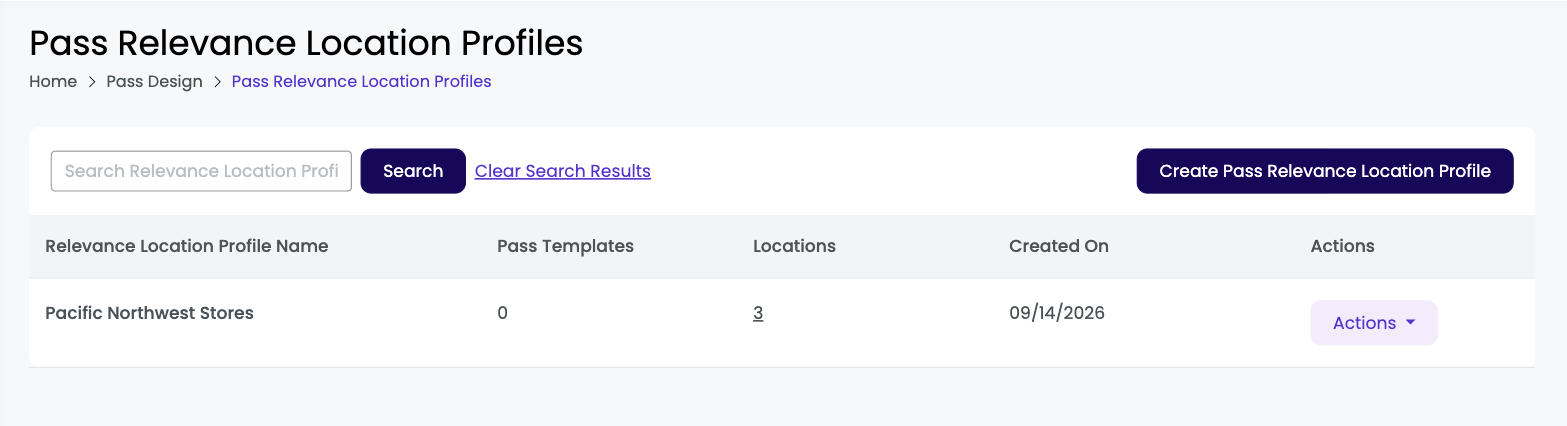
| Column | Description |
|---|---|
| Relevance Location Profile Name | The name you gave the profile when you created it. |
| Pass Templates | The number of Pass Templates this profile is linked to. Click the number to open the Pass Templates page filtered to those Templates. |
| Locations | The number of locations assigned to this profile. Click the number to open the Pass Relevance Locations page filtered to those locations. |
| Created On | The date the profile was created. |
| Actions: Edit | Opens the profile so you can rename it, change which locations are assigned, or change the default location message. |
| Actions: Add Location | Opens a pop-up for adding a new location. The location is added to this profile and to your master Pass Relevance Locations list at the same time. |
| Actions: Delete | Deletes the profile. The locations themselves stay on the Pass Relevance Locations page. |
Adding a location from the listing page
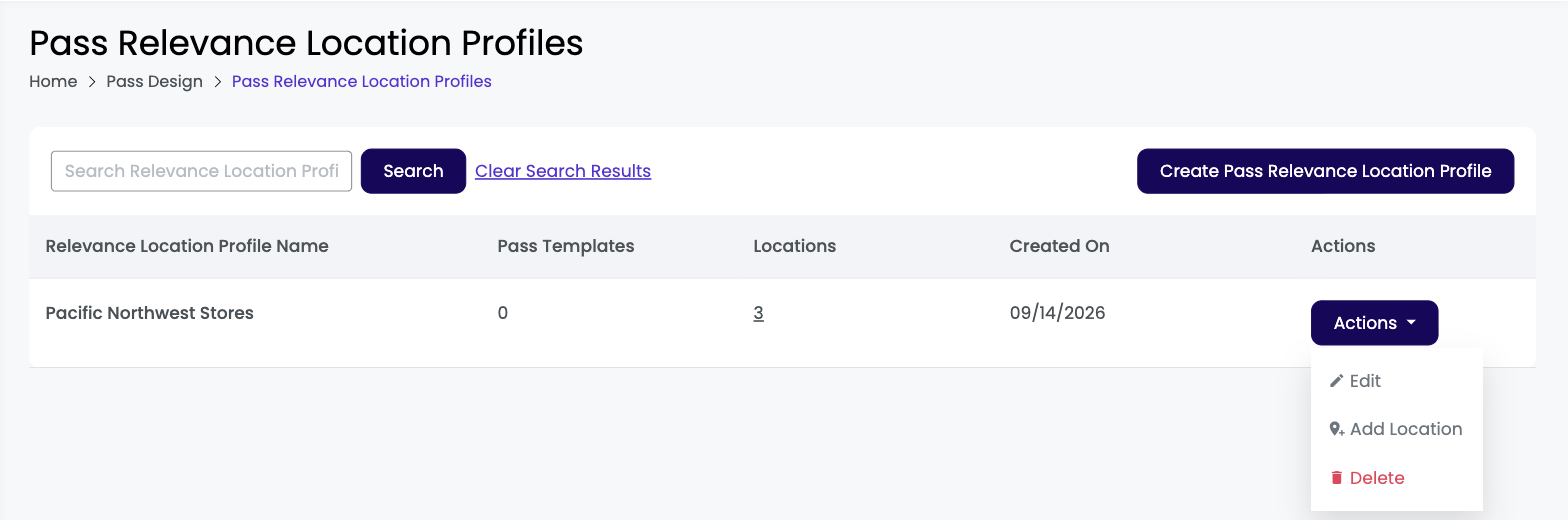
The Add Location action opens a pop-up with the following fields. Location Name, Latitude and Longitude are required; the rest are optional.
| Field | Description |
|---|---|
| Location Name | An internal name for the location. Required. This name is not shown to customers. |
| Longitude and Latitude | The GPS co-ordinates of the location. Both are required. |
| Relevance Text | The message shown on Apple Wallet Passes when a device is detected at this location. If you leave this blank, the profile’s Default Location Message is used instead. |
| Location Address | The street address, plus City, State, Country and Zipcode. These are for your own reference and do not appear on the Pass. |
Creating a Pass Relevance Location Profile #
Click Create Pass Relevance Location Profile on the listing page, or open it from the Pass Design navigation drop-down. The page has three sections, followed by a Save Profile button.
General Details
Enter a Pass Relevance Location Profile Name. This is required, and is internal only — it is how the profile appears elsewhere in the platform and is never shown to customers.
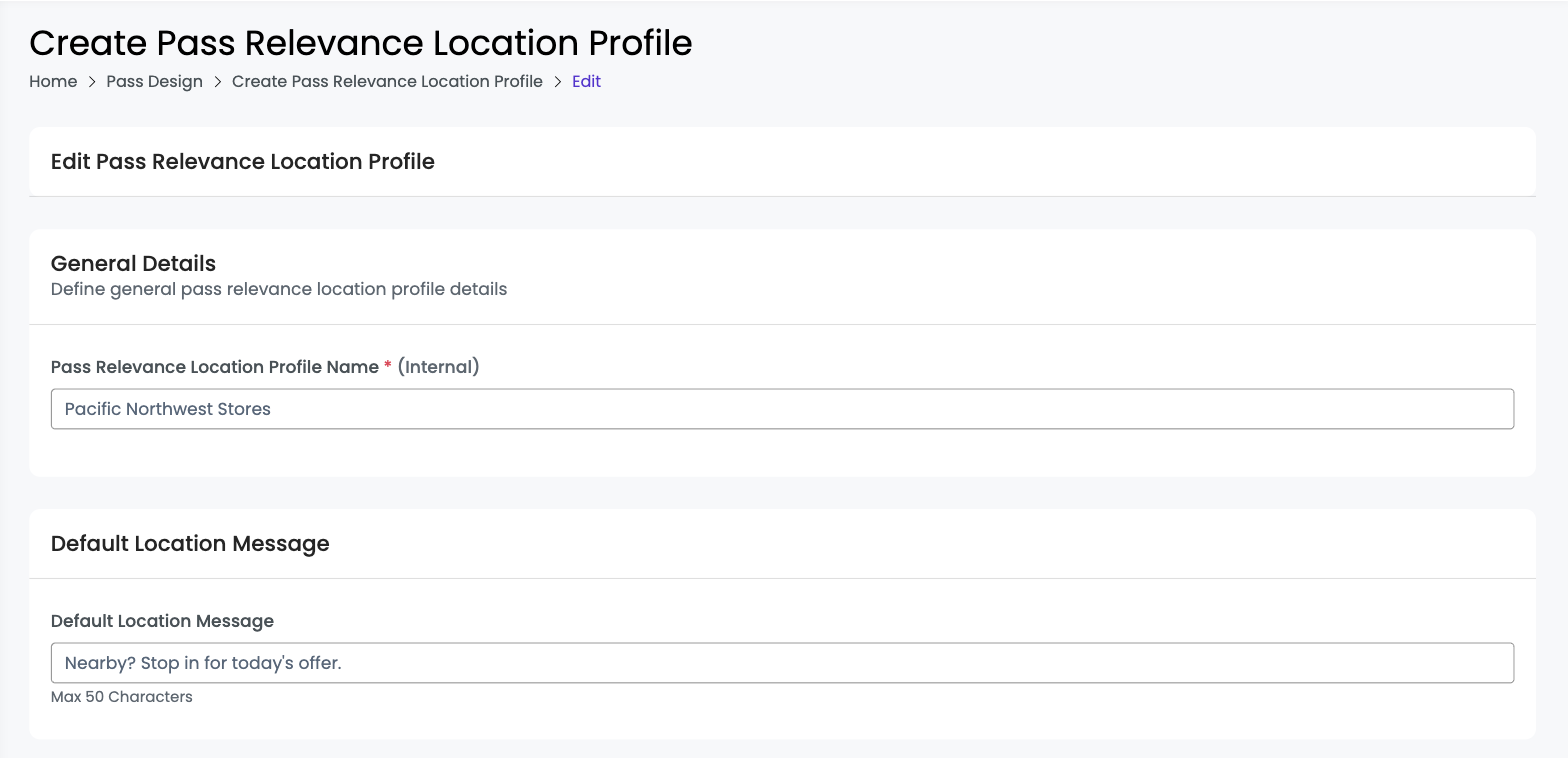
Default Location Message
Enter up to 50 characters of text. This message is shown for any assigned location that does not have its own relevance text set.
If you change the default location message on a profile that is already in use, you are asked whether to apply the new message to Passes that are already installed. Choose Apply New Message to update previously installed Passes, or Do Not Update to leave them on the old message and use the new one only for Passes installed from then on.
Pass Relevance Locations
This section is where you assign locations to the profile. Choose one of two options:
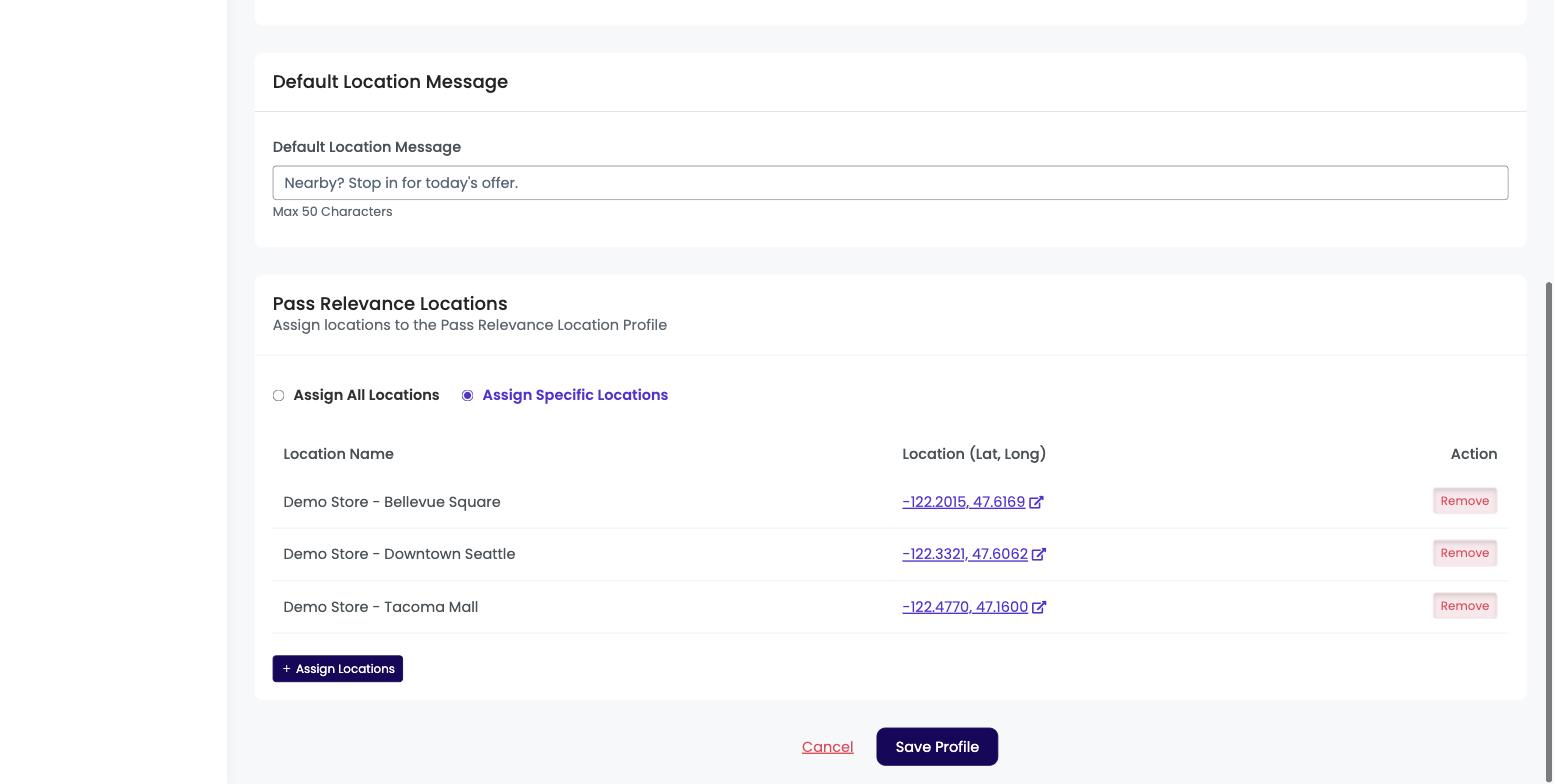
| Option | Description |
|---|---|
| Assign All Locations | Every location on your Pass Relevance Locations page is assigned to this profile, and the page confirms that all locations are added to the profile. Any location you add later is assigned to this profile automatically. |
| Assign Specific Locations | A table lists your locations with columns for Location Name, Location (Lat, Long) and Action. Each row has a button in the Action column that toggles between Assign and Remove, so you add a location to the profile by clicking Assign and take it off again by clicking Remove. When you edit a saved profile, an + Assign Locations button also appears below the table for adding locations that are not yet listed. The coordinates in each row link out to the location on a map. |
If you have not added any locations yet, this section reads “No relevance locations found. Please add them on the Pass Relevance Locations page first.” Add your locations on that page, then come back and assign them here.
Save Profile
Click Save Profile at the bottom of the page to save your changes, or Cancel to discard them.
Relevant Location Limit #
The number of relevant locations you can add is capped per account by the Relevant Location Limit setting on your plan. The default is 100. The limit applies both when you add locations through the form and when you import them, so if you hit the cap you will need the limit raised on your plan before you can add more.