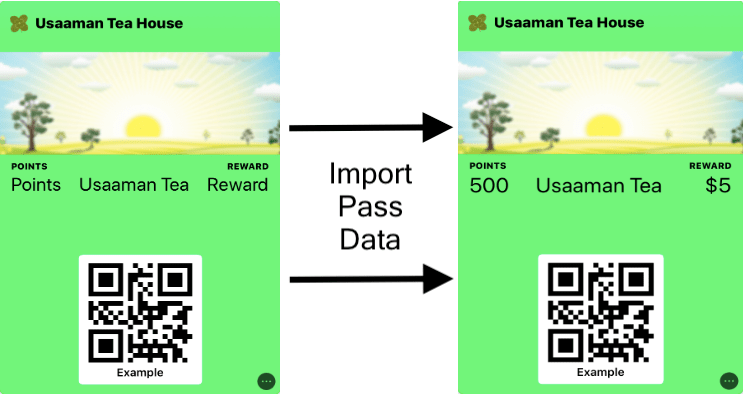
Steps to Import Pass Data: #
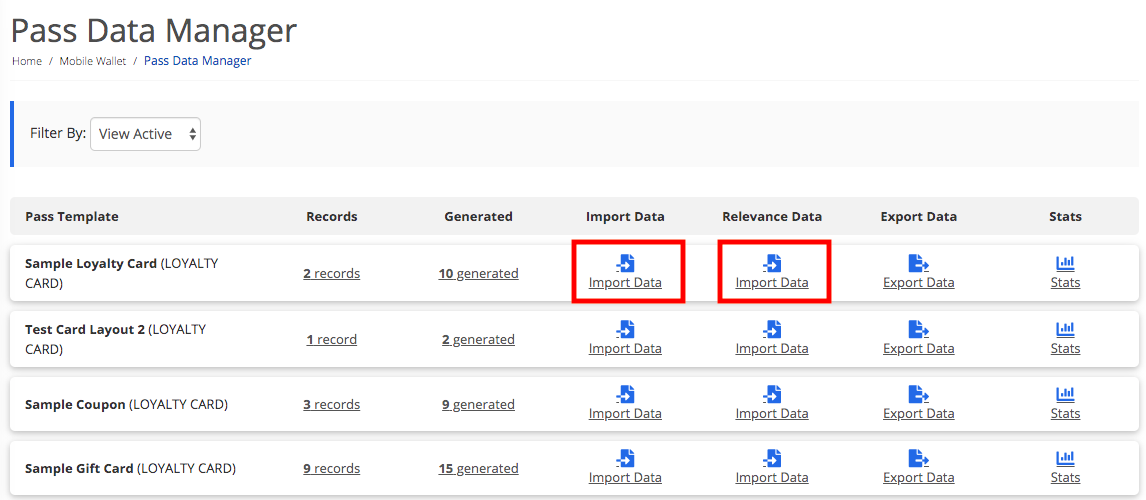
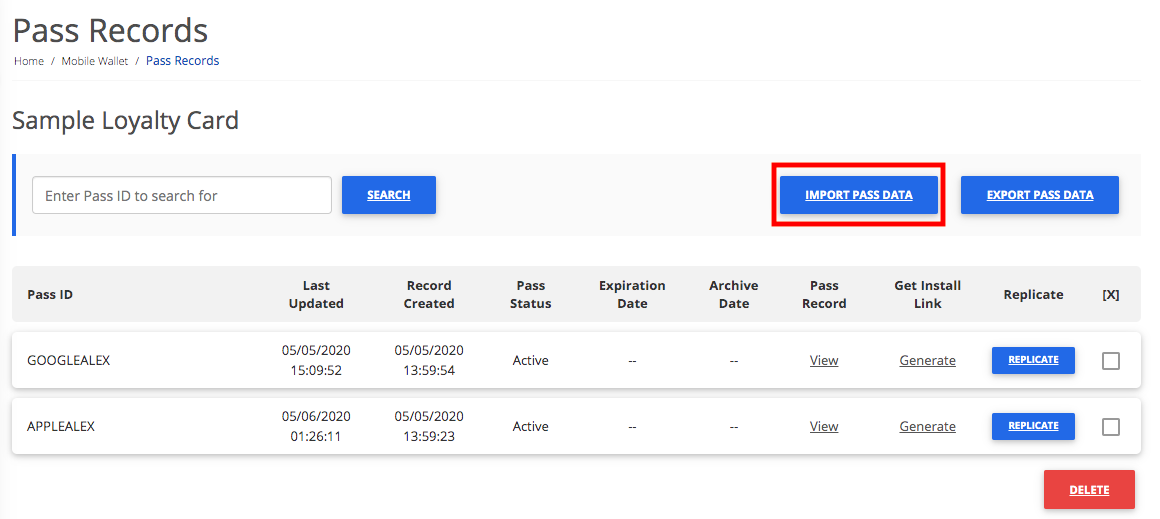
1. Select the ‘Import Data’ link on the Pass Data Manager page for the Pass template that you want to import Pass data into or click on the records link on the Pass Data Manager page and select ‘Import Pass Data’. You can also import relevant location data from the Pass Data Manager.
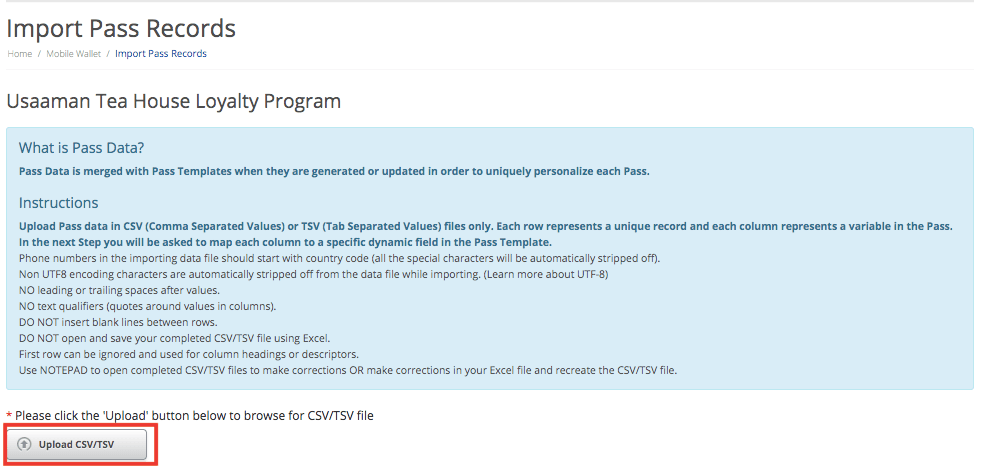
2. Upload a CSV file with the dynamic Pass data or Pass records
3. Map the standard Pass fields to the corresponding columns of your CSV/TSV file.
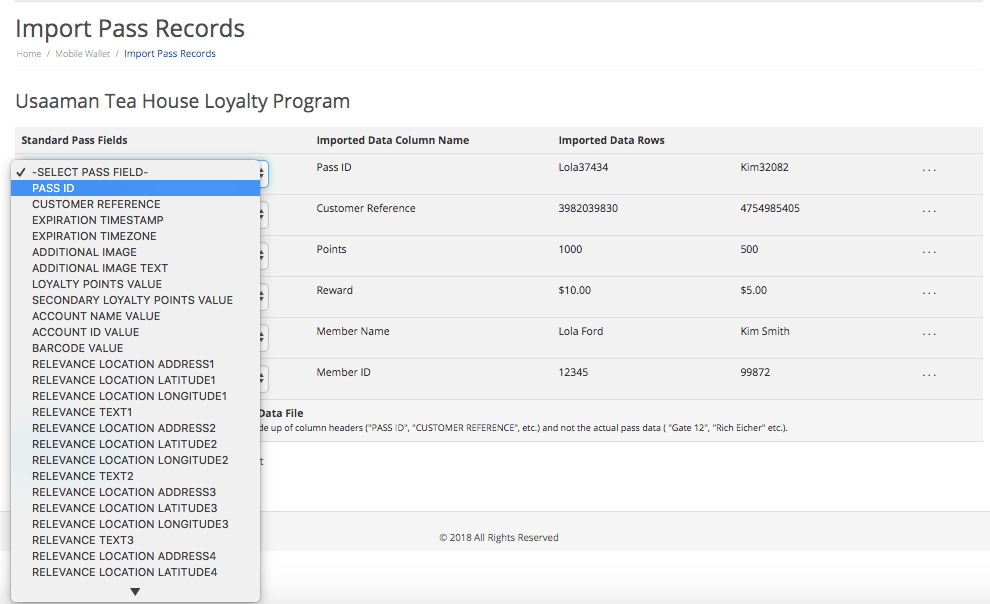
There are a few default fields:
- Customer Reference: customer references, such as an email address, phone number, or customer ID, used to reference a particular customer.
- Custom Pass ID: The identifier from your system to uniquely identify the Pass data. Note that the Custom Pass ID is required for each data row and must be unique.
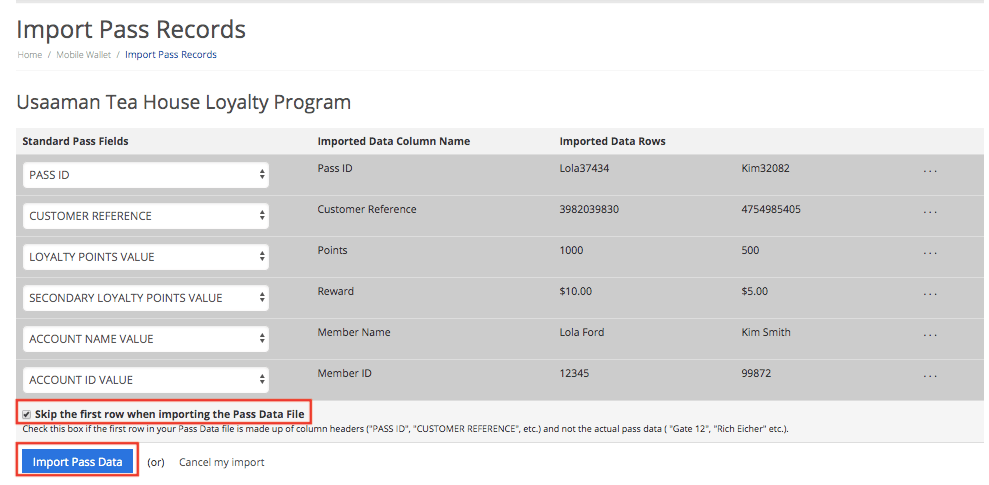
4. Once you have finished the mapping process, click the “Import Pass Data” button. Make sure to check the “Skip the first row when importing the Pass Data File” option if the first row in your CSV/TSV file is made up of column names.
5. The Pass data is now imported. Each row (a record) will contain Pass data corresponding to a data row from your CSV/TSV file. Now you can deliver unique and personalized Passes to your customers. You can view the status of your import by going to the CSV Import Page in your account.

Import Pass Data FAQs #
How do I update my customers’ Pass data once I have delivered the Passes to them?
- You can update the dynamic data of each individual generated and installed Pass in the Pass Data Manager page. Click the ‘Generated’ link for Pass Template that you want to update. Click ‘Update Record’ to update the dynamic data of the Pass.
- You can use the updatePassData API.
