How to Create a Pass Issuance Form #
WalletThat’s Pass Issuance Form Builder allows clients to easily create forms for issuing digital loyalty cards, coupons, event tickets, and more. These forms simplify the process for clients who prefer not to use our API, email marketing platform, or third-party integration for pass issuance. Follow the instructions below to create and utilize pass issuance forms.
Step 1: Create Form
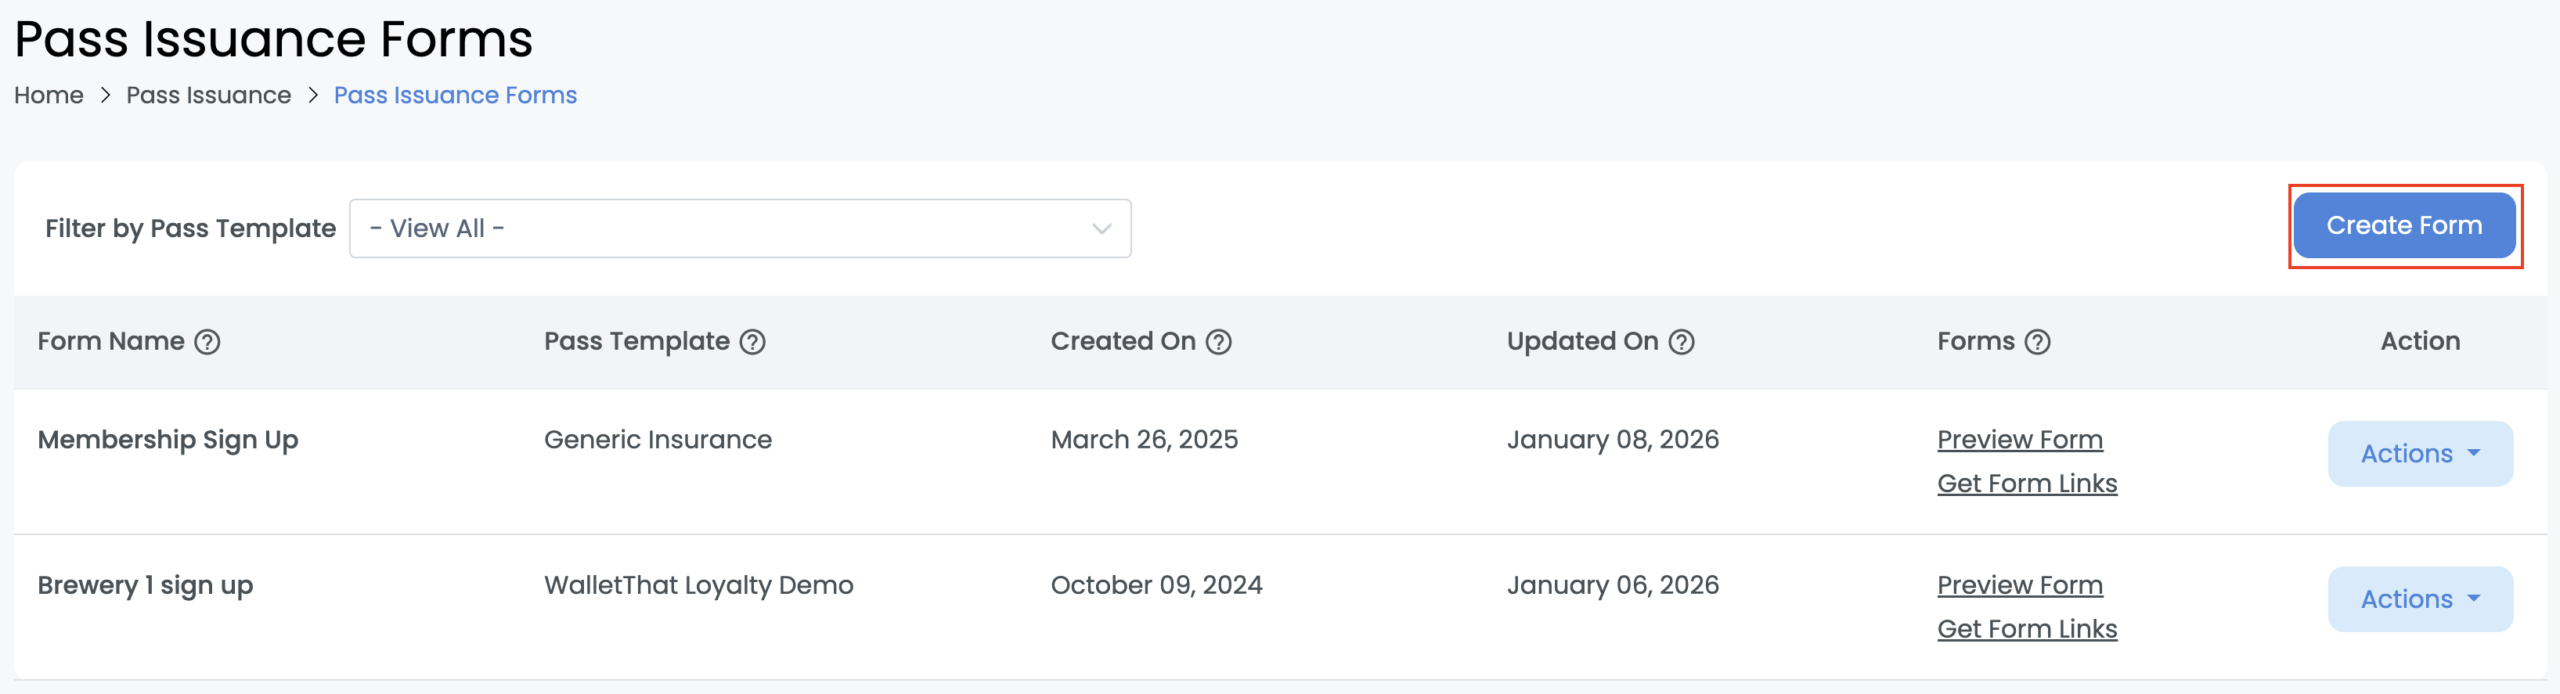
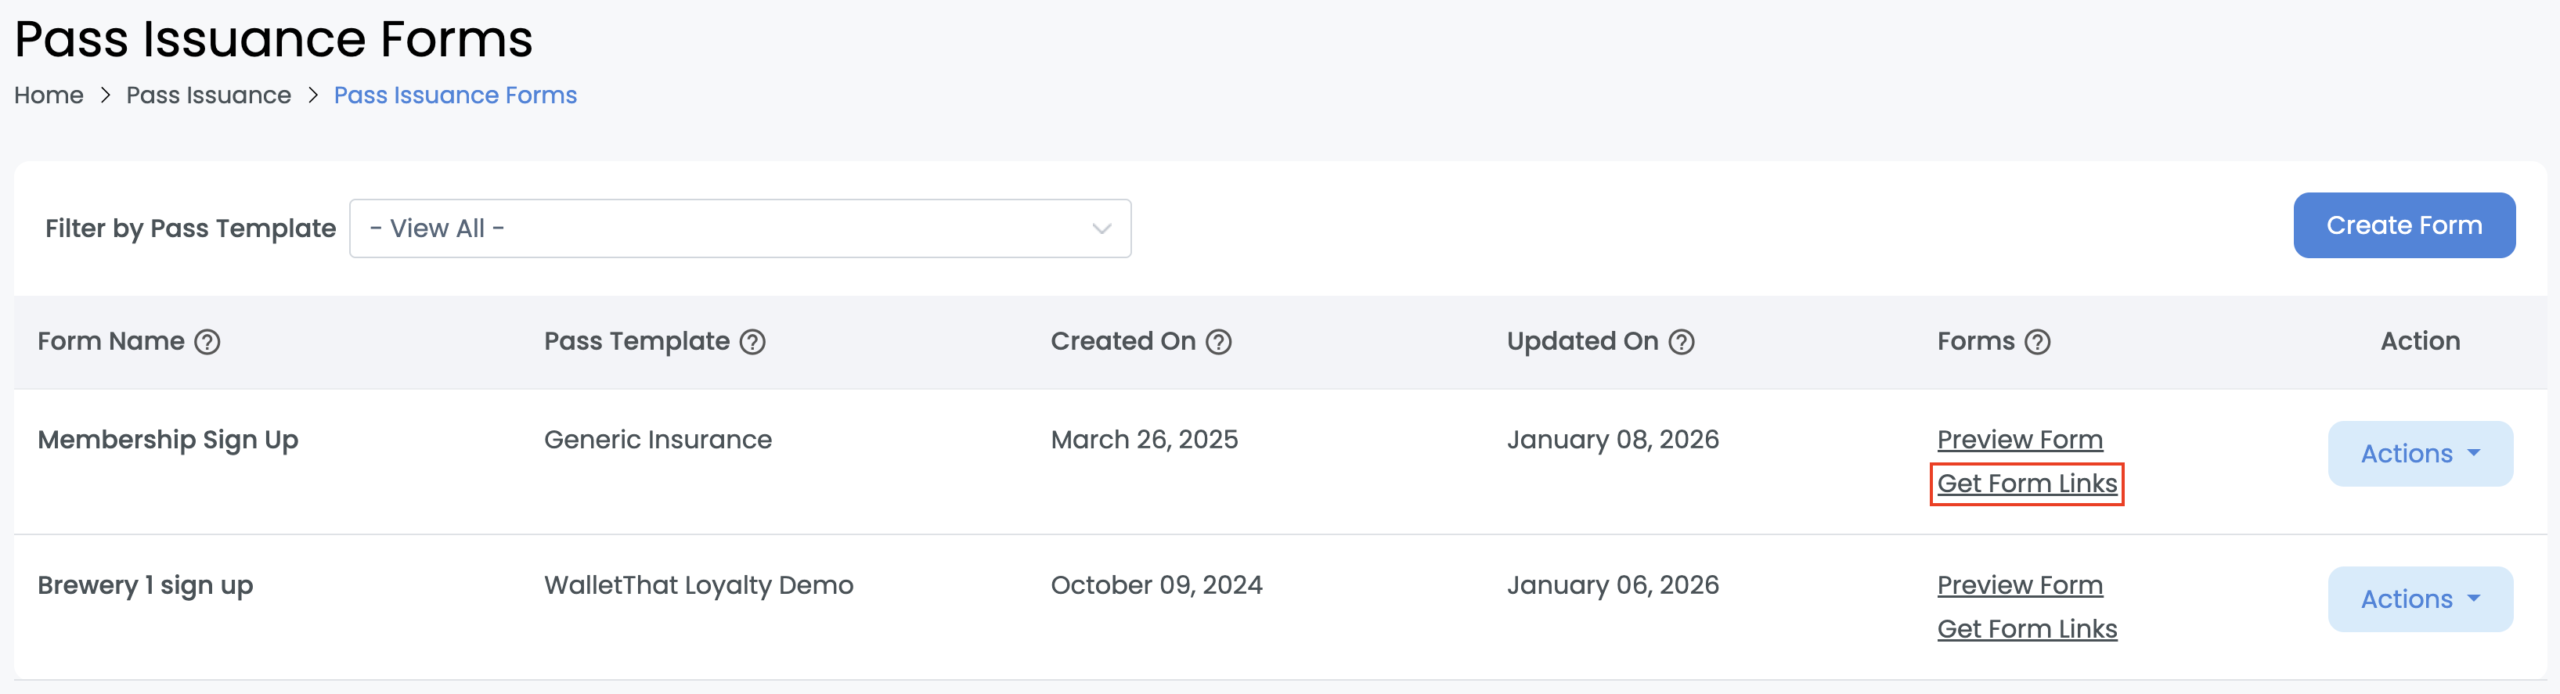
The pass issuance forms page displays information about previously created forms. You can create new forms directly from this page by clicking on the “Create Form” button.
| Setting | Description |
|---|---|
| Form Name | The form name is an internal identifier to differentiate between multiple forms you have created. |
| Pass Template | This is the pass template linked to the form. All passes generated using the specific issuance form will follow the chosen pass template layout. Please note that if a Pass Template is deleted, any Pass Issuance Forms associated with that Template will also be deleted. |
| Created On | This is the date that the form was created on. |
| Updated On | This is the date that the form was updated on. |
| Forms: Preview Form | Clicking on the “Preview Form” button will display your issuance form so you can preview how the form will look to the end user. You can also test the form by filling it out from this page. |
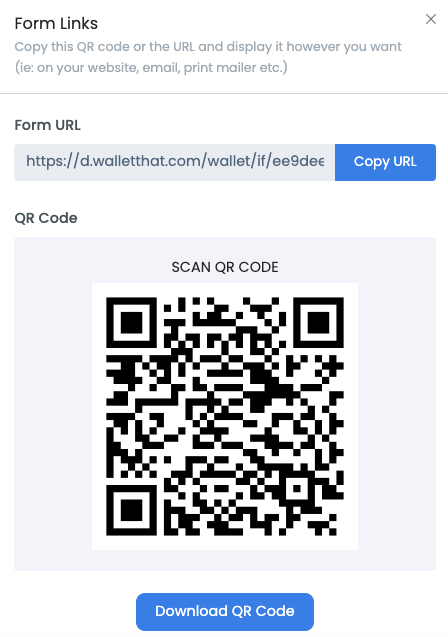
| Forms: Get Form Links |
Clicking on the “Get Form Links” button will display a popup containing a link and QR code to the issuance form so that you can embed it on your website or in a email. |
| Action: Edit | Clicking on the “Edit Form” button will display the issuance form builder settings so you can edit the previously created form. Any edits made after users have installed a pass using an existing form will not affect those passes. |
| Action: Delete | Clicking on “Delete Form Template” will delete the template. |
Step 2: Form Details
Fill out the form details section to customize the form to your liking. 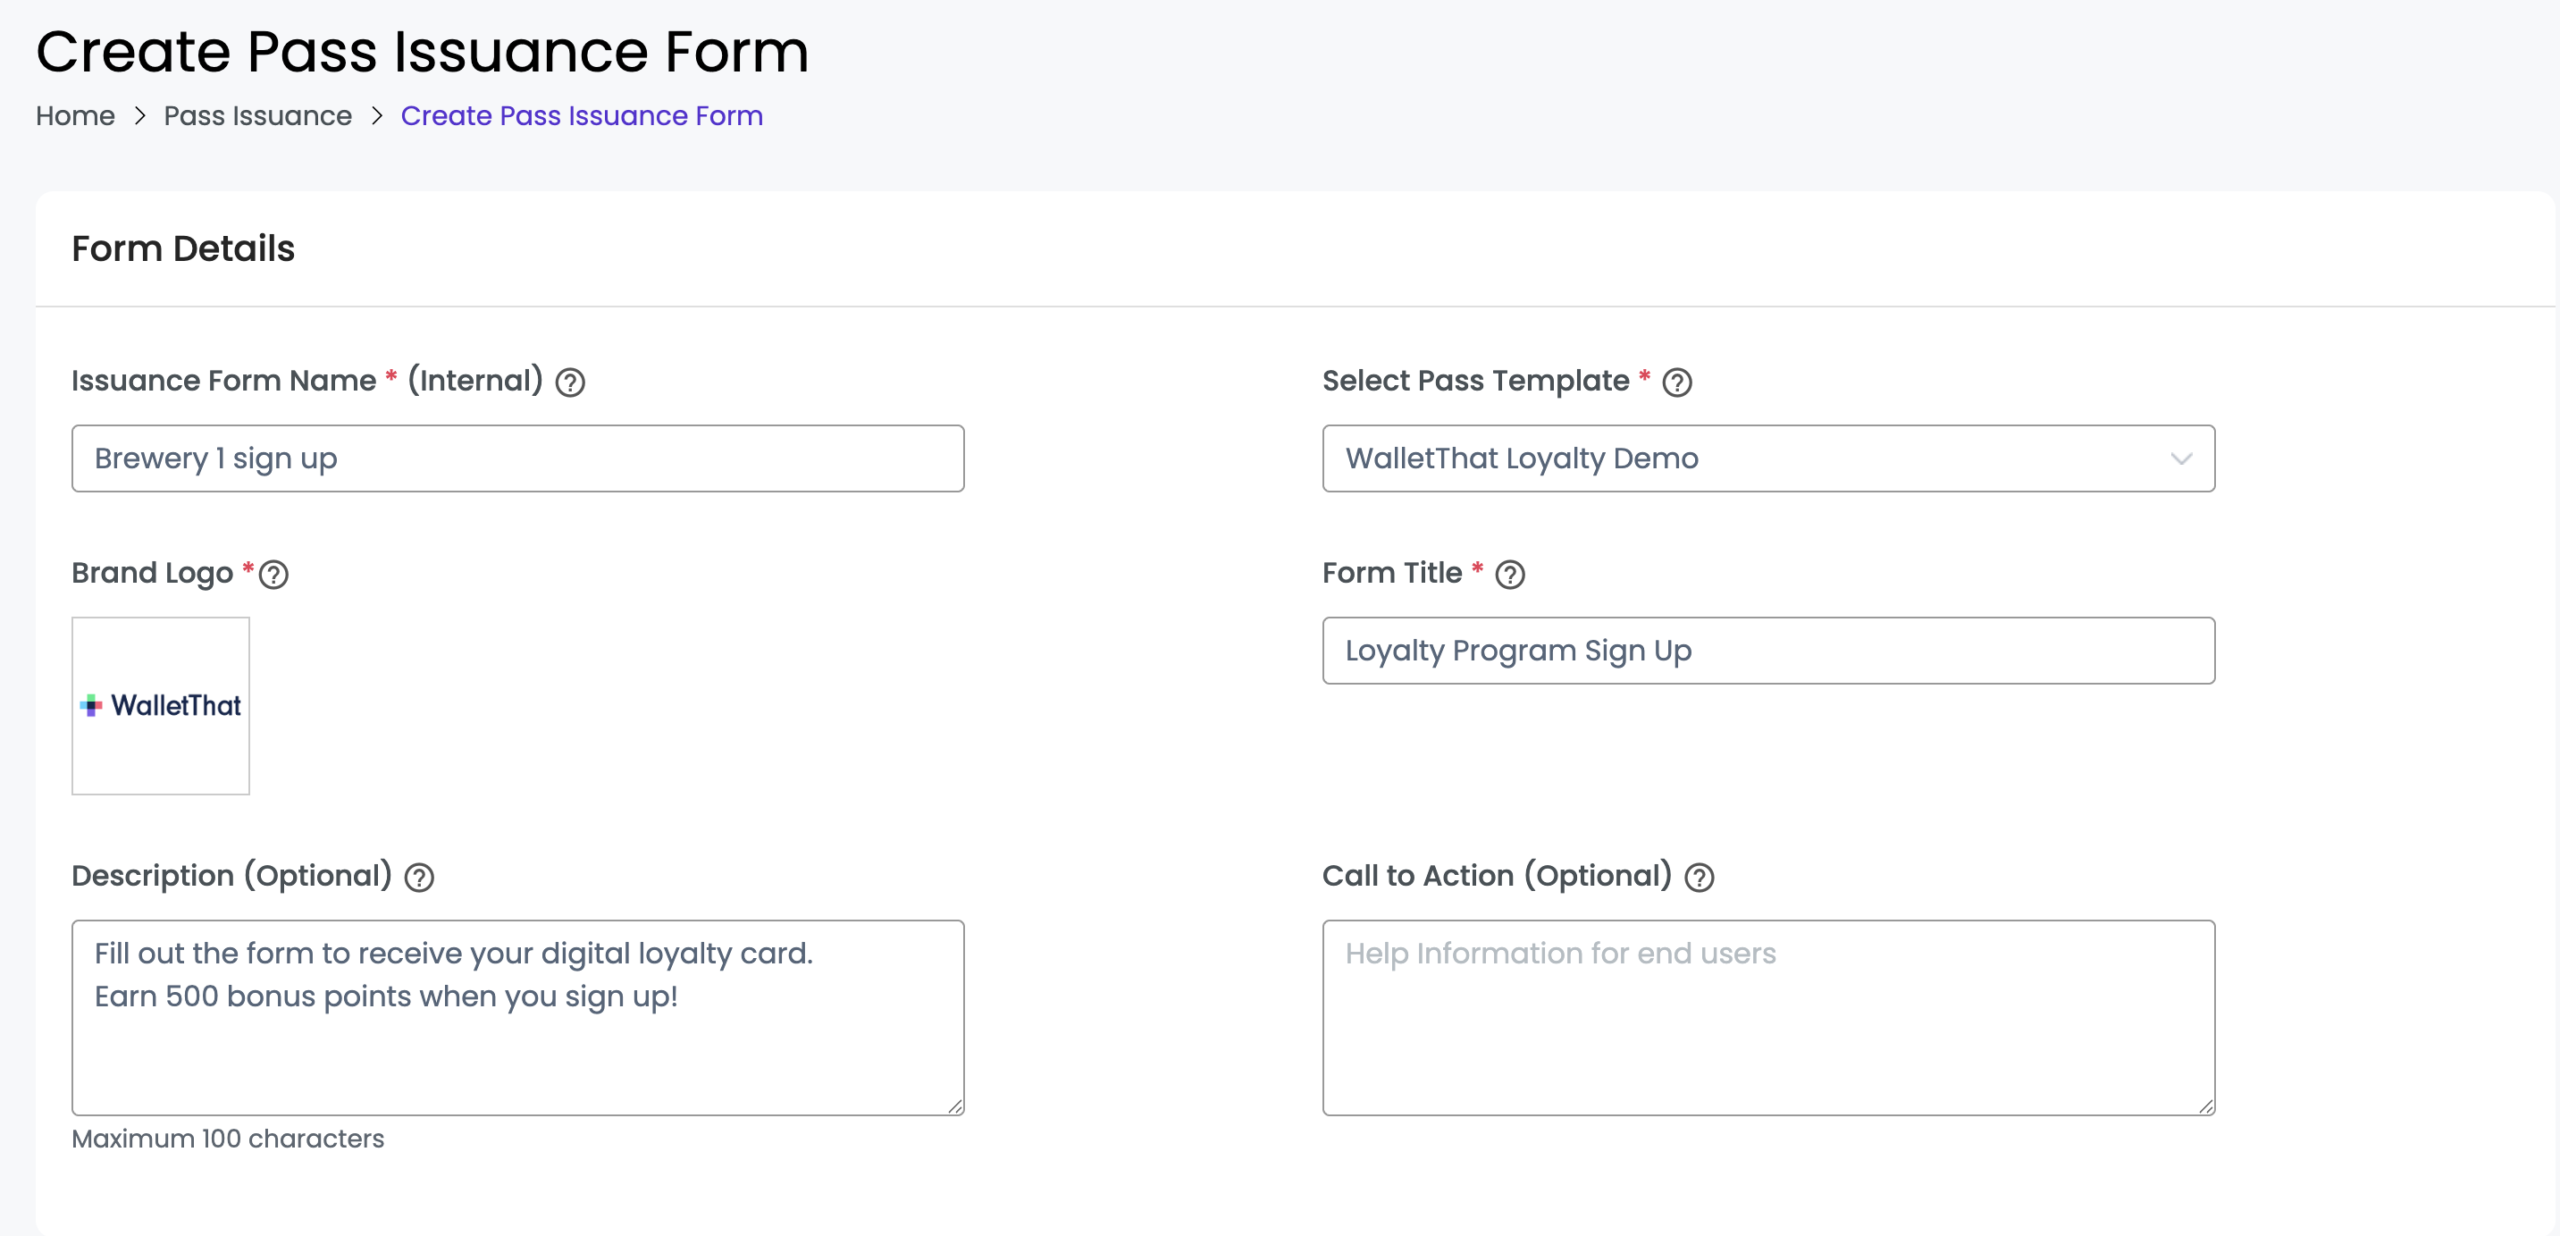
| Setting | Description |
|---|---|
| Issuance Form Name | The form name is used for internal purposes to differentiate between multiple issuance forms on the user-interface. This field is required. |
| Select Pass Template | Choose your pass template from the drop-down menu to build the issuance form based on. Each template will have a different set of variables that may be added to the form based on the pass type. This field is required. |
| Brand Logo |
The brand logo is displayed in the top center of your issuance form. This field is required. The brand logo cannot be changed per issuance form but can be edited for the entire account on the account information page. Supported logo image formats : JPEG, GIF, PNG, WEBP Upload size limit: 1 MB |
| Form Title | The form title will be displayed to end users while filling out the form ie. “H. Clothing Co Rewards Program Sign Up”. The title is displayed below the logo. This field is required. |
| Description | The description text is displayed below the form title. This text is used to give the end user instructions or a longer description of what the form is used for or how the program works. This field is optional. |
| Call to Action | The call to action text is displayed below the description text. This text is used to let the end user know what they will receive by filling out this form ie. “Receive 500 bonus points by signing up”. This field is optional. |
Step 3: Form Variables
Add the form field variables by using the “Add Variables” button in the right-hand corner. You can keep adding as many dynamic variables as the template allows. 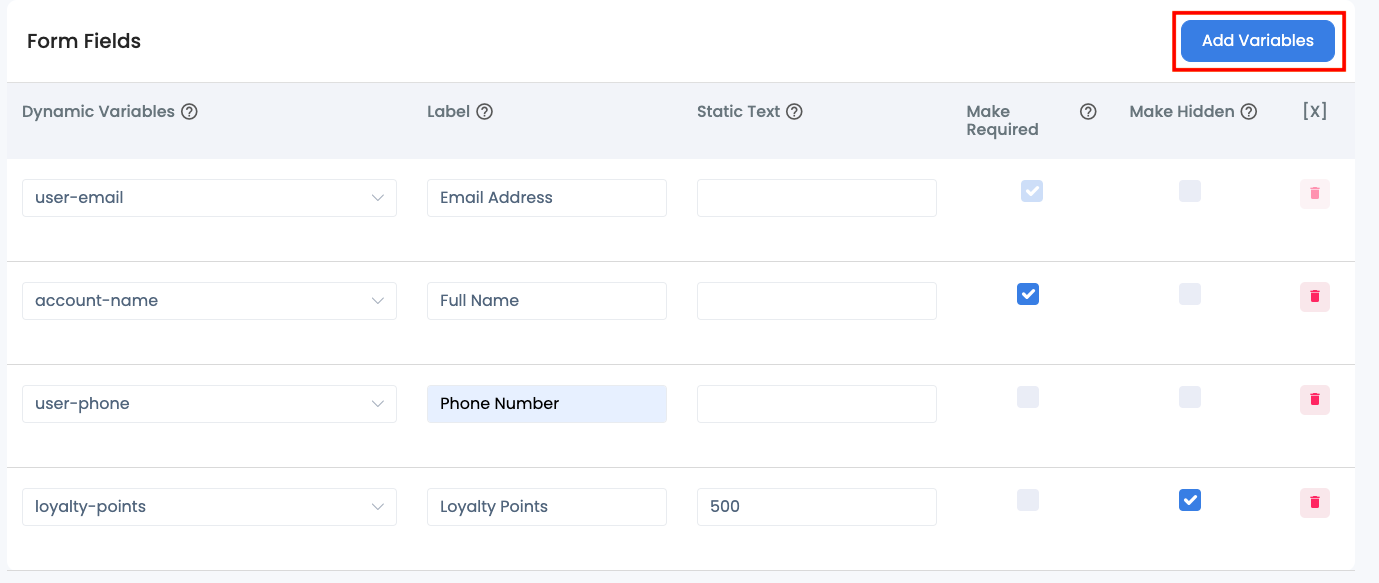
| Setting | Description |
|---|---|
| Add Variable | This button is used to add additional variables as needed to your form. You can keep adding as many variables to your form as the template allows. |
| Dynamic Variables | These are the variables which will be added to the form and filled out by the end user to generate the pass based on the unique data entered. Choose from the drop-down menu which variable from the Pass Template you’d like to add, |
| Label | This is the label of the variable which will be displayed to the end user. This label clarifies what the end user should be entering for this field. For example, the variable from the Pass Template may be called “Custom-Field-1” therefore you would add a label that indicates to the end user what custom field 1 represents. |
| Static Text | You can replace variables with static text which will be the same for everyone who fills out this form. |
| Make Required | Make the variable field required so that the form may not be submitted without this field being entered by the end user. |
| Make Hidden | You can hide certain fields that will be passed in the form but will not be displayed to the end user. To do so, check off the “Make Hidden” checkbox. |
| [X] | This button will remove the specific variable from your form. |
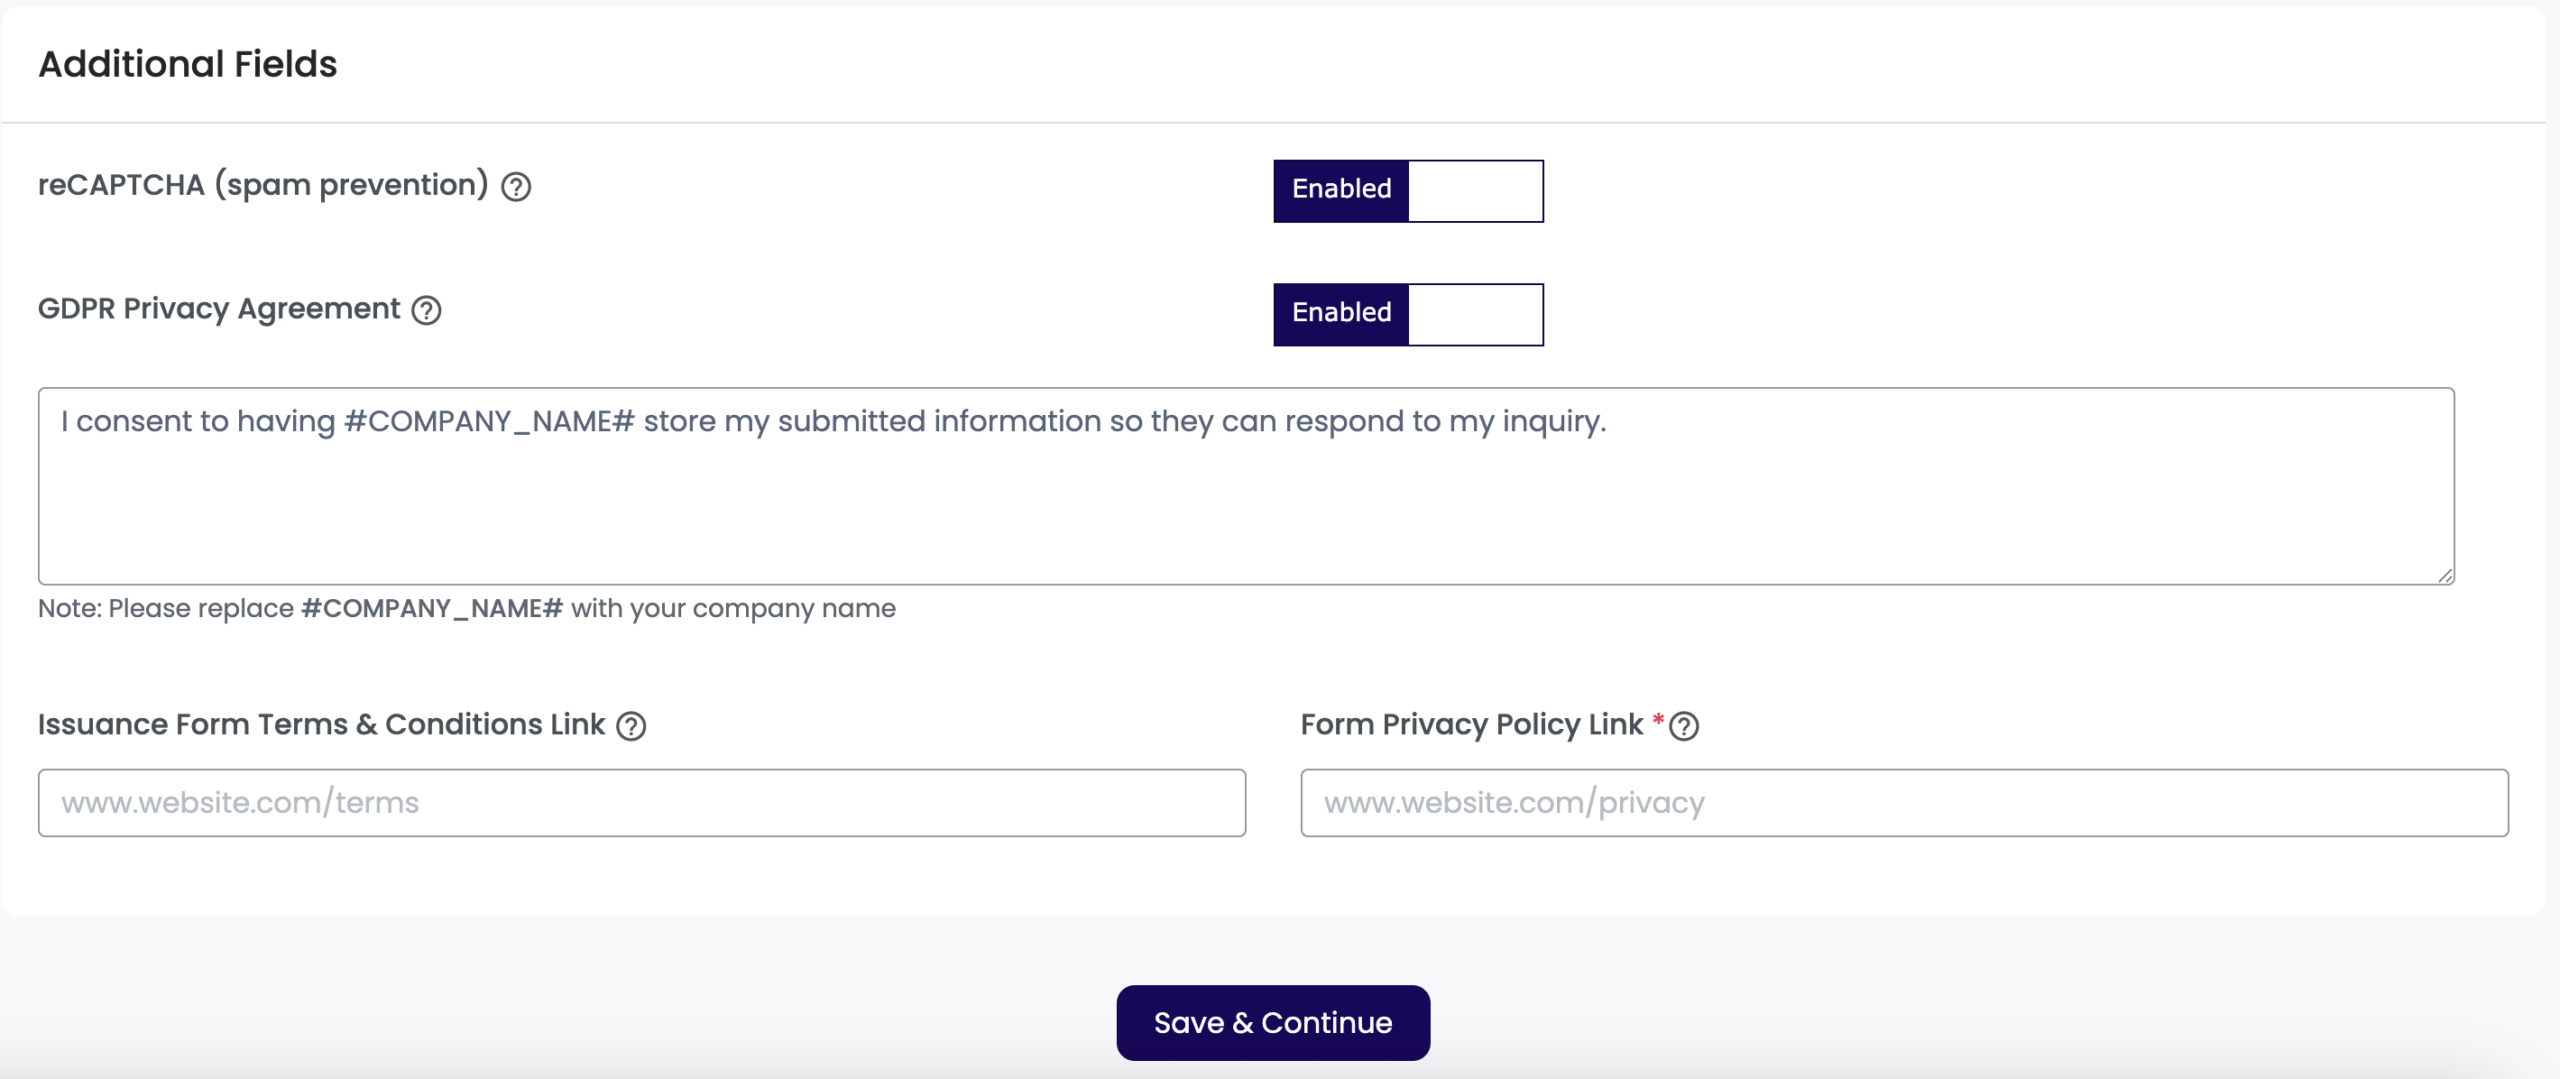
Step 4: Additional Form Fields
Fill out the additional fields settings. Click “Save and Continue” when finished.
| Setting | Description |
|---|---|
| reCAPTCHA | You can enable or disable the reCAPTCHA spam prevention setting by clicking on the toggle buttons. This provides spam prevention in your form by requiring users to check the “I’m not a robot” checkbox. |
|
GDPR Privacy Agreement |
You can enable or disable the GDPR Privacy Agreement. If enabled, you can add custom text to the text box to ensure users consent to the information submitted on the form being stored in order to issue a personalized wallet pass. |
|
Issuance Form Terms & Conditions Link |
This will link to your terms and conditions page on your website or you can enter Terms and Conditions text. This field is not required. |
|
Form Privacy Policy Link |
This will link to your privacy policy on your website. This is required. |
How to Use a Pass Issuance Form #
Once you have finalized your form details, you can preview your form and make additional edits if needed. Once you are satisfied with your issuance form, you can get a link or QR code to the form to embed in an email or on your website. Follow the instructions below to learn how to utilize a pass issuance form.
Step 1: Preview Form
Click “View Form” on the Pass Issuance Forms page to preview and test your form.


Step 2: Get Form
Click “Get Form” on the Pass Issuance Forms page to display a link and QR code to the form. You can copy the link to embed or download the QR code image with the link to the issuance form embedded.
Step 3: Embed the Form
The popup displayed after clicking “Get Form” will give you the option to embed a link or a QR code in an email, text message or on your website. As customers sign up and digital passes are issued, you will be able to view the pass records that have been created from the form in the Pass Data Manager.