Overview of WalletThat’s Webhook Actions #
We support the ability to receive a webhook from a third party system and trigger an action. Each webhook action is associated with an endpoint URL that the WalletThat system generates and waits for the event triggered from a third-party system webhook. Once the webhook event is detected at the WalletThat endpoint URL, the action is initiated using the associated data received in the webhook. The following actions that can be initiated after receiving a webhook from a third party system:
How to setup Webhook Actions #
Steps:
- Log in to your Account.
- Go to the Integrations Tab and create a new integration.
- Choose a Pass Template from the drop-down menu, as the data fields depend on the template and its supported fields.
- Select the desired mobile wallet action from the drop-down menu to determine the action event
- Review the data fields expected from the third-party http request and remove or rename them as necessary (Only applicable for creating and updating pass records)
- Save your Webhook Action and copy the Listener Endpoint URL provided.
- Configure the provided Listener Endpoint URL into a third party system as an event trigger.
Description of Each Action #
There are six wallet actions available for you to choose from. Each action allows you to receive pre-defined JSON data structure at a listener endpoint URL using an http request. The specific data that can be sent depends on the Pass Template being utilized and the fields supported by that template. It is important to note that every action requires the inclusion of the pass-id field, as it serves as a means to differentiate each pass record in your account and cannot be removed.
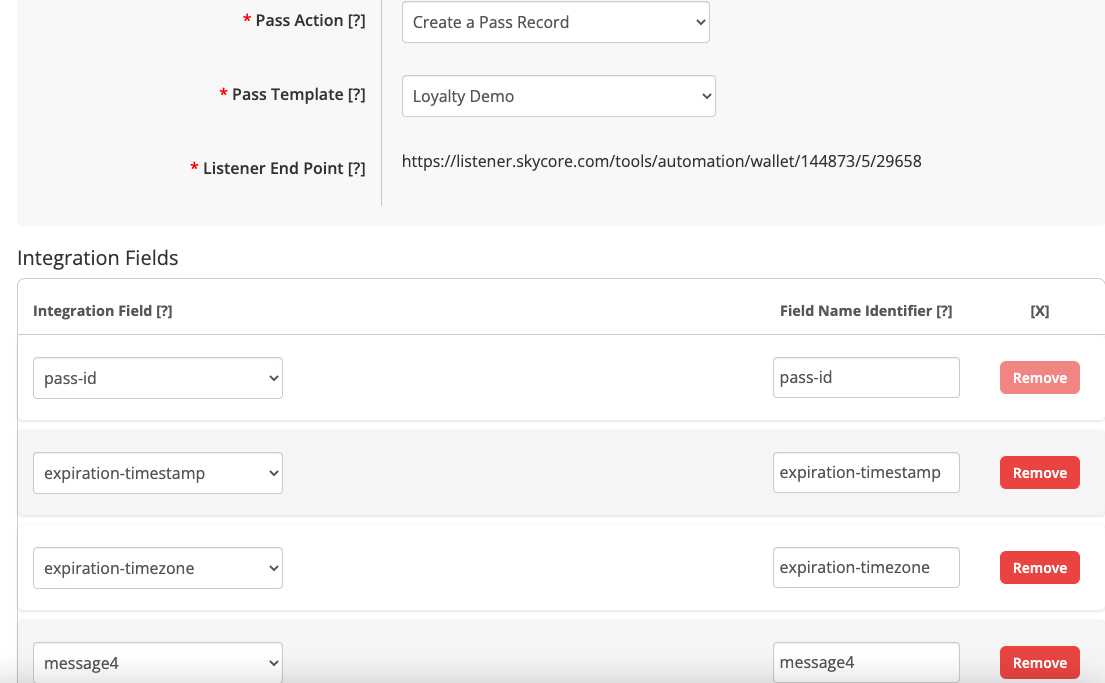
Create a Pass Record
When triggered from a webhook, the “Create a Pass Record” action generates a Pass record for a certain Pass Template. There are multiple data fields able to be passed to this URL. Here are some examples of how the Create a Pass Record action may be used for different Pass types:
- New user fills out a sign up form to join a loyalty program (Trigger) → Create a Loyalty Card Pass Record (Action)
- User texts in the coupon code and opts-in to receive special discounts and the coupon code system issues a coupon code (Trigger) → Create a Coupon Pass Record (Action)
- Customer purchases an event ticket and the ticketing system issues new ticket code (Trigger) → Create an Event Ticket Pass Record (Action)
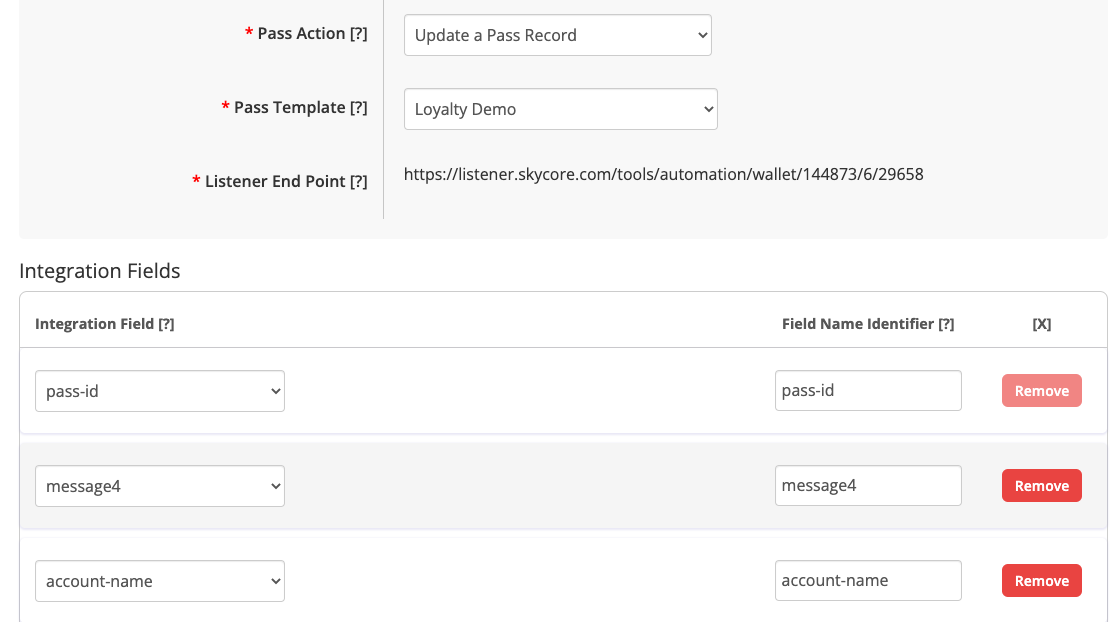
Update a Pass Record
The “Update a Pass Record” action enables you to modify the data associated with a particular Pass Record, triggered by a webhook. As you can update multiple fields, you have the flexibility to send various data fields to the endpoint URL. Here are a few instances demonstrating a few examples of the “Update a Pass Record” action:
- Customer makes a purchase and earns points (Trigger) → Update a Loyalty Card Pass Record’s Points Value (Action)
- A new promotion is beginning and the value of the coupon has changed (Trigger) → Update a Coupon Pass Record’s Offer Text (Action)
- A musical artist has to reschedule their performance to a later date (Trigger) → Update an Event Ticket Pass Record’s Start Time (Action)
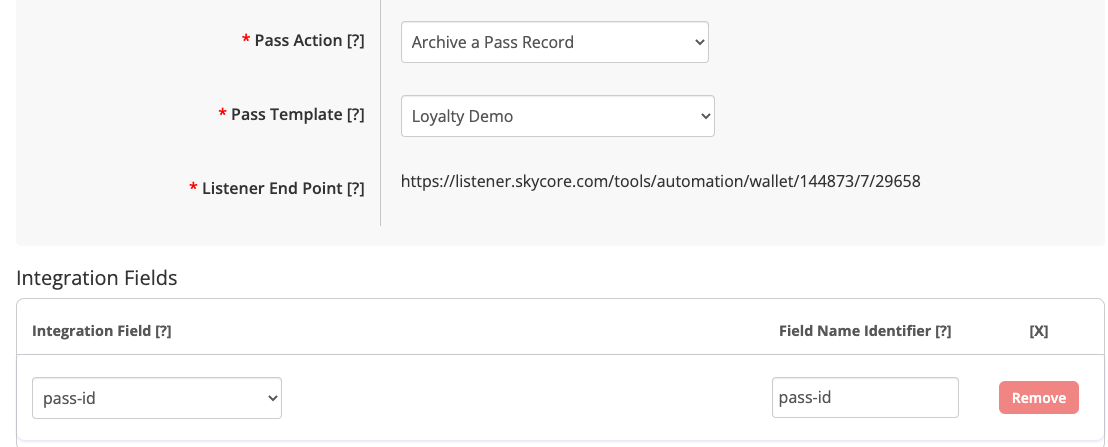
Archive a Pass Record
The “Archive a Pass Record” action is used to delete a Pass Record from the WalletThat database when triggered by a specific event. As this action is solely responsible for record deletion, only the pass-id field can be passed to this action. The pass-id field is mandatory to identify the specific record that needs to be removed from the WalletThat system. Here are some examples of how this action may be used:
- A customer is removed from the loyalty club’s CRM system (Trigger) → Archive a Loyalty Card Pass Record (Action)
- A user redeems their coupon and it is only good for one use (Trigger) → Archive a Coupon Pass Record (Action)
- A concert has ended and the ticket has expired (Trigger) → Archive an Event Ticket Pass Record (Action)
Change the Pass Status to Expired
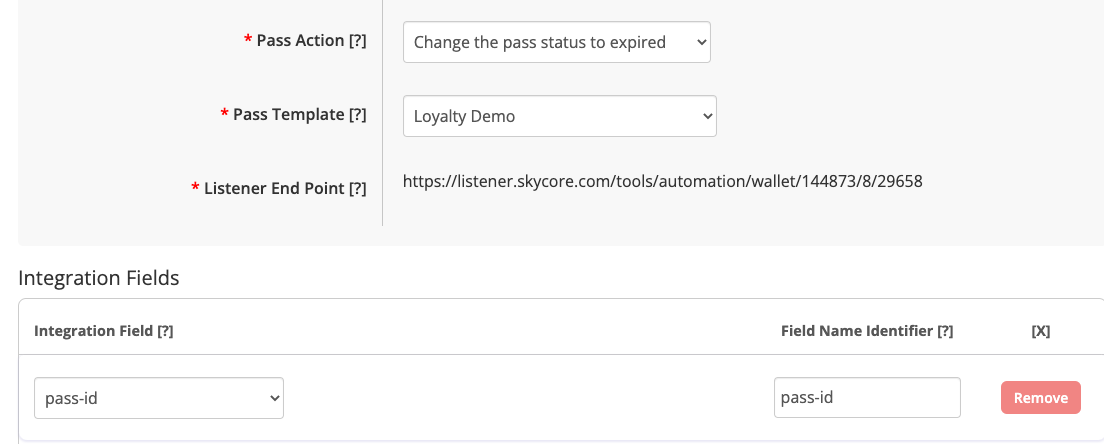
When the “Change the Pass Status to Expired” action is activated through a webhook, it updates the status of the user’s Pass to expired. The barcode on the user’s Pass will appear grayed out in Apple Wallet, and the Pass itself will be automatically moved to the “Expired Passes” section in both Apple Wallet and Google Wallet. This action supports only the pass-id data field since its purpose is to solely update the pass-status for the Pass Record. Here are a few examples showcasing the implementation of this action:
- A loyalty member does not renew their membership and the membership expires (Trigger) → Change the Loyalty Card Pass Status to Expired (Action)
- A coupon is no longer valid after a certain date and the date passes (Trigger) → Change the Coupon Pass Status to Expired (Action)
- An event has ended over 24 hours ago and the ticket is set to expire after 24 hours (Trigger) → Change the Event Ticket Pass Status to Expired (Action)
Change the Pass Status to Voided
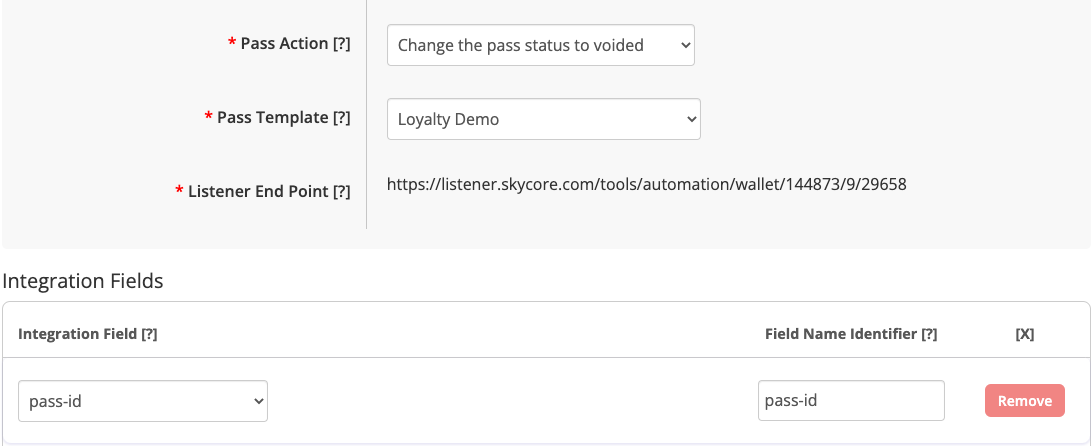
When the “Change the Pass Status to Voided” action is triggered, the status of the user’s Pass is changed to “voided.” This status change works similarly to an expired status, resulting in the barcode being grayed out on Apple Wallet and the Pass being moved to the “Expired Passes” section in both Apple Wallet and Google Wallet. This action exclusively supports the pass-id data field as its purpose is to update only the pass-status for the Pass Record. Here are a few examples demonstrating how you might use this action:
- A loyalty card has not been used for an extended period of time and the retailer decides to make the card inactive (Trigger) → Change the Loyalty Card Pass Status to Voided (Action)
- A customer has used their coupon too many times and the retailer needs to stop their usage (Trigger) → Change the Coupon Pass Status to Voided (Action)
- An event is canceled and not rescheduled (Trigger) → Change the Event Ticket Pass Status to Voided (Action)
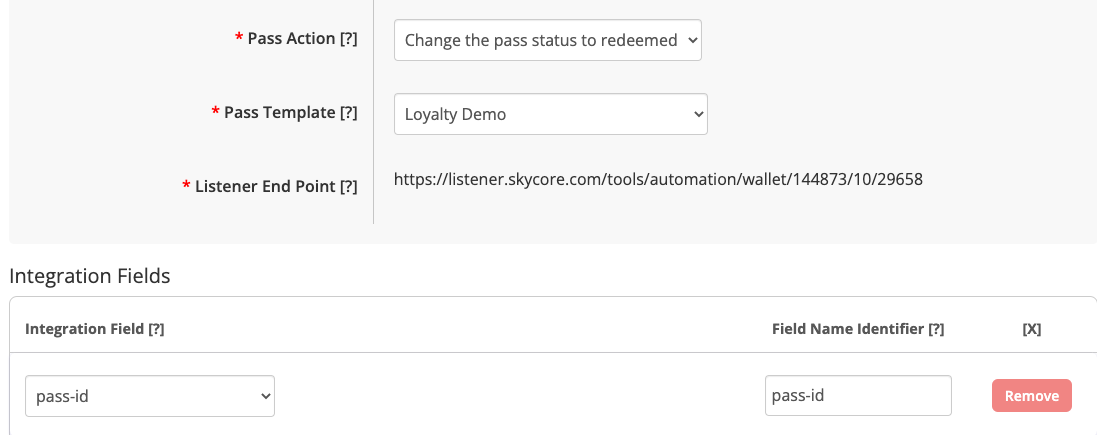
Change the Pass Status to Redeemed
When you choose the “Change the Pass Status to Redeemed” action, the status of the user’s Pass will be modified to “redeemed,” rendering it unusable. This is similar to an “expired” status, where the barcode is grayed out on Apple Wallet and the Pass is moved to the “Expired Passes” section in both Apple Wallet and Google Wallet. This action only supports the pass-id data field as it is simply updating the pass-status for the Pass Record. Here are a few examples of how you can use this action:
- A user redeems points to earn a free reward (Trigger) → Change the Loyalty Card Pass Status to Redeemed (Action)
- A customer utilizes a one-time use coupon and it cannot be redeemed again (Trigger) → Change the Coupon Pass Status to Redeemed (Action)
- The attendee’s name is checked off of a list when their ticket barcode is scanned and considered redeemed (Trigger) → Change the Event Ticket Pass Status to Redeemed (Action)
