How to Issue Personalized Mobile Wallet Passes Through Mailjet #
The Mailjet-WalletThat integration makes sending digital Passes such as loyalty cards, coupons, and event tickets simple through email. Digital passes are designed on the WalletThat platform and are issued through Mailjet. Follow this guide to learn how to issue passes through Mailjet.
WalletThat Platform Steps #
Step 1: Login to your WalletThat Account
Step 2: Create a Pass Template
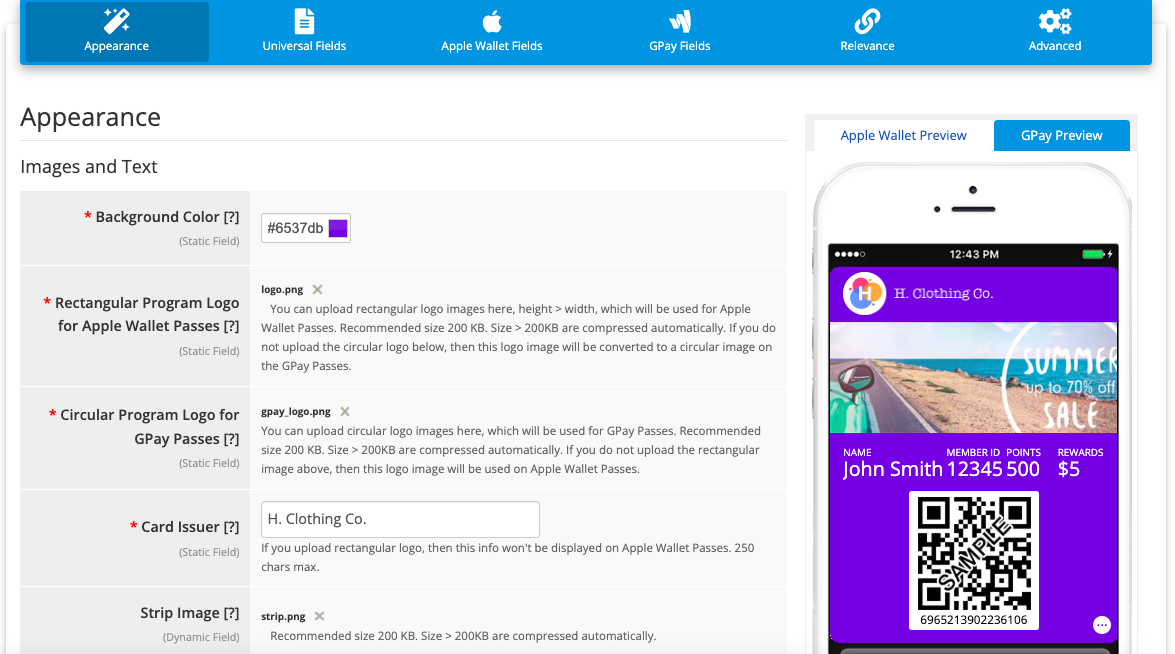
To create a Pass Type template in WalletThat, navigate to the Pass Templates page. Refer to these articles for additional assistance creating Pass Templates:
Step 3: Determine How You’ll Personalize Passes
There are three methods to customize digital Passes. The initial option is to import data into WalletThat, allowing you to upload personal user data and generate a Pass Issuance Link utilizing just a pass-id field. This option is ideal when you already have your customer data before issuance. The second option to personalize Passes is to utilize Mailjet’s personalized variables and create your issuance link with multiple variables that will be customized. This method is utilized when customer data is already stored in Mailjet. Lastly, Passes can be customized by integrating third party apps with Zapier. This choice is most suitable when customer data is collected through another system and that system will be utilized to personalize Passes.
Option 1: Import Data into WalletThat
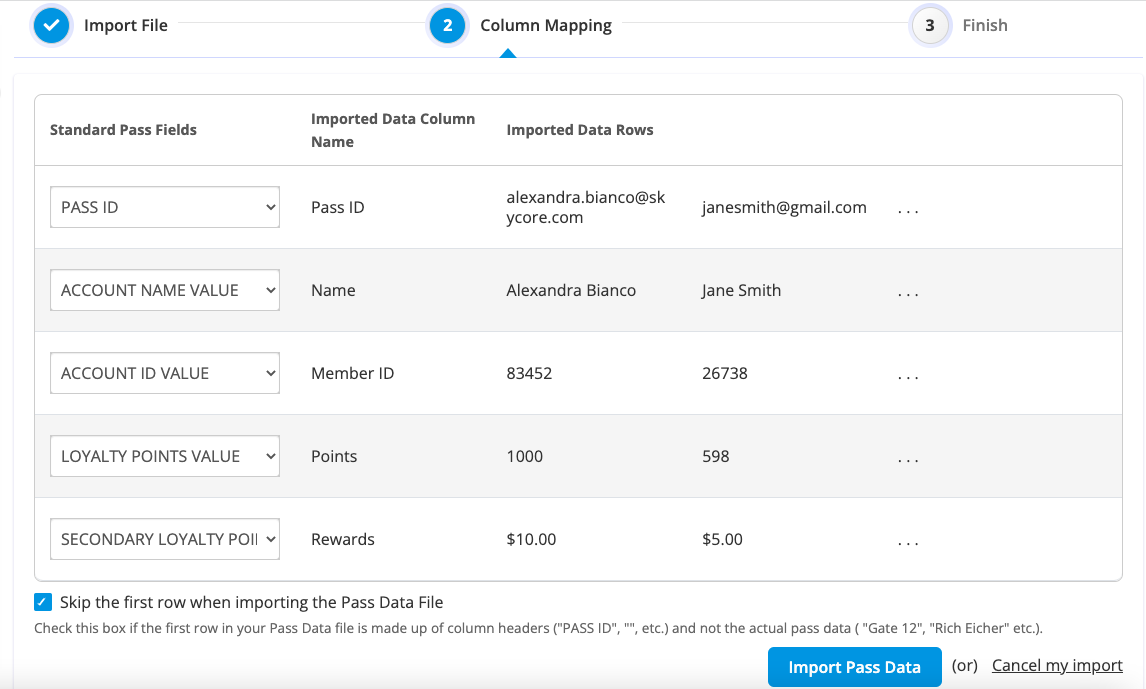
To generate a CSV file with the dynamic fields utilized in your Pass Template, include a “pass-id” column to distinguish Passes based on the user’s email address. Then, navigate to the Pass Data Manager, import your CSV file, and map the fields from the CSV file to the dynamic fields added in the Pass Template. Remember to select the “Skip the first row…” option located at the bottom of the page. If you require additional assistance with importing data into WalletThat, refer to this article: Importing Pass Data

Option 2: Use Personalized Variables in Mailjet
Mailjet provides both pre-set and customizable variables that can be utilized to substitute data in emails with personalized information. Create a Pass Issuance Link on the WalletThat platform with multiple variables and personalize those variables in Mailjet. Learn more about how to add personalized variables here: How to Personalize Emails
Option 3: Use a Zapier Integration
Issue personalized Passes by connecting Mailjet & WalletThat through Zapier. Learn more about how to implement a Zapier Trigger or Action Integration: Zapier Triggers Guide & Zapier Actions Guide
Step 4: Create a Pass Issuance Link
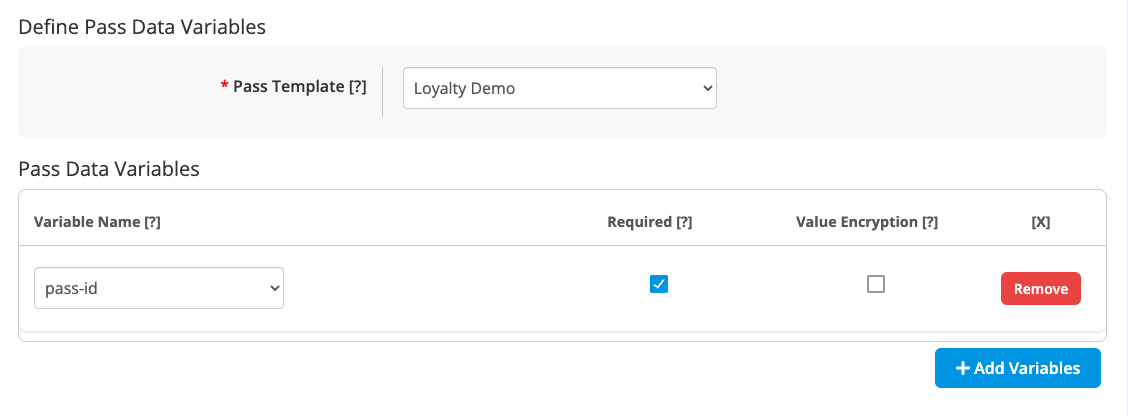
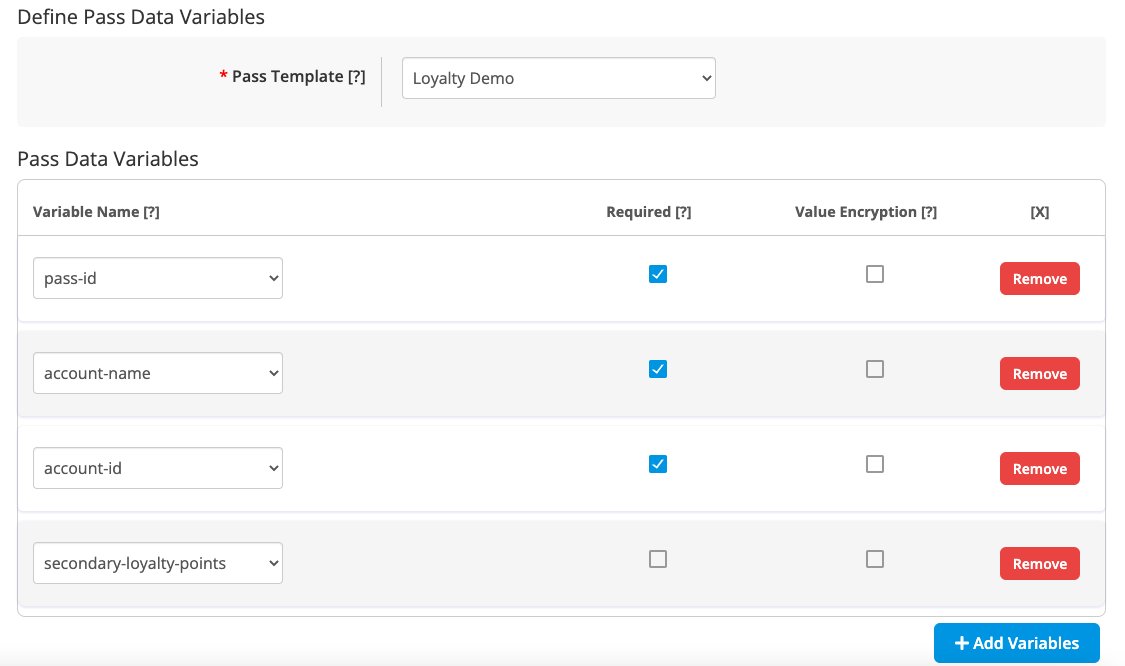
If you imported personalized data into WalletThat, create a Pass Issuance Link and only add the pass-id variable. The pass-id variable needs to be checked as “Required.” If you are using Mailjet’s personalized variables to customize your Issuance Link, add all of the variables that need to be personalized as variables within the link. Learn more about Pass Issuance Links here: Pass Issuance Links
Step 4a: (Optional) Add Encryption to your Pass Issuance Link
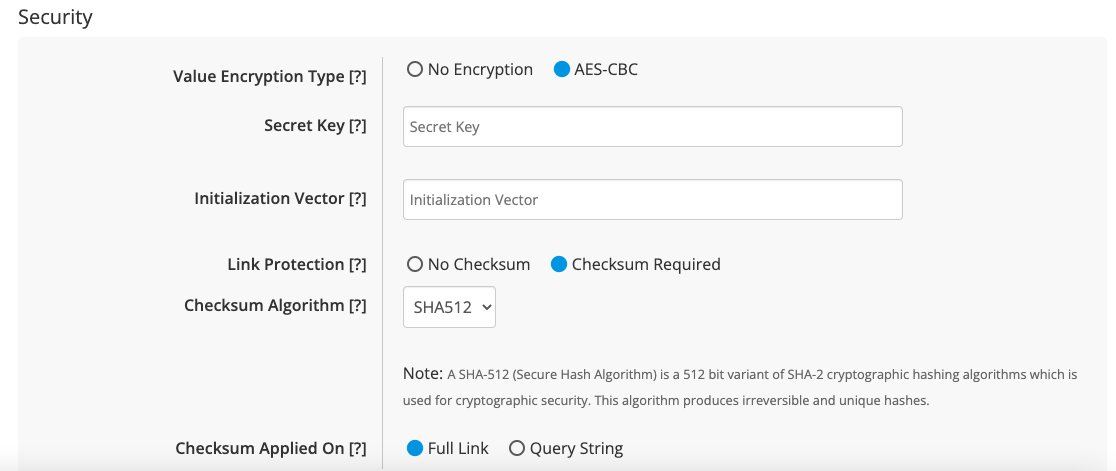
Your link may contain sensitive information such as email addresses, names, or rewards, therefore, you can encrypt your issuance link. You can encrypt the entire link or only certain variables in the link.
Step 5: Copy Your Pass Issuance Link
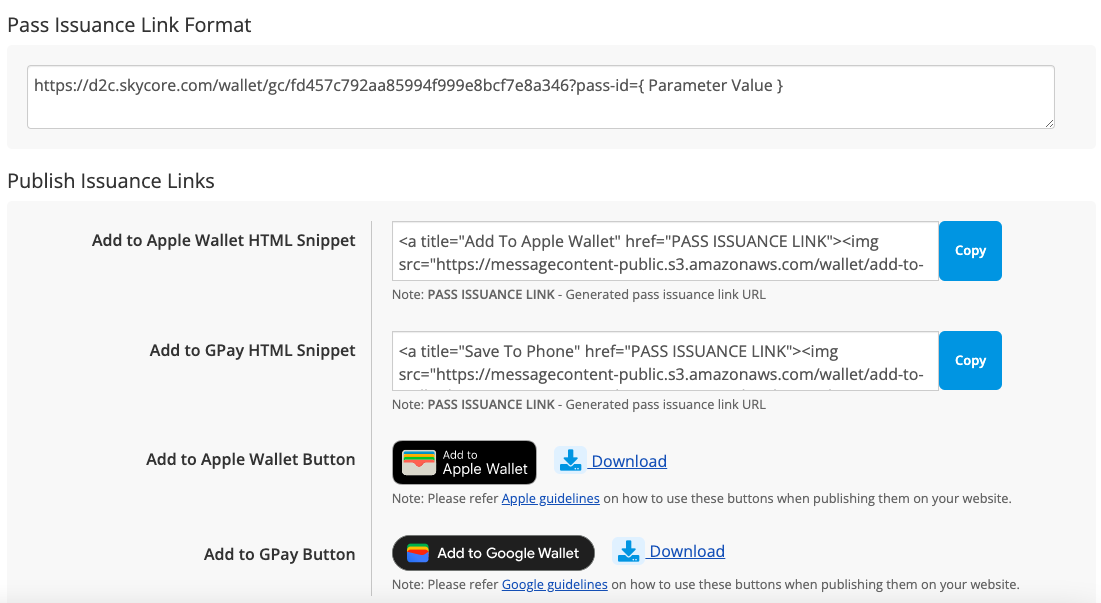
Once you have created your link and added the necessary variables and encryption (if needed), save the link. To obtain the Pass Issuance Link, go to the Pass Issuance Links page and click on “Get Link” under the “Link” column. Copy the Pass Issuance Link and store it for later use in your email campaign. Before sending, replace the {Parameter Value} placeholders with the appropriate personalized variables.
If you imported your data into WalletThat, your link should look like this:
Example Link: https://d2c.walletthat.com/wallet/gc/502d8e5eb3f364526245828877537c8a?pass-id={ Parameter Value}
If you are using Mailjet’s personalized variables to personalize your link, your link should look something like this:
Example Link: https://d2c.walletthat.com/wallet/gc/502d8e5eb3f364526245828877537c8a?pass-id={ Parameter Value }&account-name={ Parameter Value }&account-id={ Parameter Value }&loyalty-points={ Parameter Value }
Mailjet Platform Steps #
Step 1: Login to your Mailjet account
Step 2 : Add Your Contacts to a Contact List
To add your contacts to Mailjet, create a Contact List within your account. Certify your Contact List to verify that you have obtained consent to contact these leads. If you need assistance with managing contacts and lists, please refer to this resource for further information: Contact Management
Step 3: Create an Email Campaign
Create an email campaign when you are ready to send personalized Passes to your contact list. Learn more about creating email campaigns in Mailjet here: Create an Email Campaign
Step 4: Design Your Email Template
After creating your campaign, choose the type of template you want to use and design your template. Read more about designing templates in the Mailjet help section: Email Design & Editing
Step 5: Add Your Pass Issuance Link
Once you’ve designed your template, add your Pass Issuance Link to the body of your email using one of three ways. Be sure to replace the personalized fields in the link with personalized variables from Mailjet. The first option is to add the hyperlink directly in the email template, the second option is to use add to Wallet button images using HTML with the issuance link embedded, and the third option is to upload a QR code image with the link embedded.
If you imported personalized data into WalletThat your link should look like this:
Example Link: https://d2c.walletthat.com/wallet/gc/502d8e5eb3f364526245828877537c8a?pass-id=[[EMAIL_TO]]
If you are using Mailjet’s personalized variables your link should look like this:
Example Link: https://d2c.walletthat.com/wallet/gc/27c3ed70dfa9663f3fc55380046b955a?pass-id=[[EMAIL_TO]]&account-name=[[data:firstname:””]]&account-id=[[data:memberid:””]]&loyalty-points=[[points:””]]
Option 1: Add the Hyperlink Directly in the Template
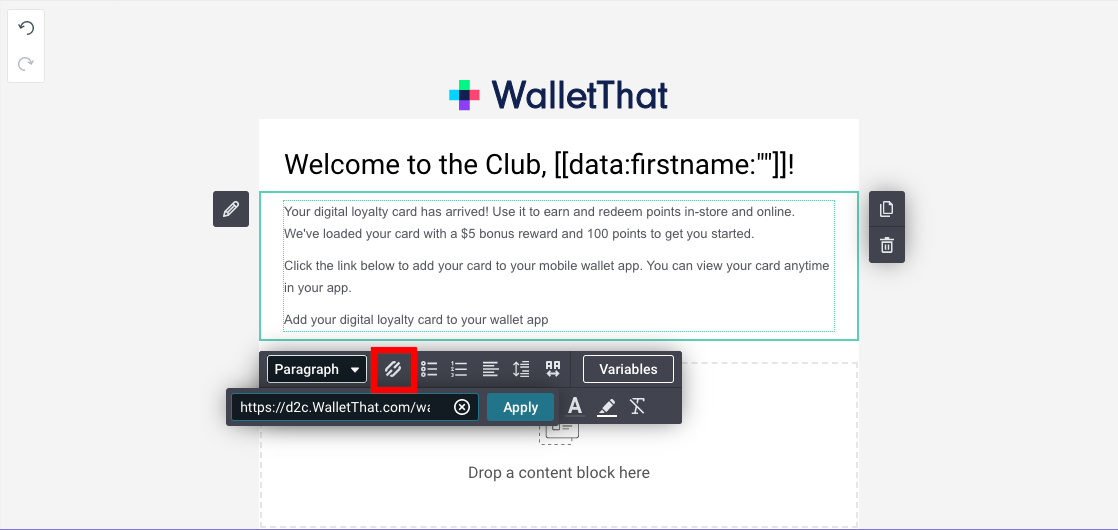
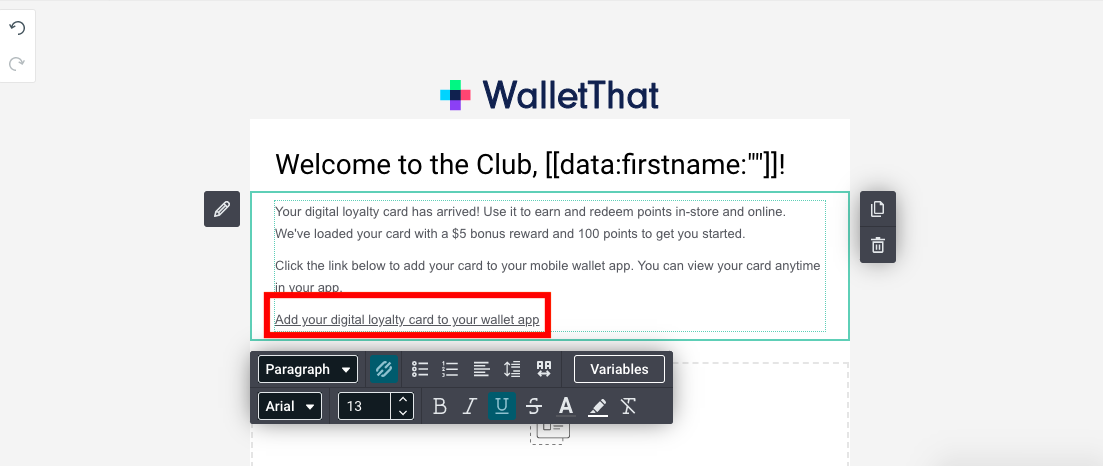
Add your issuance link directly into the email template. You can shorten your link text that is displayed in the email by typing the text into the email that will instruct the end user to click the link. Highlight the text, click the Insert Link button in the design settings block, paste the issuance link, and click “Apply”.
Option 2: Embed the Link Behind Add to Wallet Buttons using HTML
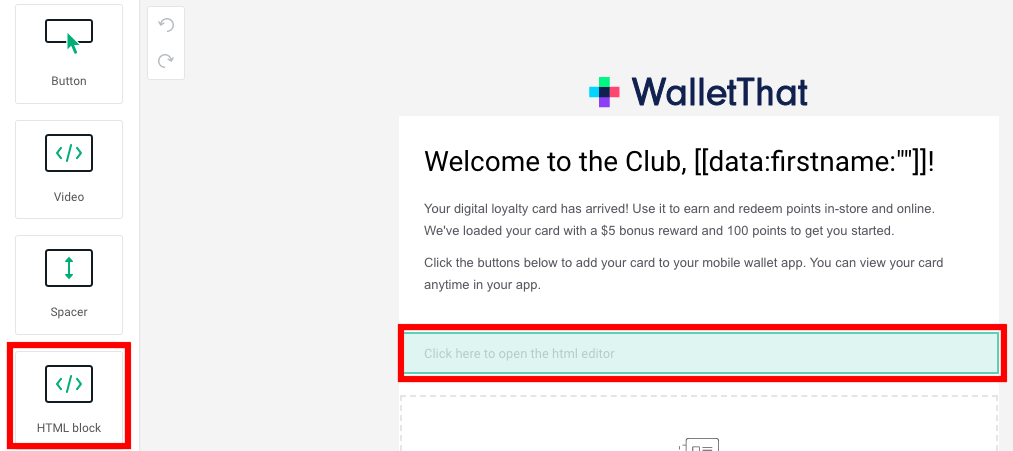
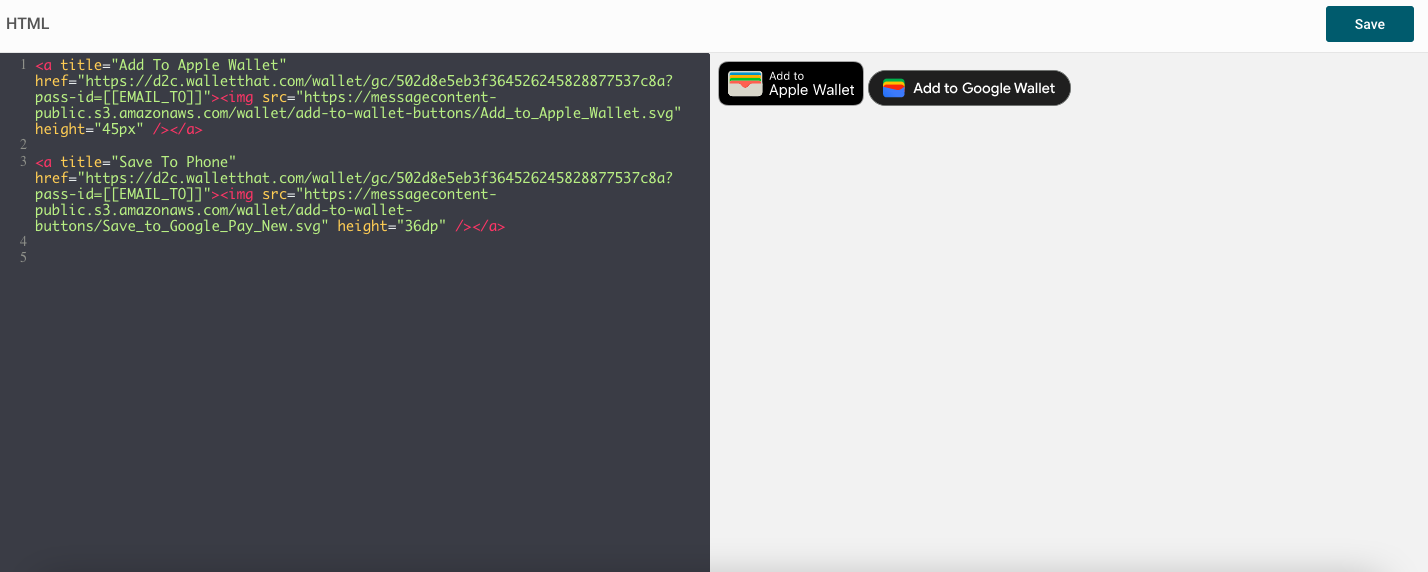
To add the Add to Wallet buttons using HTML, Add the “HTML Block” option to your email from the content settings on the left hand side of the email editor. Click the link in the email template to open the HTML editor. You will then need to copy the “Add to Apple Wallet HTML Snippet” and “Add to Google Wallet HTML Snippet” from the Pass Issuance Links page on the WalletThat Platform. Paste your HTML snippets where you want the buttons to be placed within your template. Replace the “PASS ISSUANCE LINK” text within each HTML snippet with your Pass Issuance Link. If you need additional help using HTML blocks, check out this help section article: Add HTML Blocks
Option 3: Embed the Link Behind a QR Code
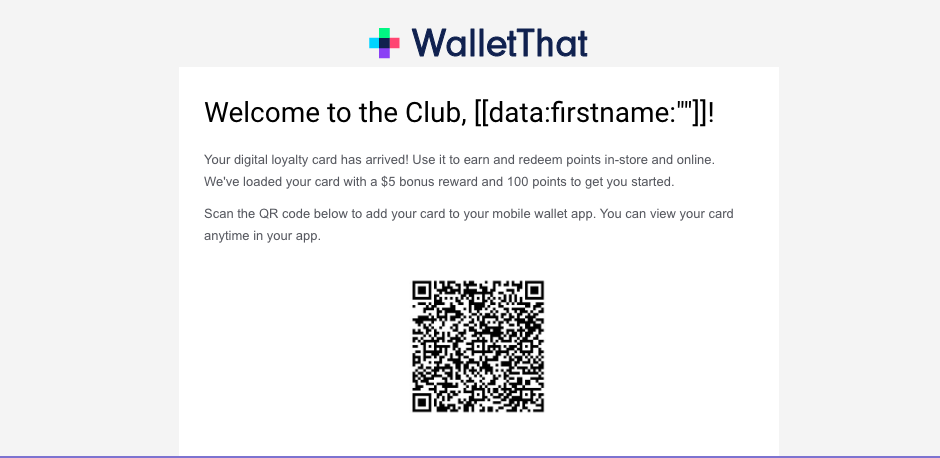
To embed the link behind a QR code, you can use a free online QR code generator and paste your issuance link into the URL field. Save the QR code as an image and upload your embedded QR code to your email template. If you need help adding images to your template, read more here: Inserting Images in Emails
Step 6: Review & Send Your Campaign
Finally, when you’re done designing your template, you can send your email immediately or schedule a date and time to send it. You can review this article for a guide and some tips on email sending from Mailjet: Review and Send Campaigns
