How to Create a Zapier Integration for a Mobile Wallet Action Through Webhooks #
This guide will assist you in creating a Mobile Wallet Action in WalletThat, which another app will trigger through Zapier. To do this, you will connect Zapier’s webhooks to Wallet’s webhook system, which will automatically trigger the Mobile Wallet Action. Zapier provides ready to use webhooks with no development required. All you need to do is choose webhooks by Zapier, fill out a few details, copy a URL provided by WalletThat, and enter that URL in Zapier to connect the two systems together. If you need more information on webhooks from Zapier, check out this article: Webhooks Guide
Available Actions #
- Create a Pass Record
- Update a Pass Record
- Archive a Pass Record
- Change Pass Status to Expired
- Change Pass Status to Voided
- Change Pass Status to Redeemed
Creating a Mobile Wallet Action #
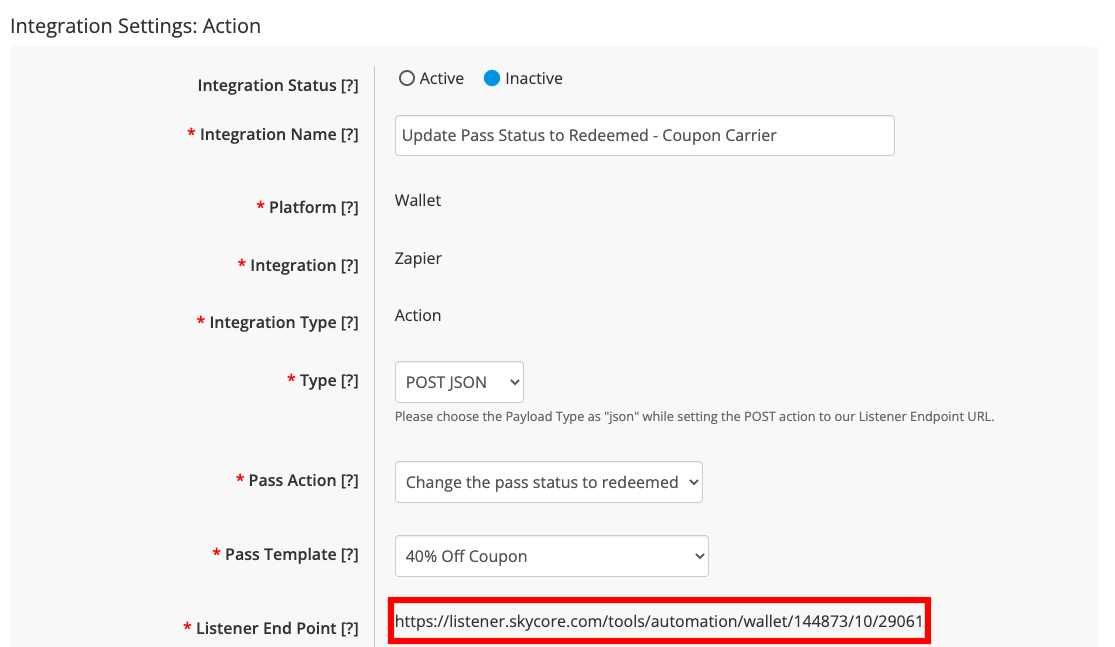
The available Mobile Wallet actions are creating, updating, or archiving a Pass Record, or updating the Pass Status to expired, voided, or redeemed. The following steps demonstrate how to update the Pass Status for users when a coupon is marked as redeemed or used in Coupon Carrier.
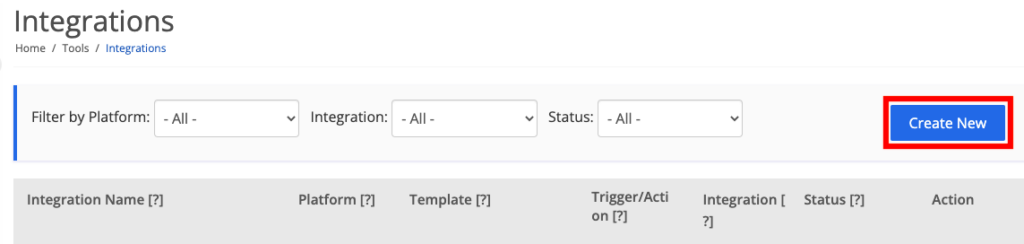
Step 1: Login to your WalletThat Account
Go to the Integrations page in the Tools tab of your WalletThat account. Click ‘Create New’.
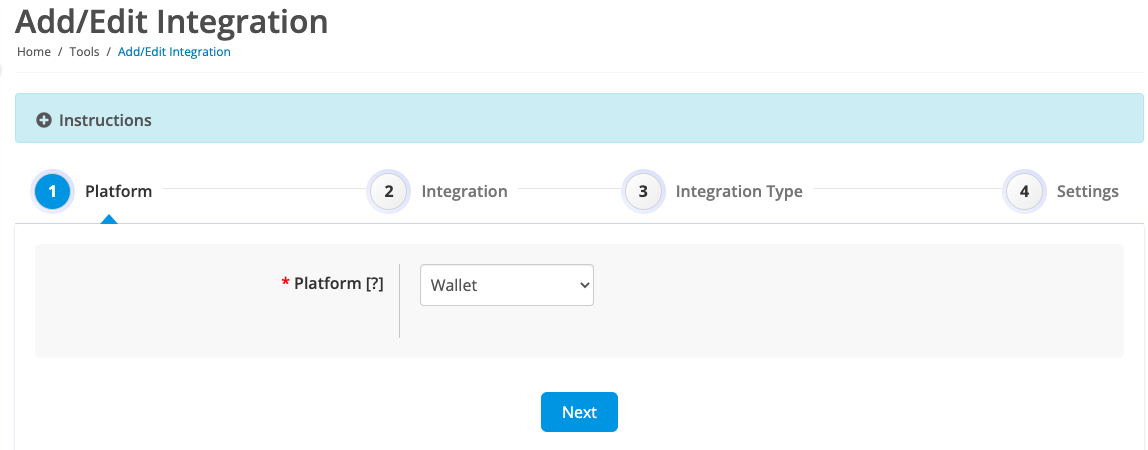
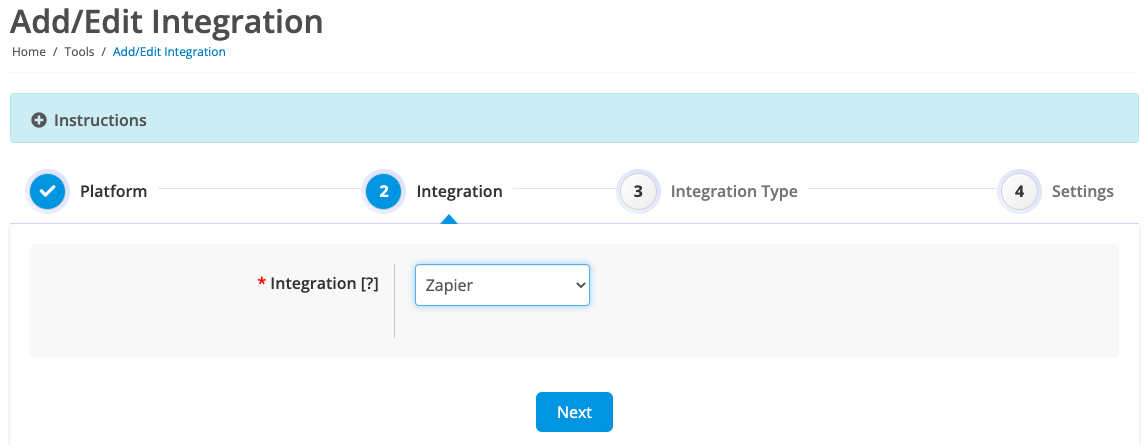
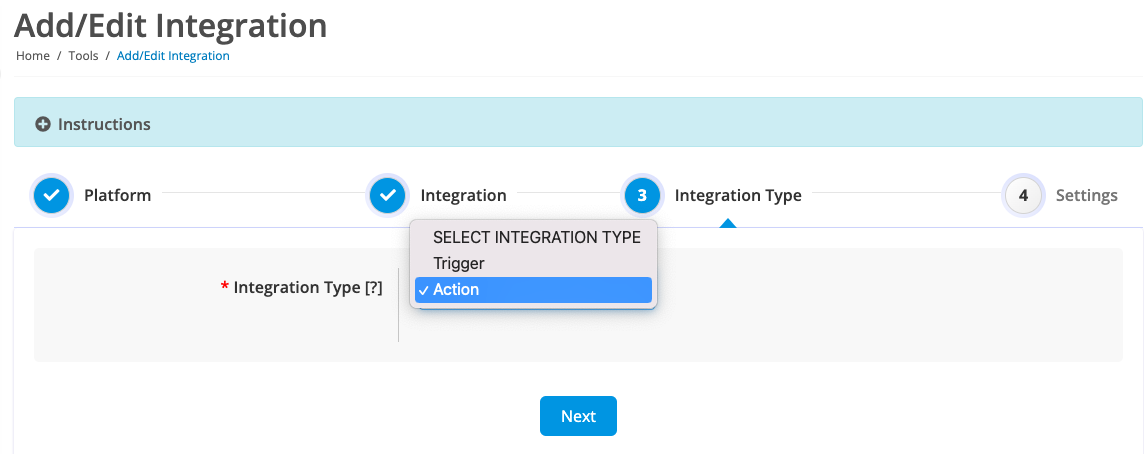
Step 2: Create your Wallet Action
Create your Wallet “Action” on the WalletThat platform on the integrations page. Choose Wallet as the Platform, Zapier as the Integration, and Action as the Integration Type.
Step 3: Choose Your Wallet Action
Fill out the integration details and select the type of Mobile Wallet action you want to use. WalletThat offers various Mobile Wallet actions that can be executed by creating a “Zap” triggered from another app. Each action is listed below along with an example of how each might be used.
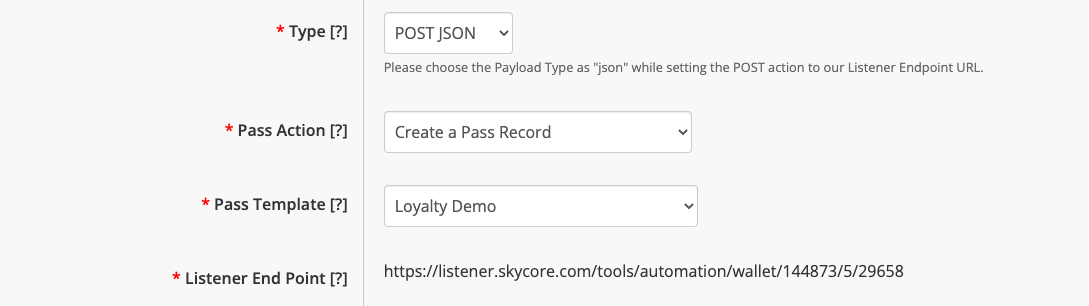
Option 1: Create a Pass Record
When triggered from another app, the “Create a Pass Record” action generates a Pass record for a certain Pass Template. This action can be useful in scenarios such as creating a new pass record for a loyalty card template when a customer signs up for a loyalty program. To set up this action, you must first create a Pass Template on the WalletThat platform. If you need assistance with creating templates, please refer to the following articles:
- Loyalty Card Layout 1
- Loyalty Card Layout 2
- Coupon Layout 1
- Coupon Layout 2
- Event Ticket
- Boarding Pass
- Gift Card
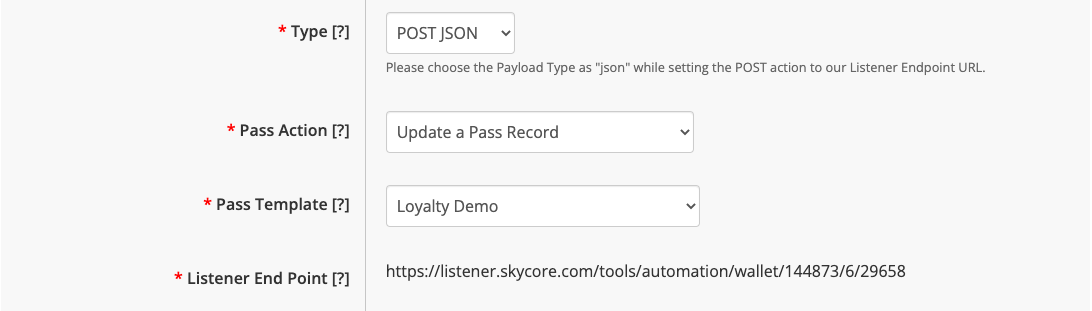
Option 2: Update a Pass Record
The “Update a Pass Record” action enables the modification of specific Pass records triggered by an event from another app. For instance, when a member scans their loyalty card to redeem points, you can use this action to update their card’s points balance.
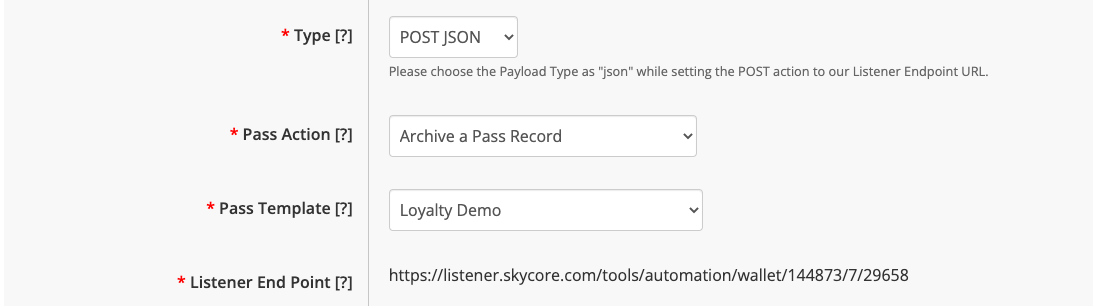
Option 3: Archive a Pass Record
The “Archive a Pass Record” action is utilized to remove records from the WalletThat database. This action is helpful in cases where a user cancels their membership, and their loyalty card data needs to be erased.
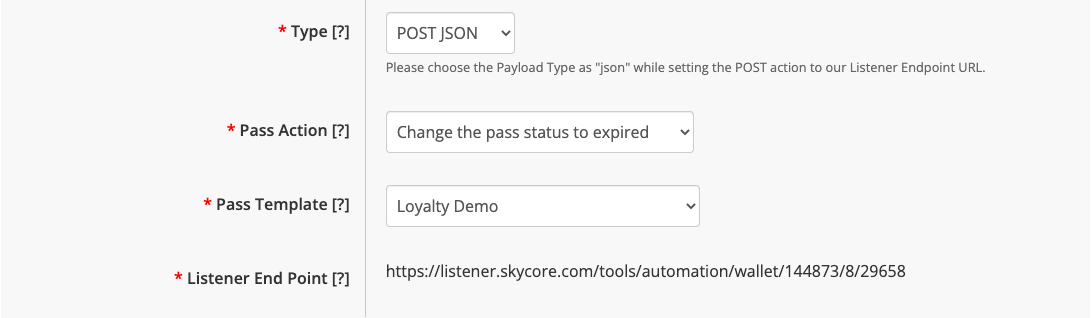
Option 4: Change the Pass Status to Expired
When the “Change the Pass Status to Expired” action is triggered, the user’s Pass is updated to an expired status. This results in the barcode on their pass (if applicable) being greyed out in Apple Wallet and the Pass being moved automatically to the “Expired Passes” section in both Apple Wallet and Google Wallet. This action is beneficial in situations such as when a user’s membership has expired, and they can no longer utilize their loyalty card.
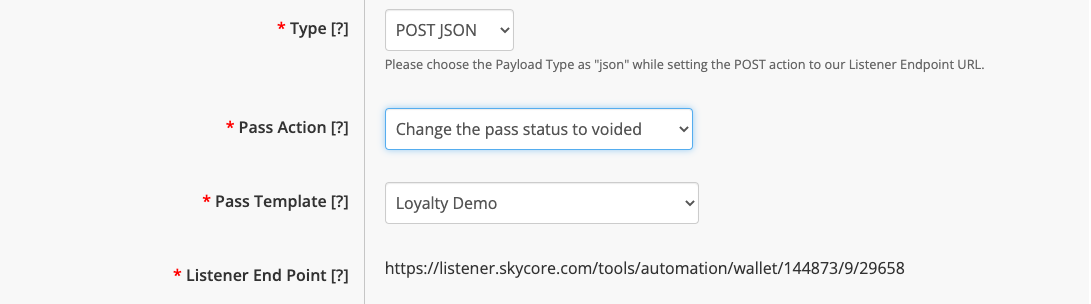
Option 5: Change the Pass Status to Voided
When the “Change the Pass Status to Voided” action is triggered, the user’s Pass status is updated to “voided.” For example, this action can be used when a user cancels their order for event tickets, and their event ticket Pass needs to be voided. The status change operates similarly to an expired status, where the barcode is greyed out, and the Pass is moved to the “Expired Passes” section in both Apple Wallet and Google Wallet.
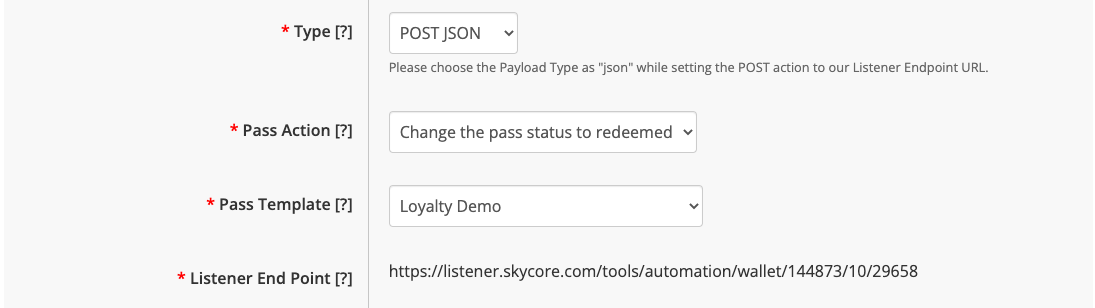
Option 6: Change the Pass Status to Redeemed
By selecting the “Change the Pass Status to Redeemed” action, the user’s Pass status will be updated to “redeemed,” preventing any further use of the Pass. You can use this action, for example, when a user redeems a coupon and the coupon Pass is no longer valid. This status change is similar to an “expired” status, causing the barcode to be greyed out and the Pass to be relocated to the “Expired Passes” section in both Apple Wallet and Google Wallet.
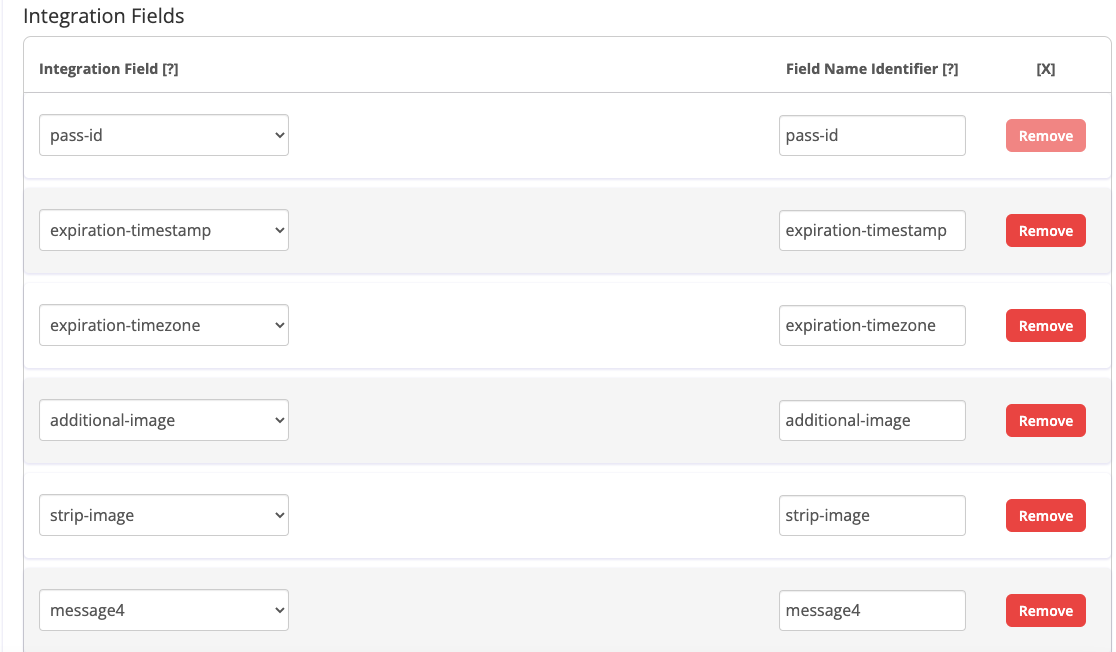
Step 4: Review Integration Data Fields
Each action allows the use of specific data fields that can be passed through the listener endpoint URL. Review the list of “integration fields” for each action and exclude any fields that you do not want to be passed to the endpoint URL. However, please note that the “pass-id” field is always included and cannot be removed. These data fields will be later added in Zapier so be sure to copy or write down the data fields you will be using in the integration.
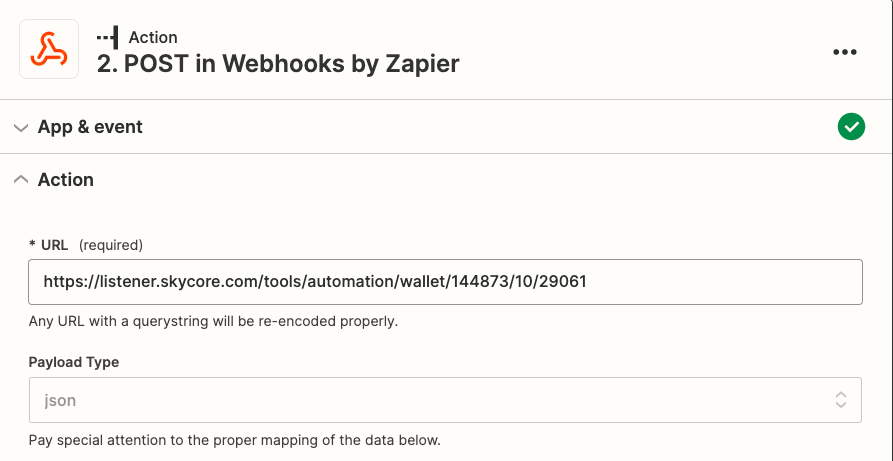
Step 5: Copy the Listener End Point URL
Copy the Listener End Point URL, which will be used in your Zap in Zapier. Save your integration once all of the necessary fields are filled out.
Step 6: Activate your Wallet Action Integration
Set the Integration Status to “Active” when you are ready to use it.

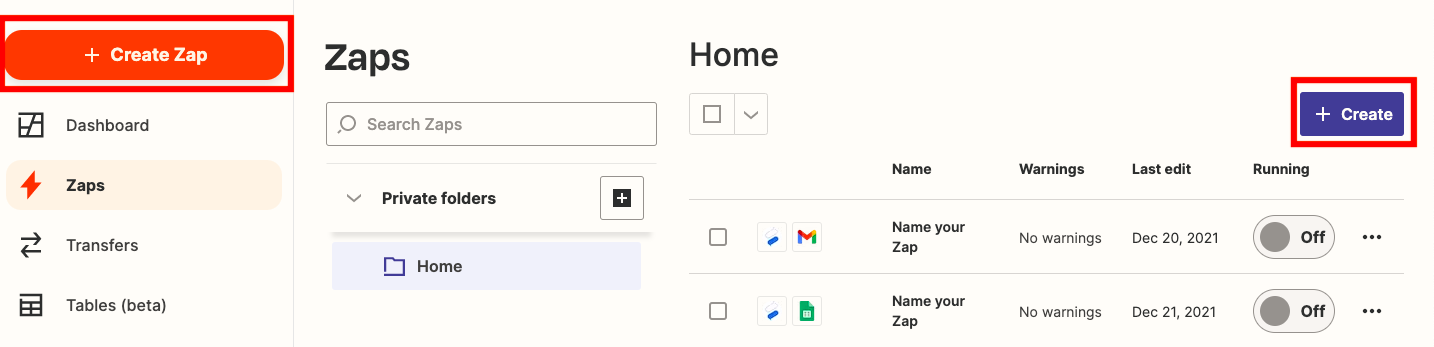
Step 7: Login to your Zapier Account
Log in to your Zapier account and create a Zap.
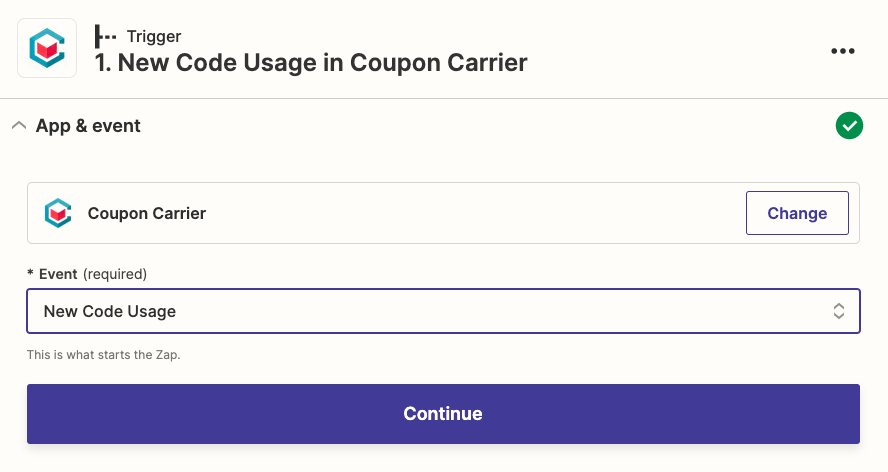
Step 8: Setup the Event Trigger in Zapier
Choose the app for the “Trigger” that will cause the Zap to occur. Choose the “Trigger” event from the other app.
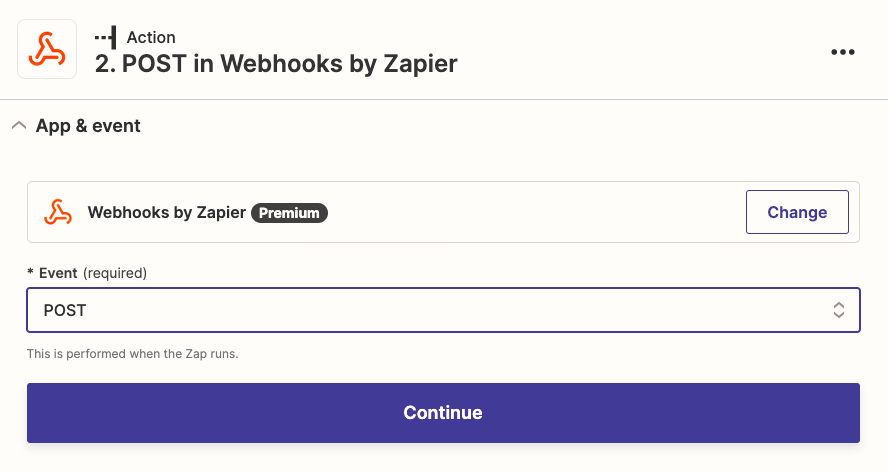
Step 9: Setup the Event Action in Zapier
Choose Webhooks by Zapier for the event “Action” and select the “Action” event. Enter the Listener End Point URL from step 5 above. Choose the payload type and any other necessary details.
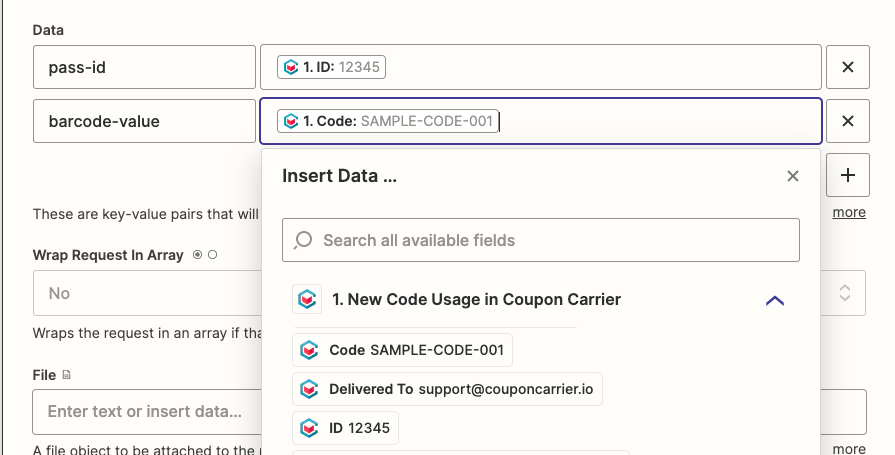
Step 10: Add your Data Fields in Zapier
Add the data fields from step 4 above that you need to pass through the URL to your Zap in Zapier. You will need to map the WalletThat data fields to data fields available from the app that you are using for your event trigger. Map your fields by choosing from the drop-down menu provided in Zapier.
Step 11: Test & Run Your Integration
Once you’ve created your Zap for a Mobile Wallet Action in Zapier, you can test the integration to make sure it is working properly. After testing, click “Publish” in the top right corner of the Zap creator and toggle your Zap to “Running” status when you are ready to use it. If you need additional help creating a Zap in Zapier, check out this article: Creating a Zap