How to Create a Google Pay & Wallet Console Account
Before you can start issuing Google Wallet passes, you need to set up a Google Pay & Wallet Console account. This is where you register your business, get your Issuer ID, link the standard WalletThat service account email address, and control who has access to your account.
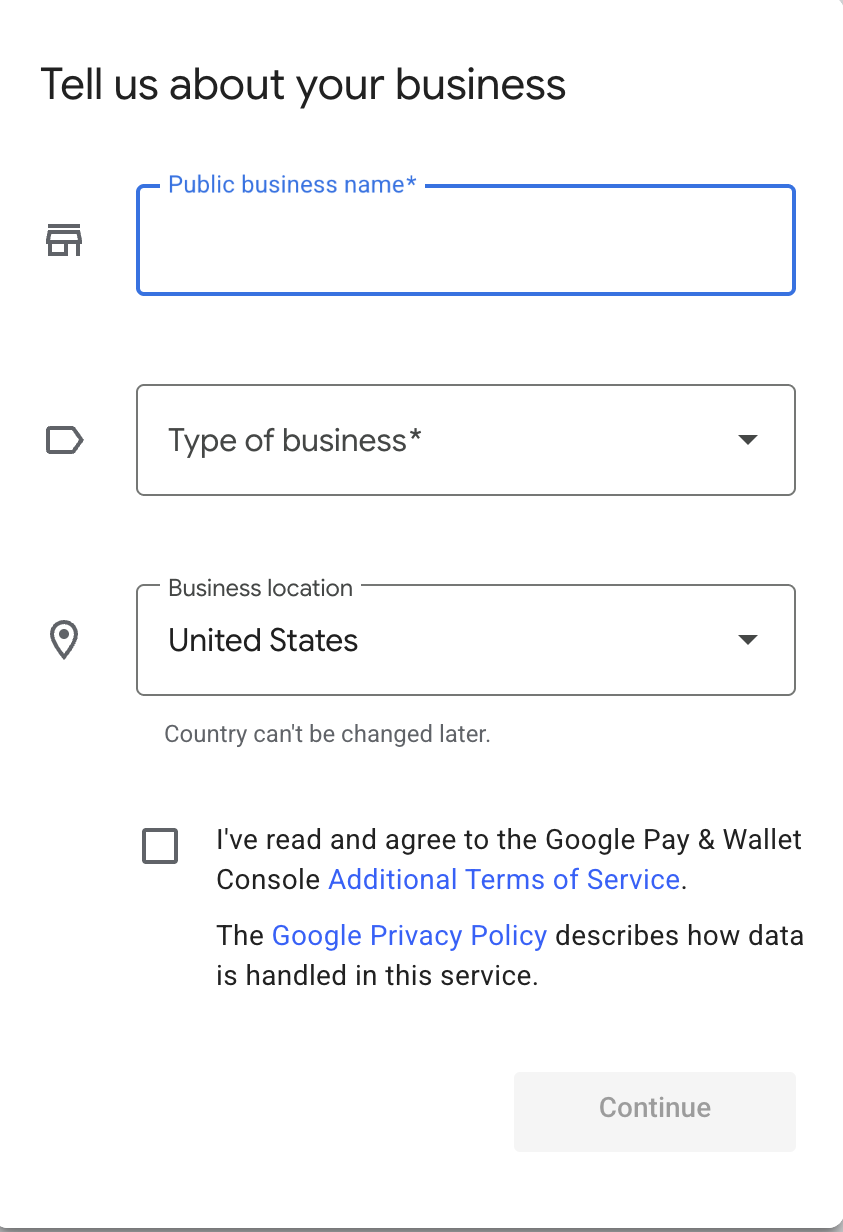
Step 1: Go to the Google Pay & Wallet Console Account Homepage #
Go to: pay.google.com/business/console and fill out the following three required fields:
- Public Business Name
- Type of Business – This will typically always be “Merchant” as “Financial Institution” is for banks only.
- Business Location
After filling out those three fields, you will just need to agree to Google’s terms and then click “Continue”.
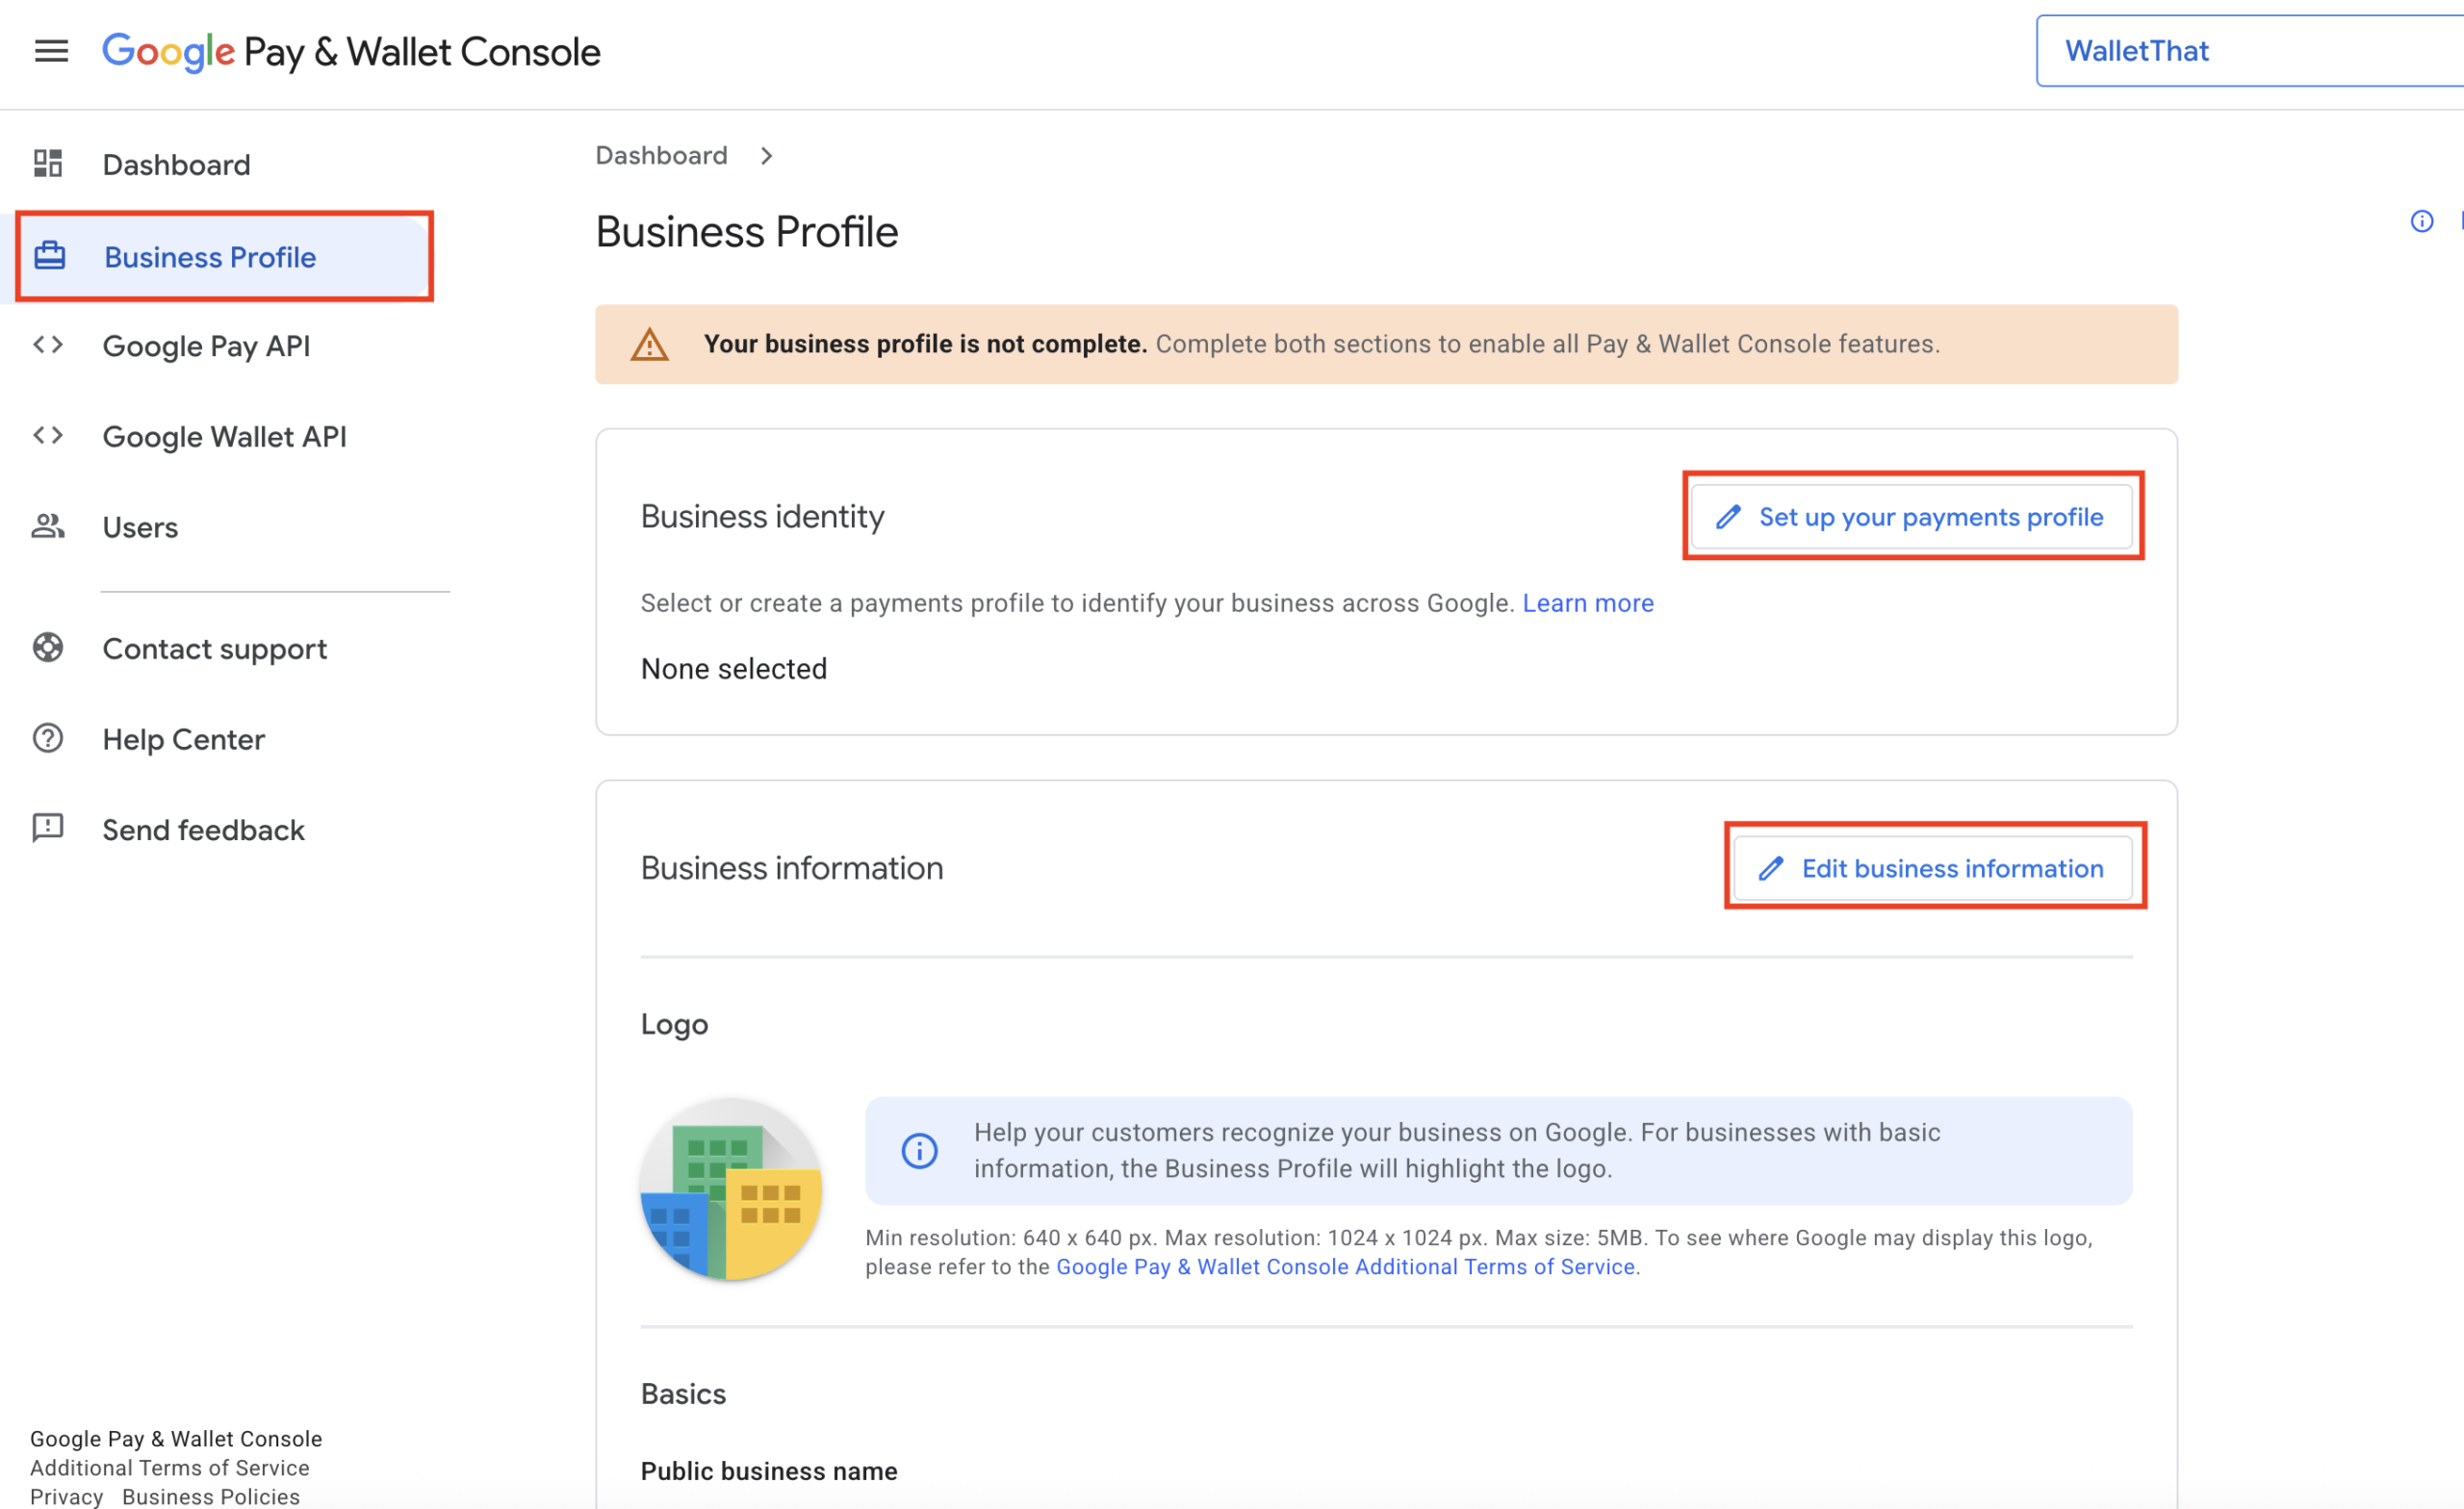
Step 2: Complete your Business Profile #
Google requires that all console accounts have a completed business profile. You will need to click the “Business Profile” tab from the left-side navigation. This is broken into two sections:
- Business Identity – This section is completed by clicking “Set up your payments profile” and filling out your business address.
- Business Information – This section is completed by clicking “Edit business information” and filling out billing details such as website link and customer support information.
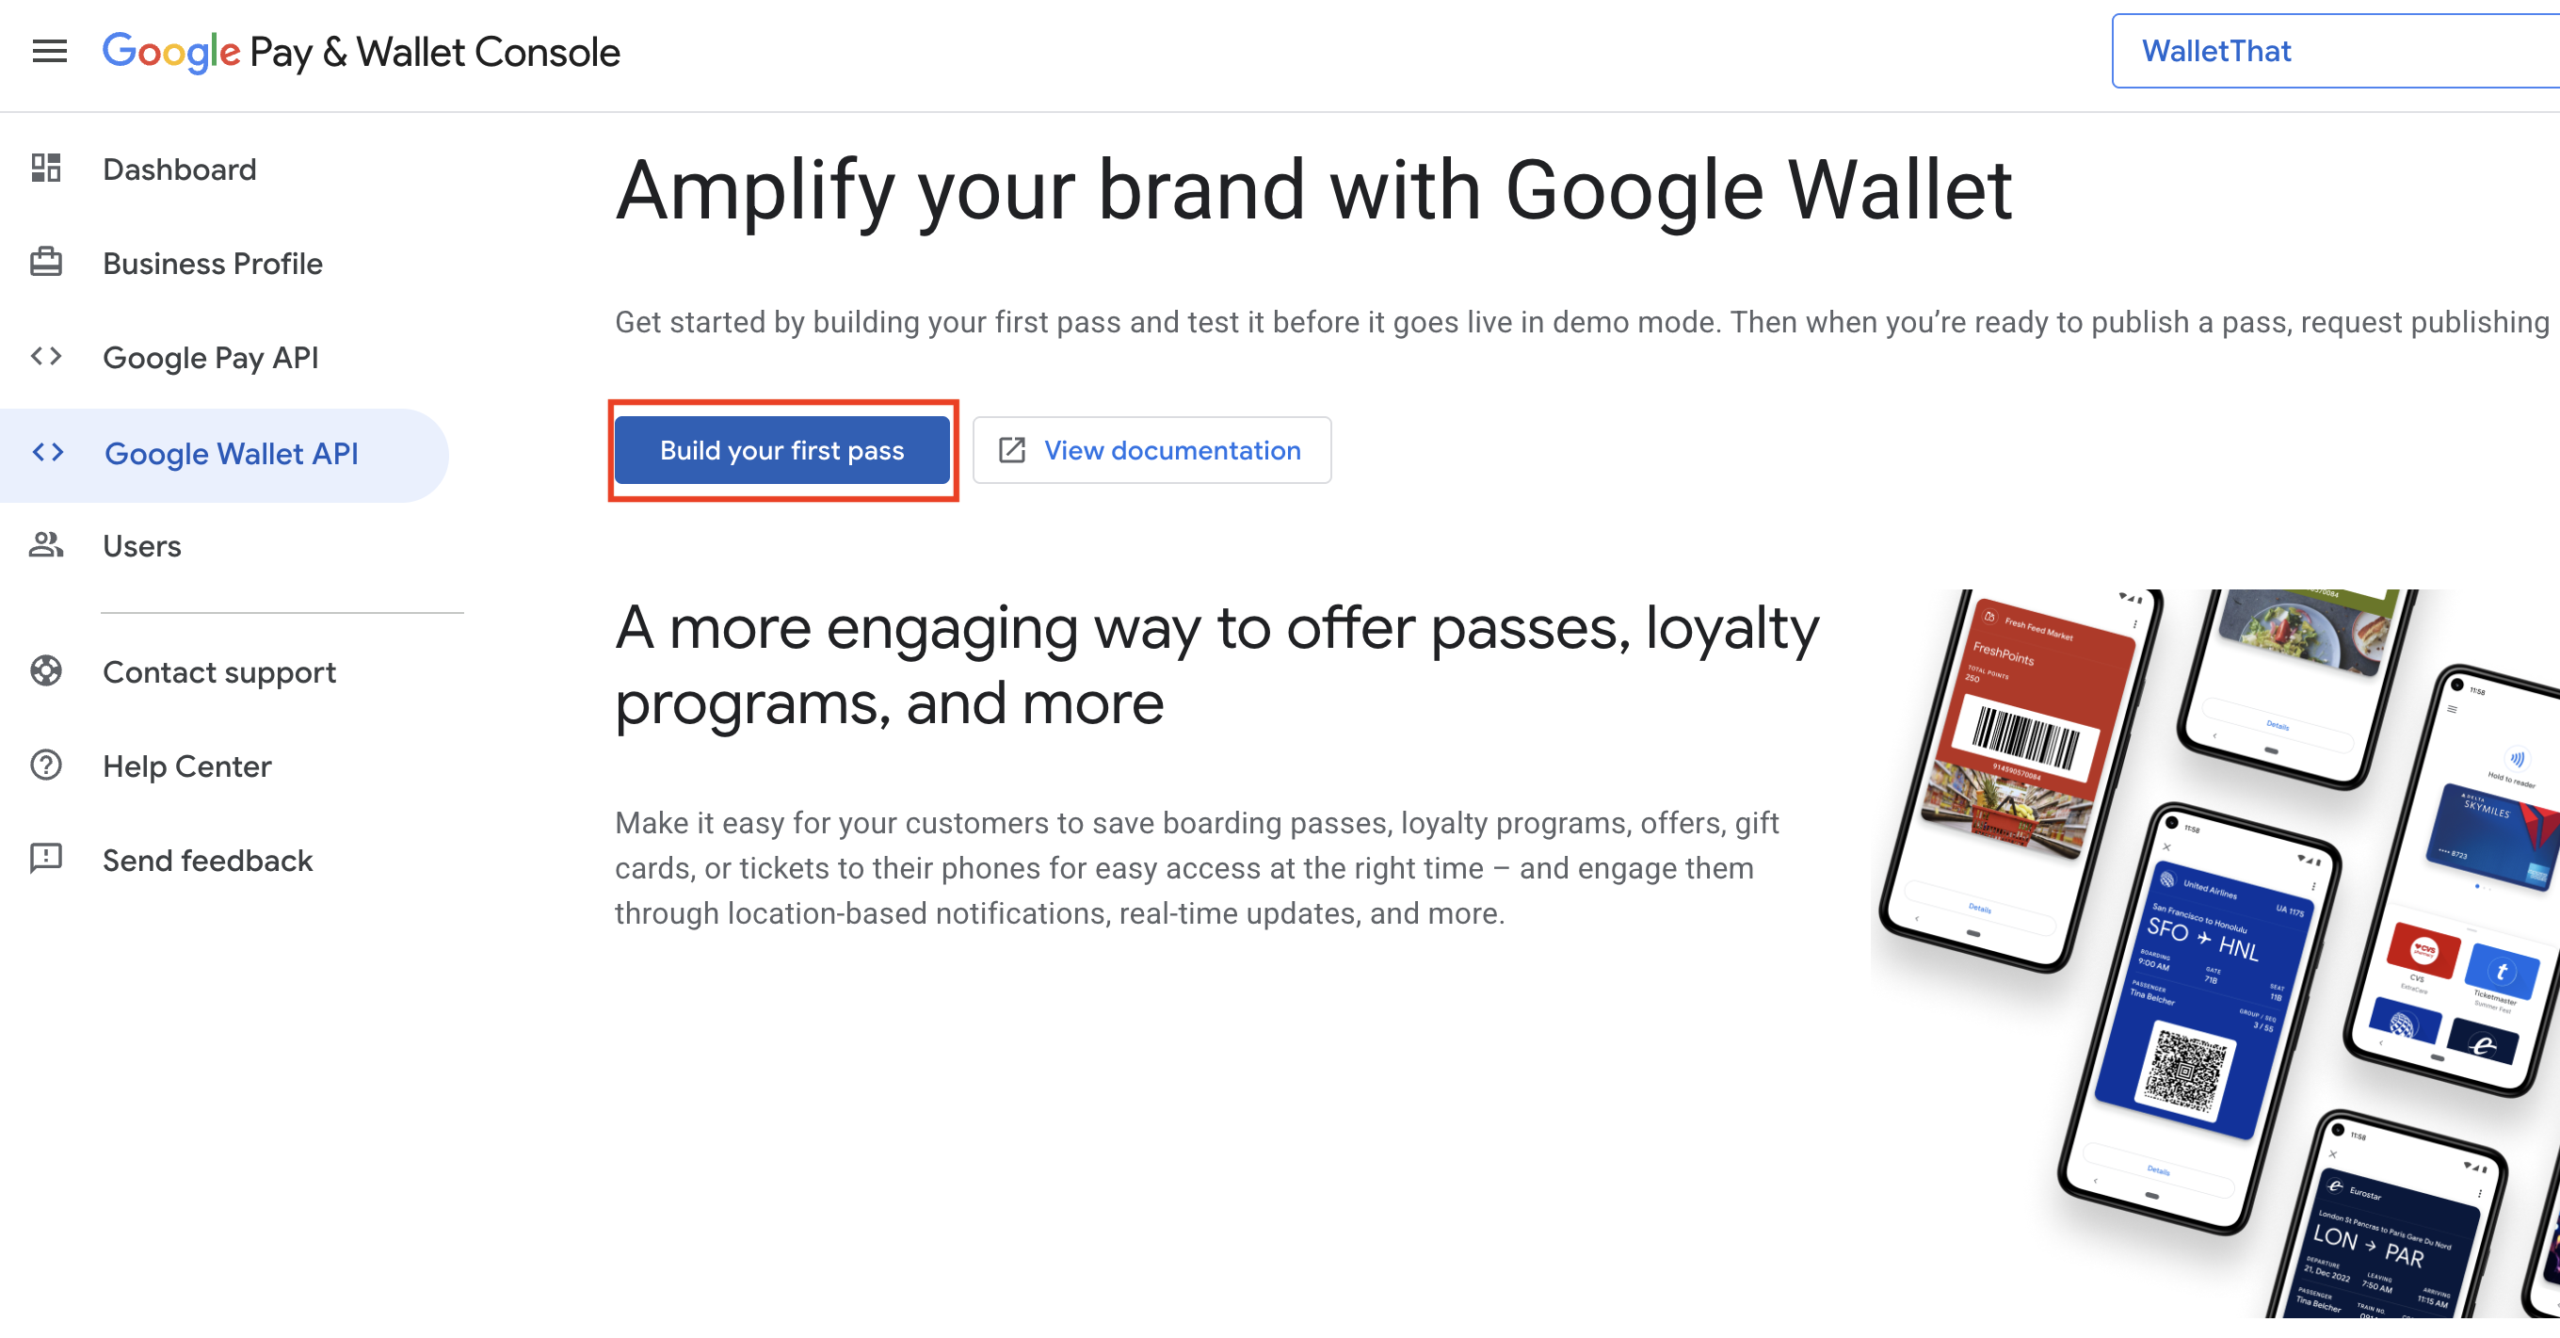
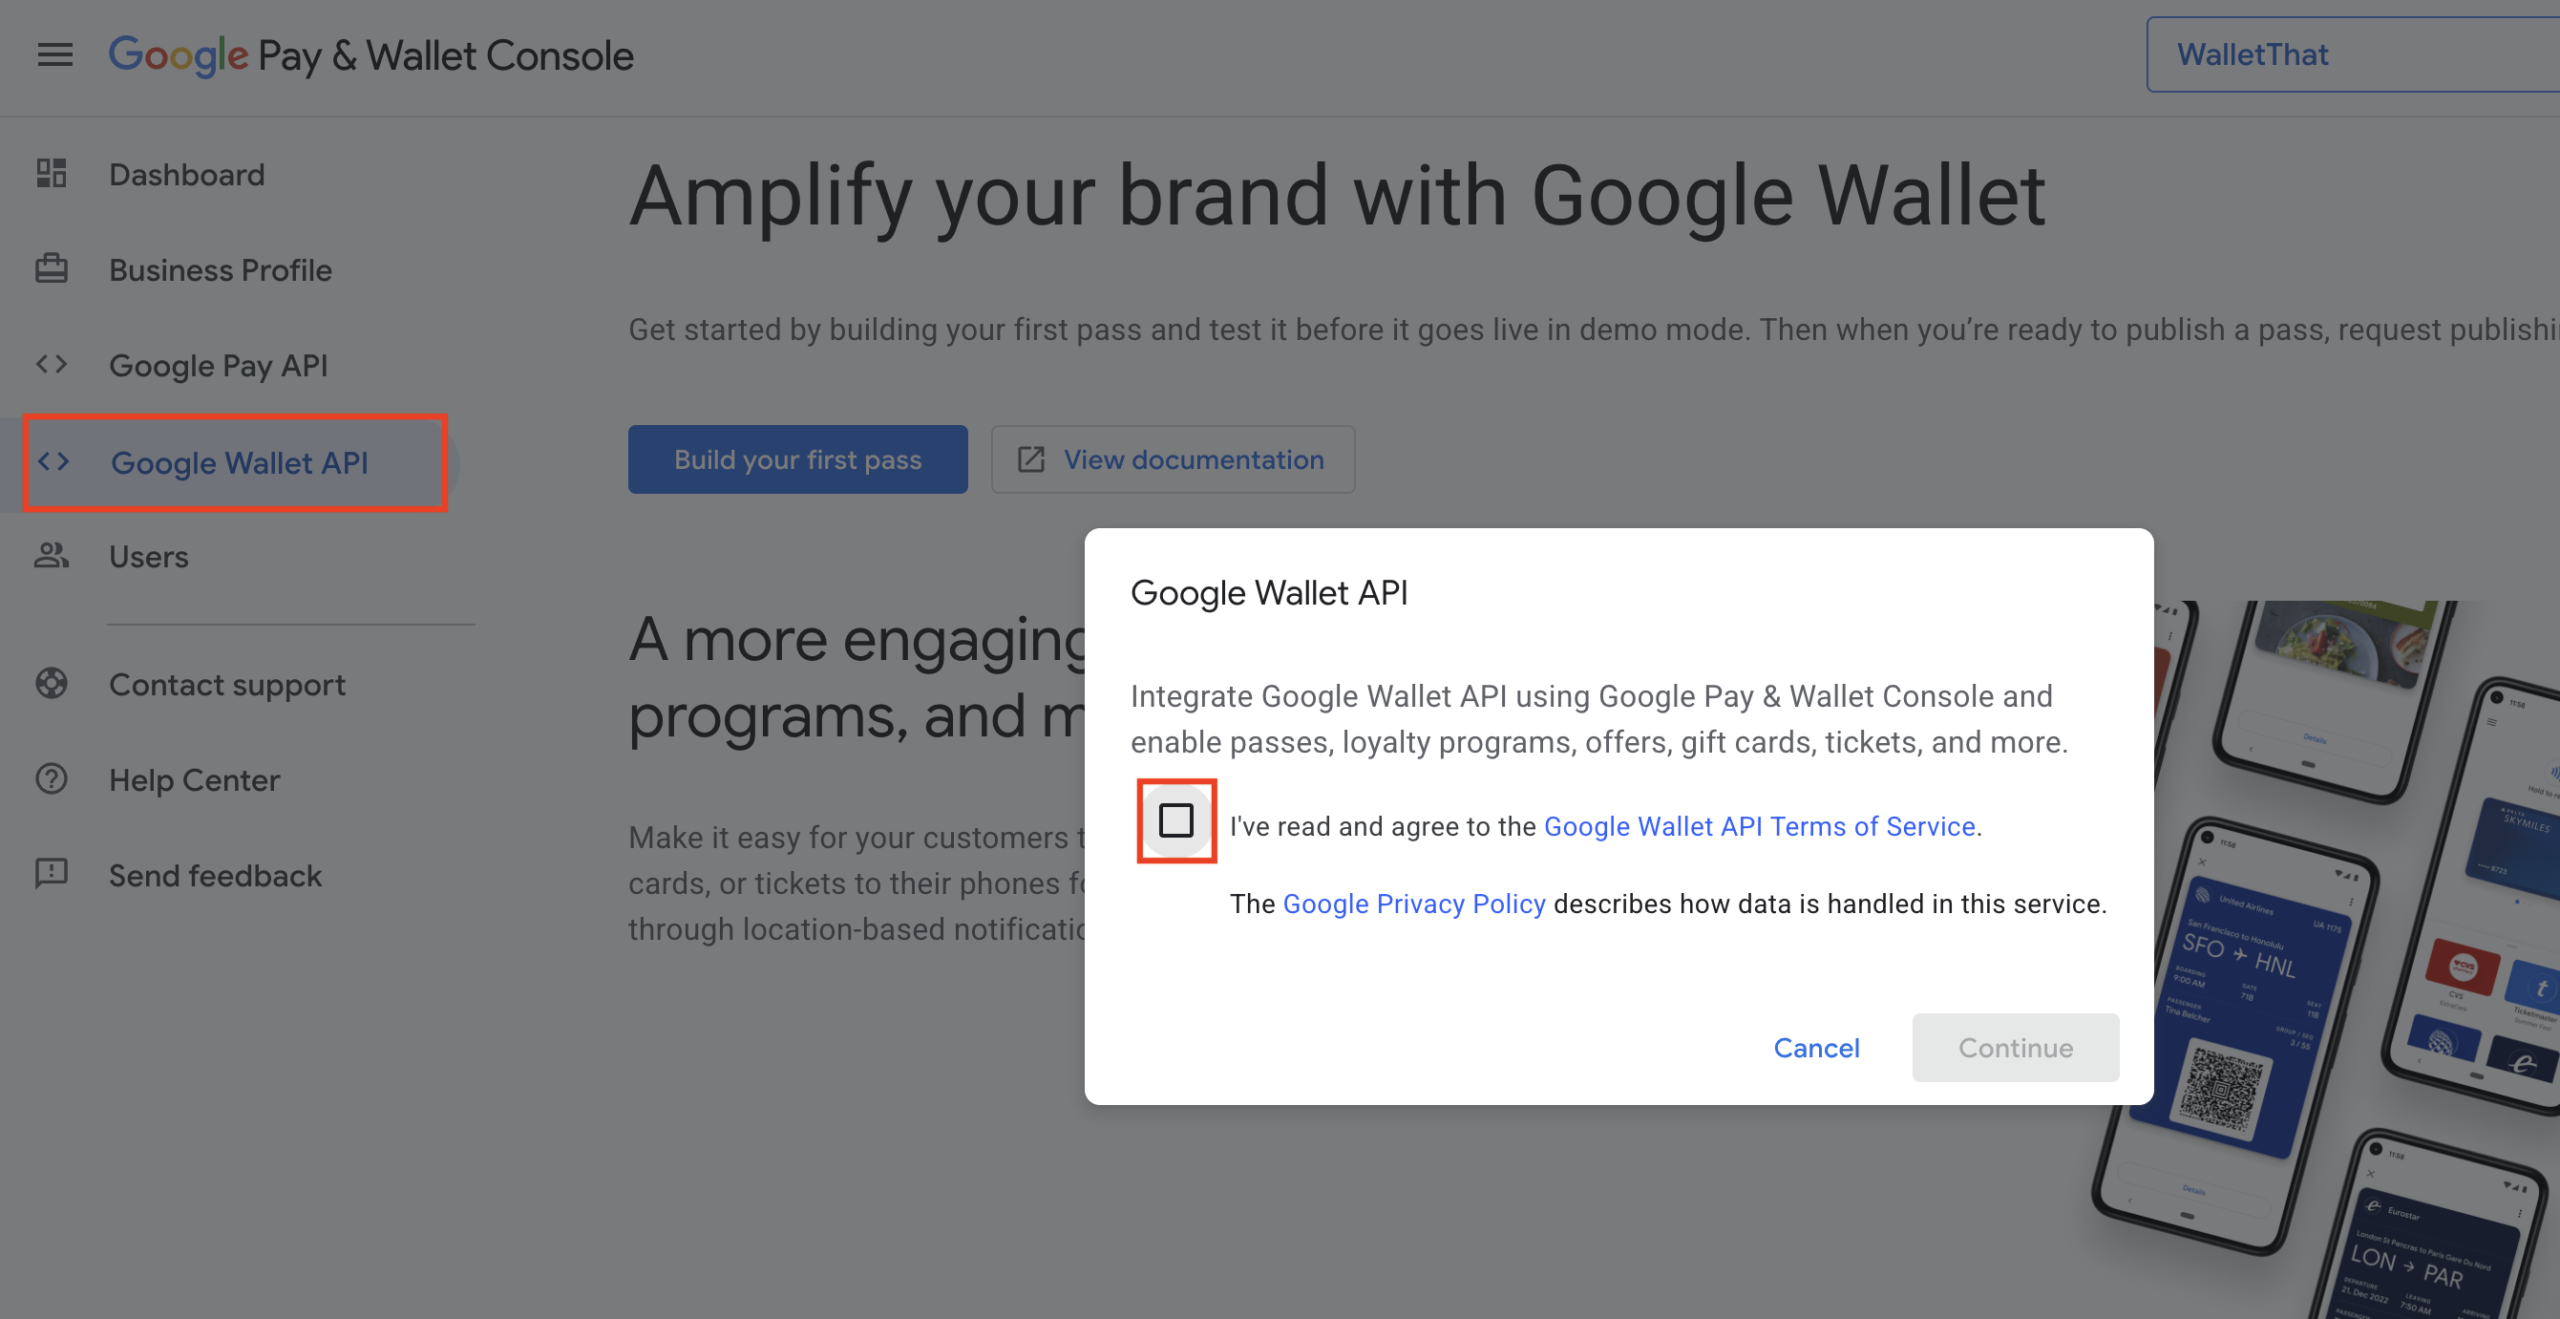
Step 3: Navigate to the Google Wallet API Section #
Click the “Google Wallet API” tab from the left-side navigation. You will then need to click “Build your first pass”. This will prompt you to agree to Google Wallet’s terms and then click “Continue”.
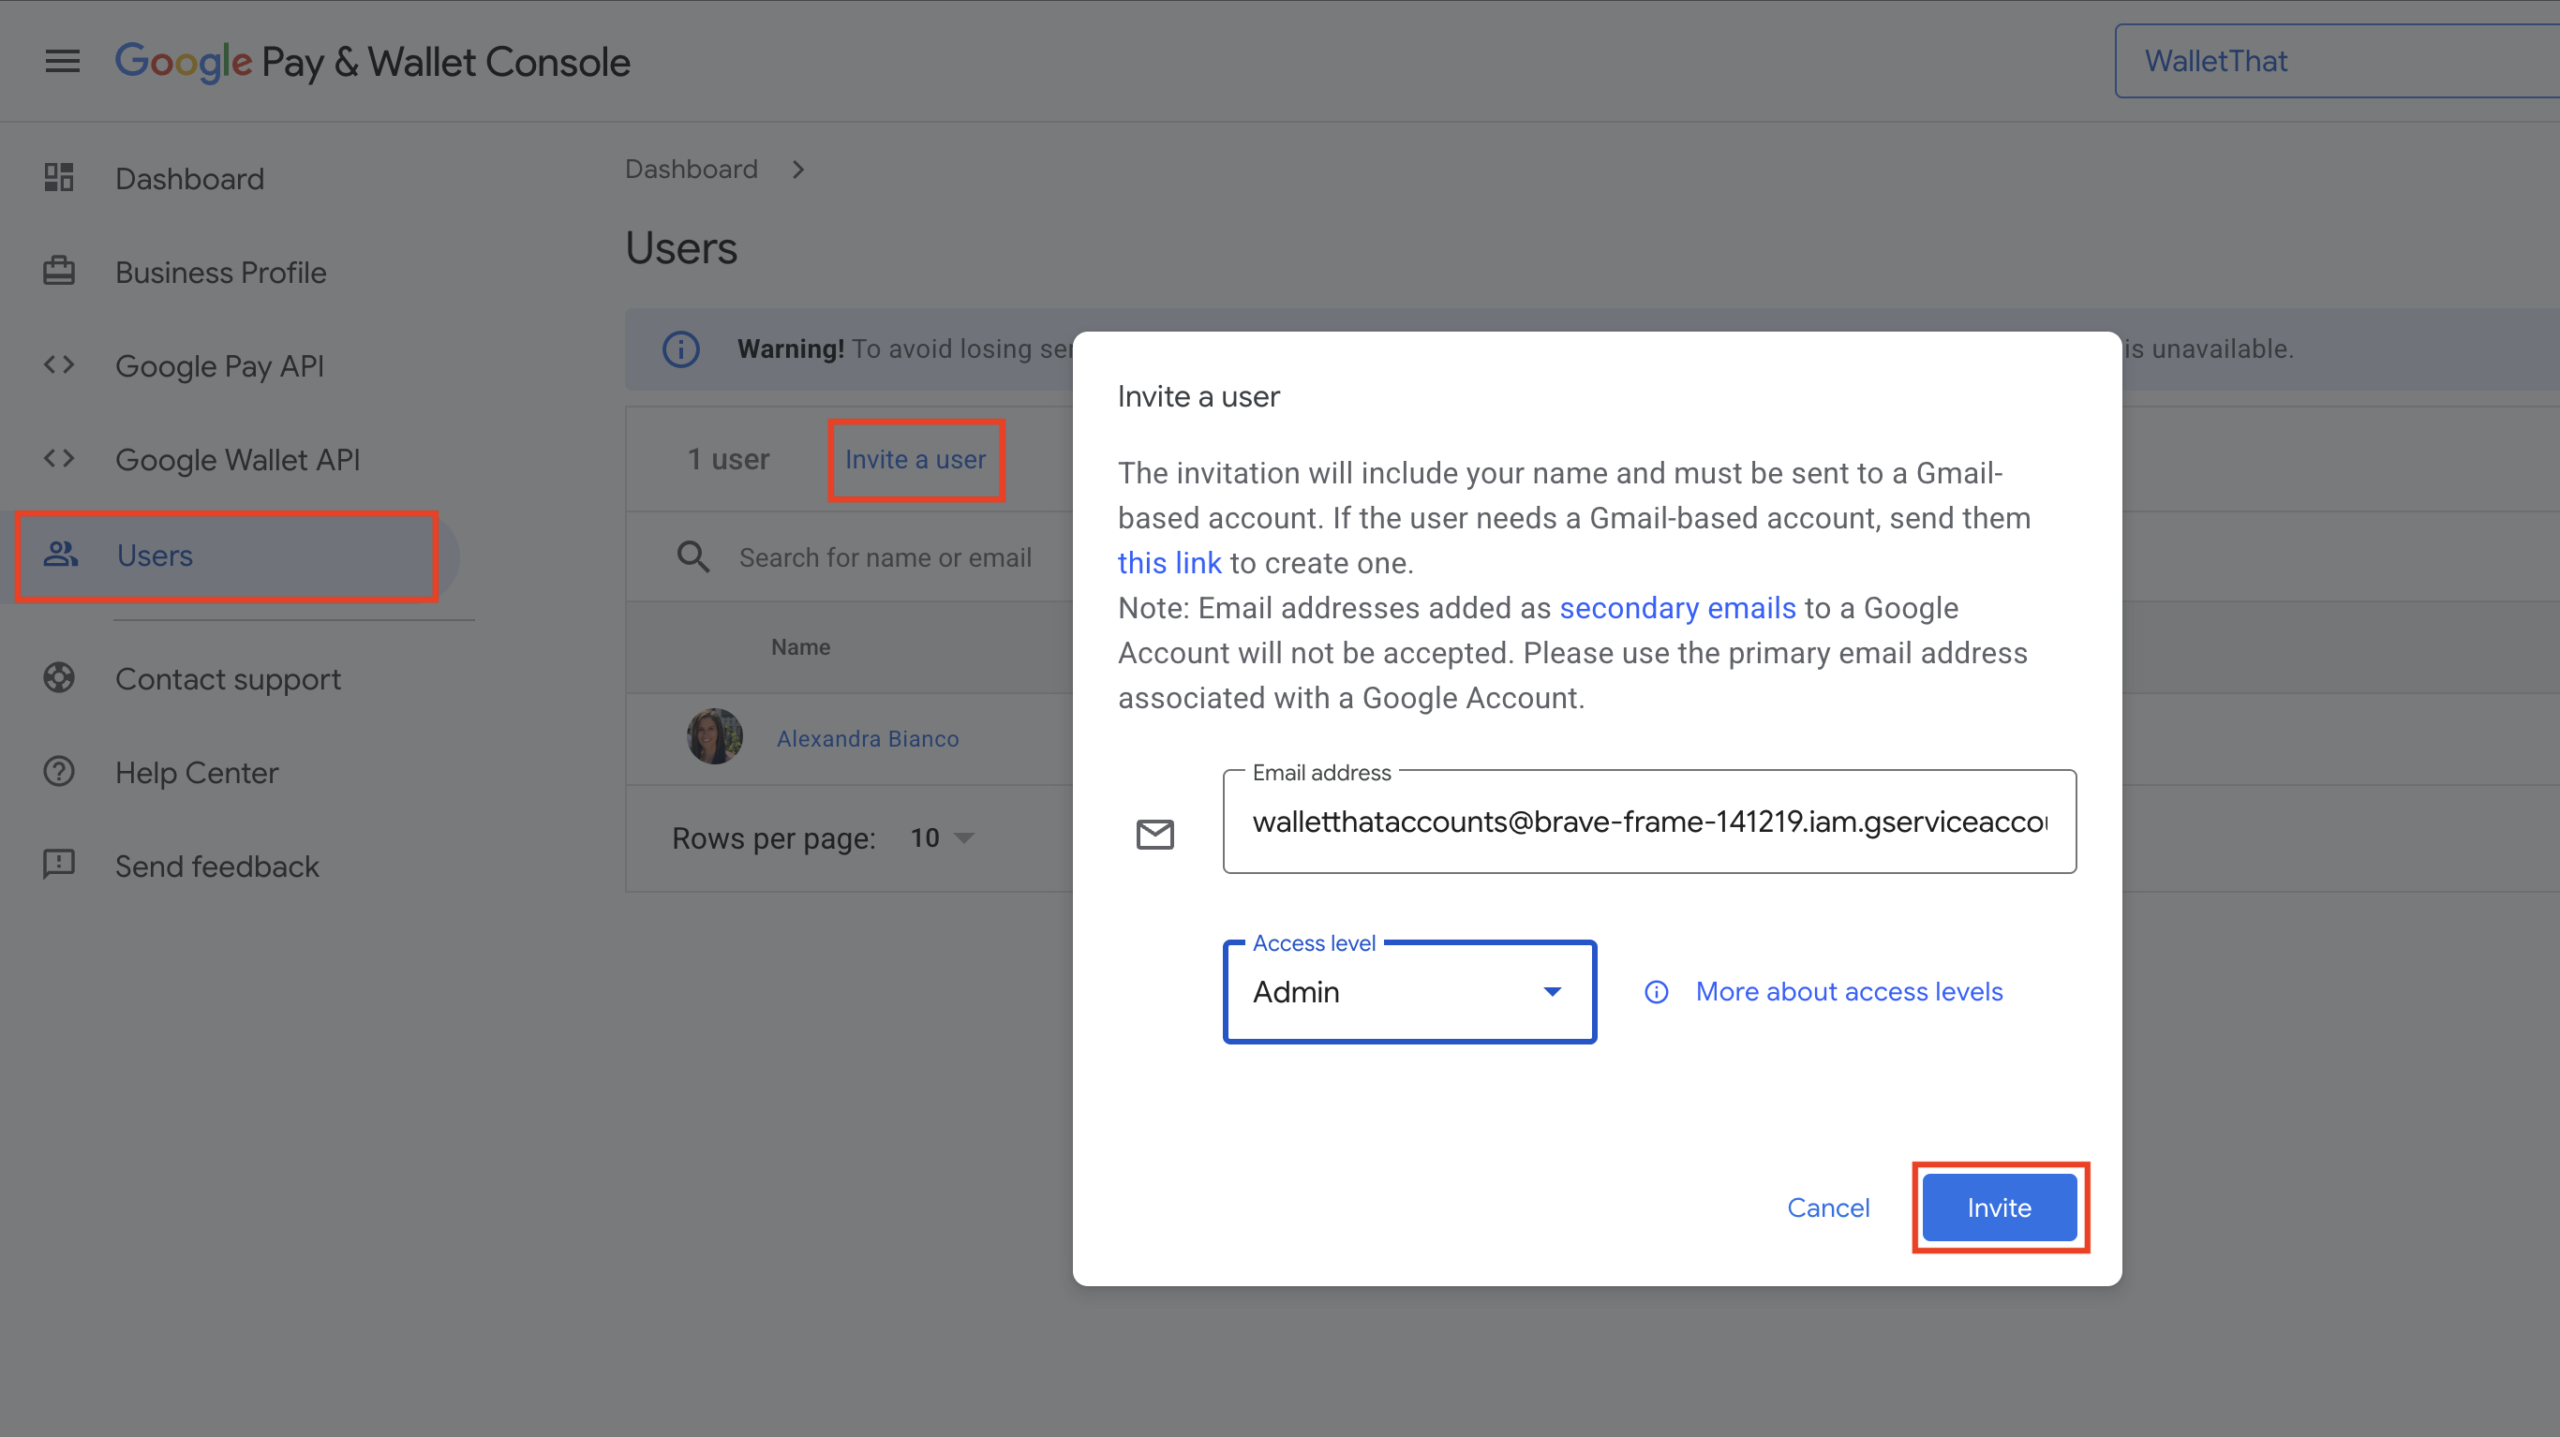
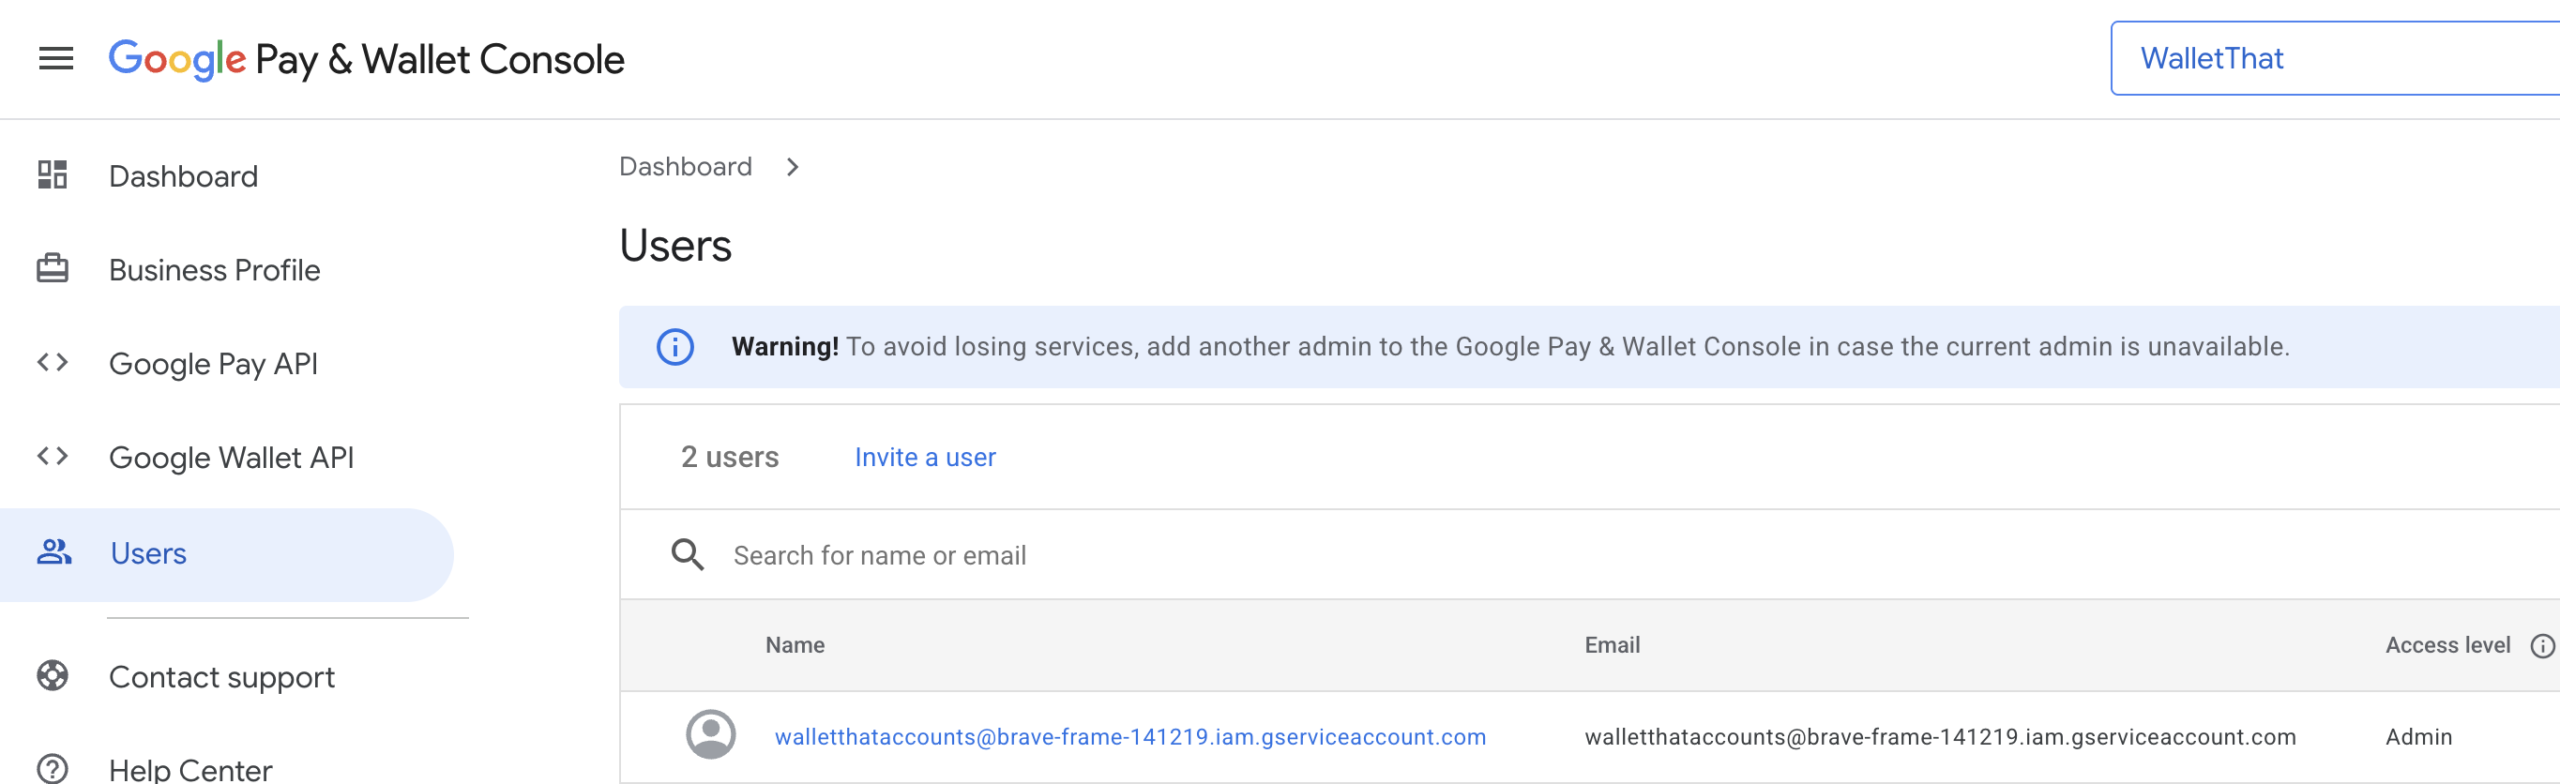
Step 5: Invite WalletThat’s Service Account as a User #
Navigate to the “Users” tab in the left-side navigation and click “Invite a user”. When prompted, invite WalletThat’s service account email address (walletthataccounts@brave-frame-141219.iam.gserviceaccount.com) as an Admin user in your console account.
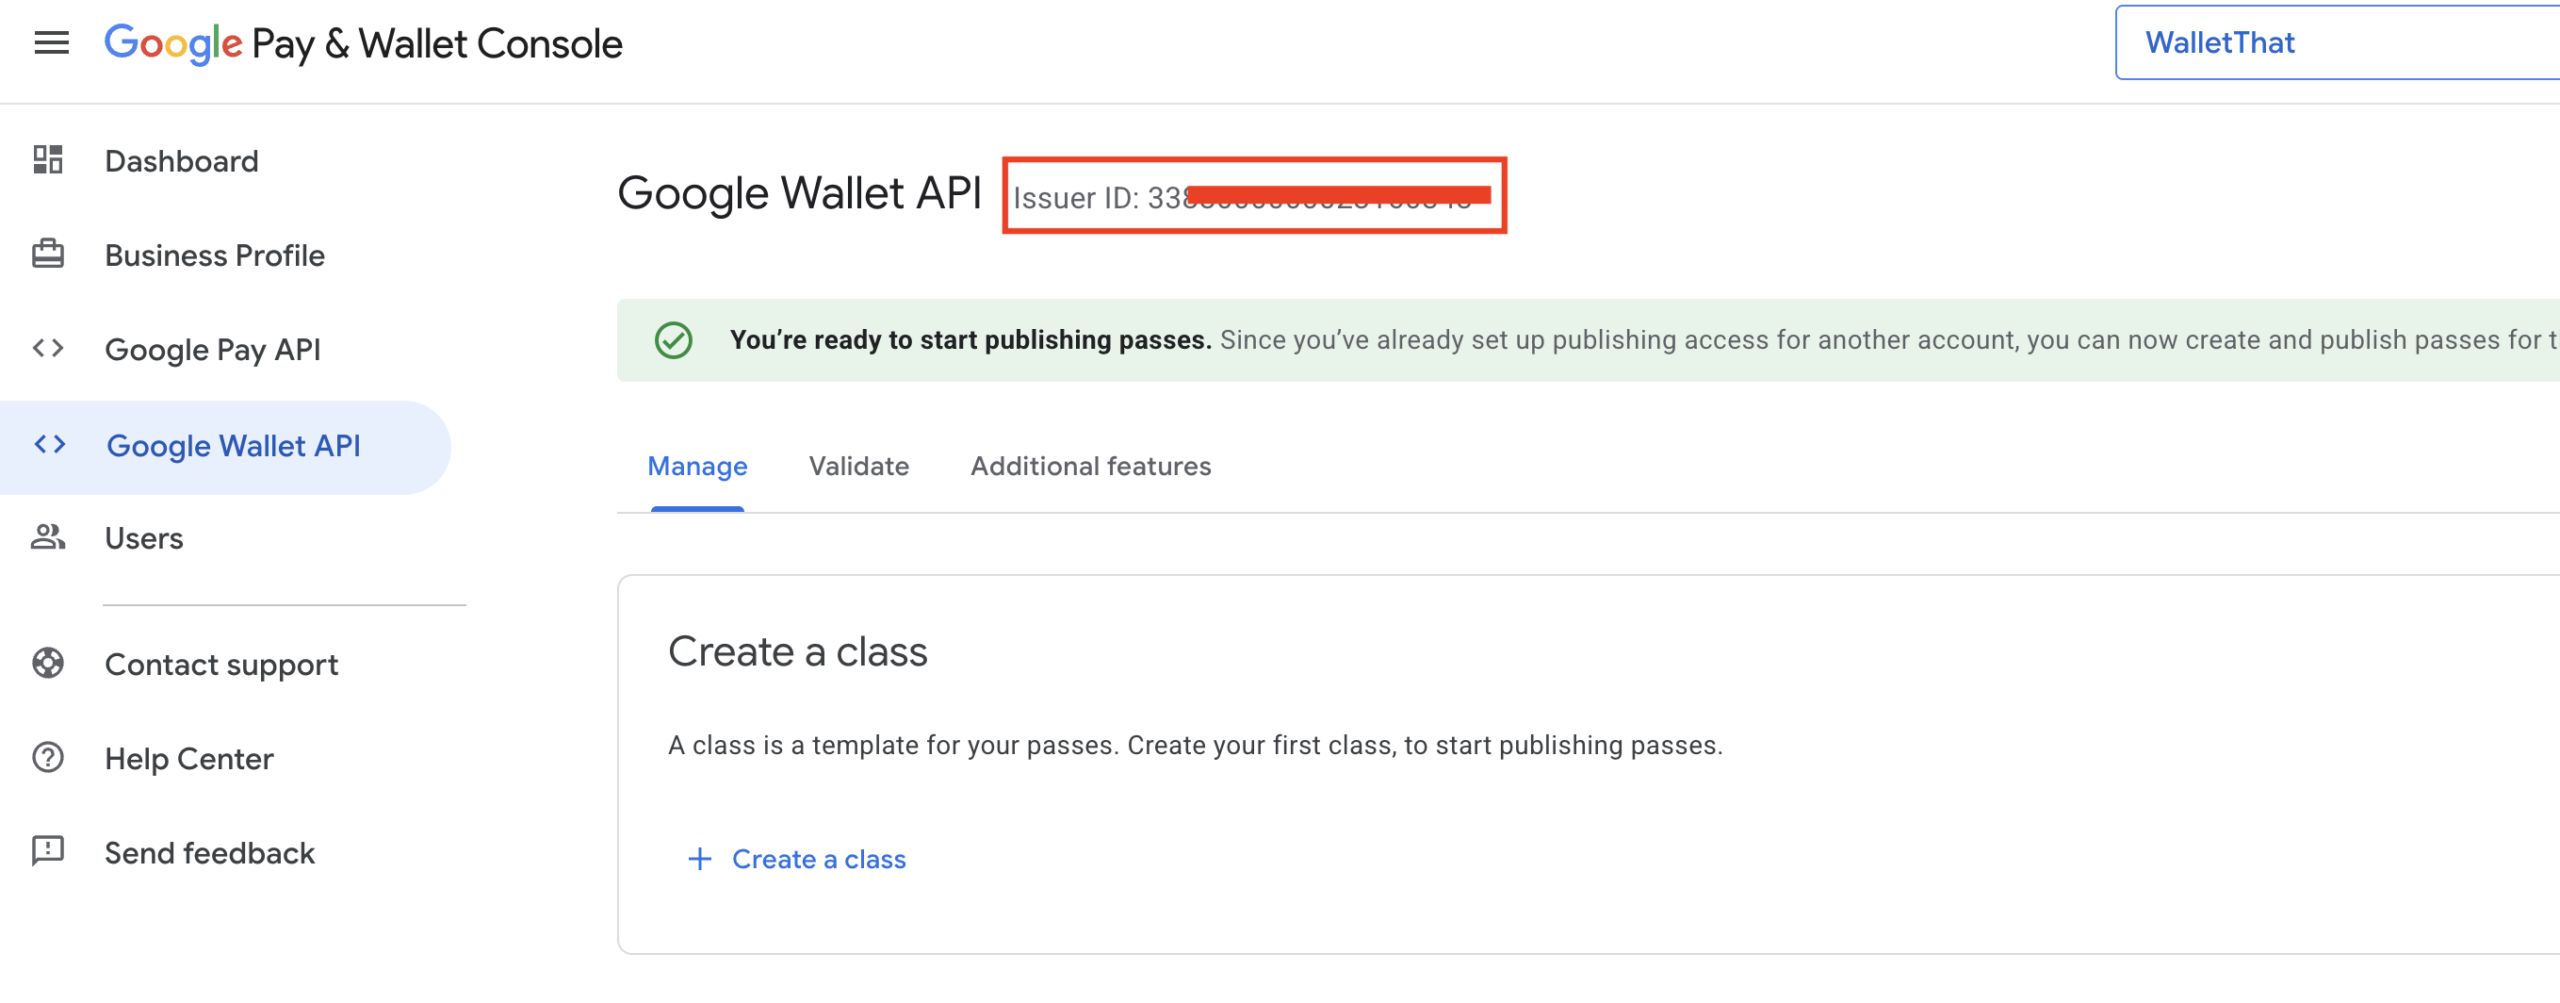
Step 6: Add Your Issuer ID in Your WalletThat Account #
To complete the setup process to issue Google Wallet Passes, you will just need to add your Issuer ID in the Apple & Google Wallet Settings page in your WalletThat account. If you need help adding this to your WalletThat account, you can use this article: Apple & Google Wallet Settings