How to Issue Personalized Mobile Wallet Passes Through Klaviyo #
Learn how to use Klaviyo to create and distribute digital passes, including loyalty cards, coupons, and event tickets through email. The digital passes are created on the WalletThat platform and issued through Klaviyo. Follow the steps below to create personalized mobile wallet passes and issue them through Klaviyo.
WalletThat Platform Steps #
Step 1: Login to your WalletThat Account
Step 2: Create a Pass Template
To create a Pass Template for your preferred Pass Type, visit the Pass Templates page on WalletThat. You can use the following articles as references to help create your template:
Step 3: Choose How You’ll Personalize Passes
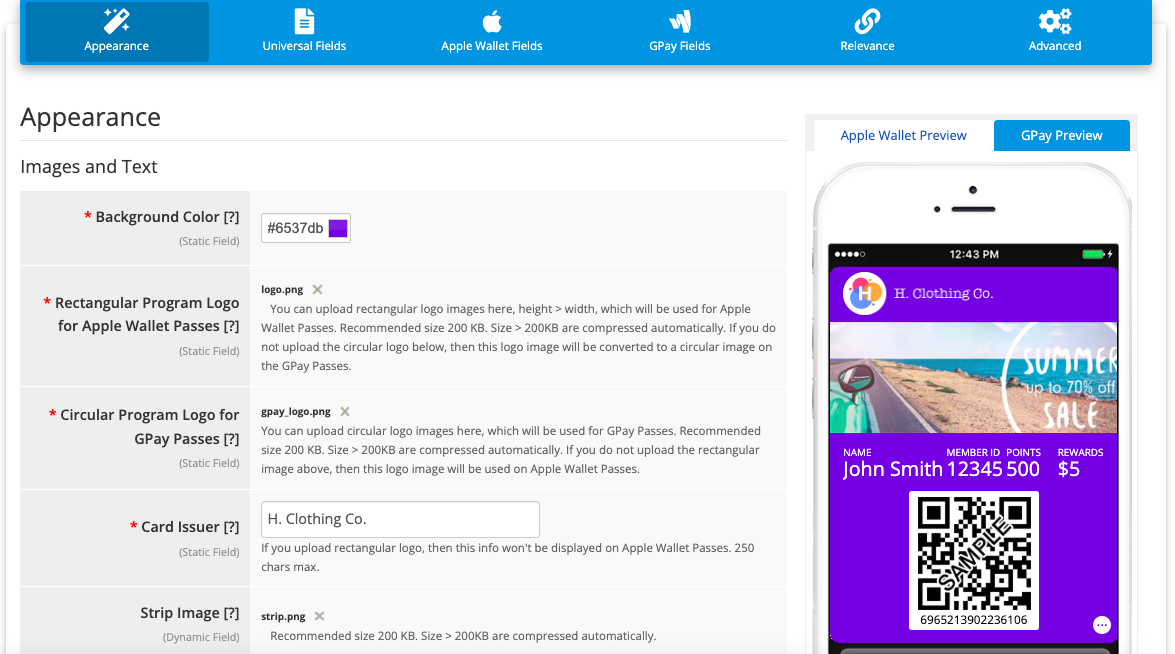
There are three ways to personalize your Passes. The first option is to import data into WalletThat by uploading dynamic data in a CSV file. This option is best if you have all the customer data prior to issuing the Passes and enables you to create a simple Pass Issuance Link using only the pass-id field. The second option is to use Klaviyo’s template tags to build out the issuance link with multiple personalized variables. This option is suitable if you already have customer data stored in Klaviyo. Lastly, you can integrate third party apps with Zapier to personalize your Passes. This option is ideal when you are collecting customer data through another system and need to utilize that data to personalize your Passes.
Option 1: Import Data into WalletThat
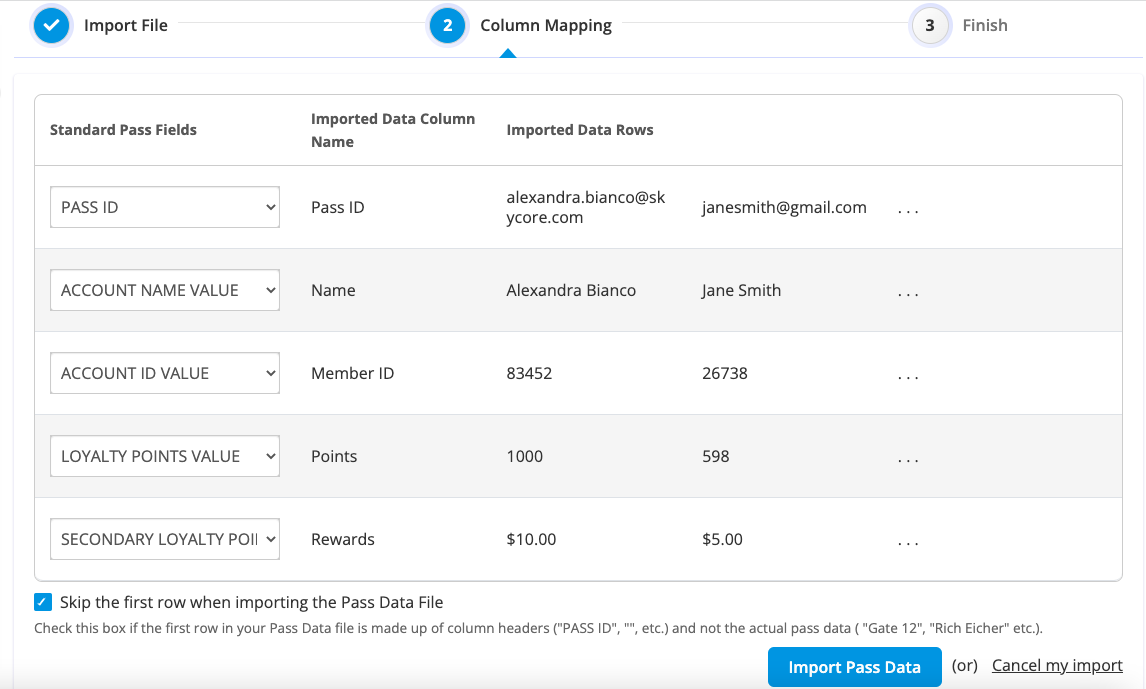
To import personalized data into the Pass Template, first, create a CSV file that includes all the dynamic fields you will need. Add a pass-id column to differentiate Passes using the user’s email address. Next, access the Pass Data Manager and click on “Import Records.” Afterward, upload the CSV file and map all fields to the dynamic fields in the Pass Template. To avoid errors, make sure to check the “Skip the first row…” box. For more details on data importing, read this article: Importing Pass Data

Option 2: Use Template Tags in Klaviyo
Klaviyo offers template tags to replace data in emails with personal information. You can create a Pass Issuance Link on the WalletThat platform and add tags in Klaviyo to personalize Passes. Learn more about how to add template tags: How to Use Template Tags
Option 3: Use a Zapier Integration
Personalize Passes by linking Klaviyo and WalletThat with Zapier. Discover how to set up triggers or actions in Zapier by following this guide: Zapier Triggers Guide & Zapier Actions Guide
Step 4: Create a Pass Issuance Link
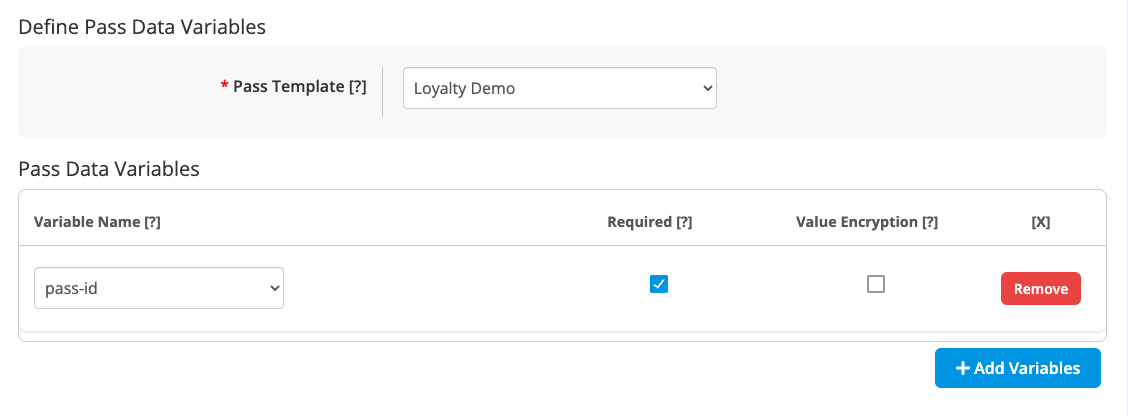
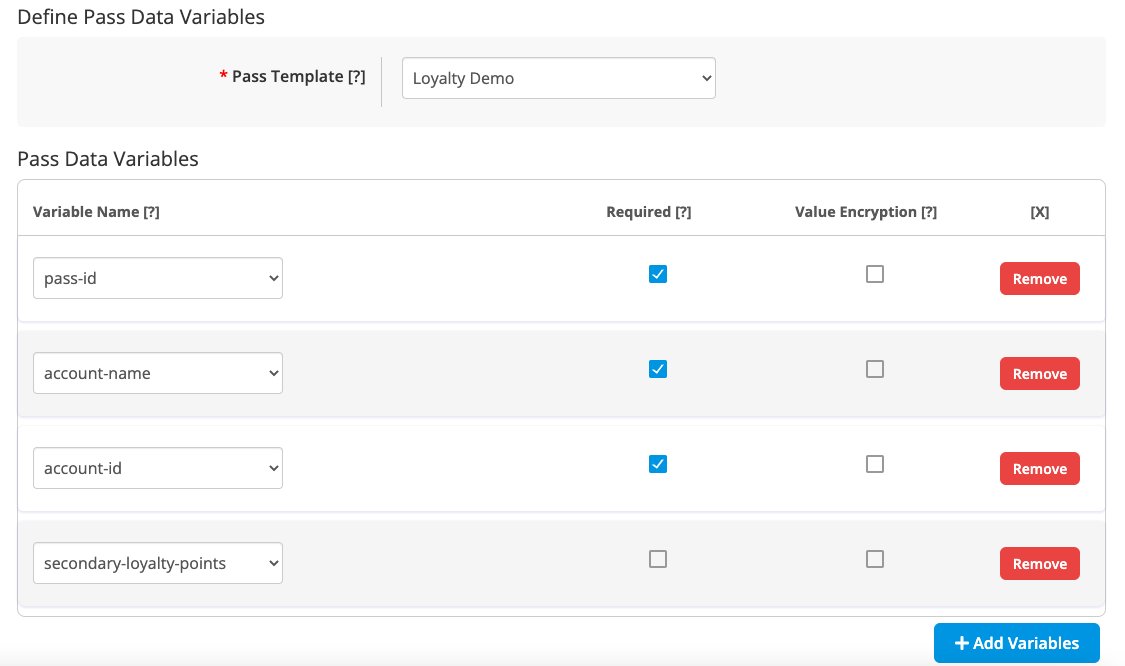
If you imported data into WalletThat, create a Pass Issuance Link containing only the pass-id variable. Make this variable required. On the other hand, if you are customizing the Issuance Link using Klaviyo’s template tags, you will need to add all the variables that require personalization within the link. Further information on creating Pass Issuance Links can be found here: Pass Issuance Links
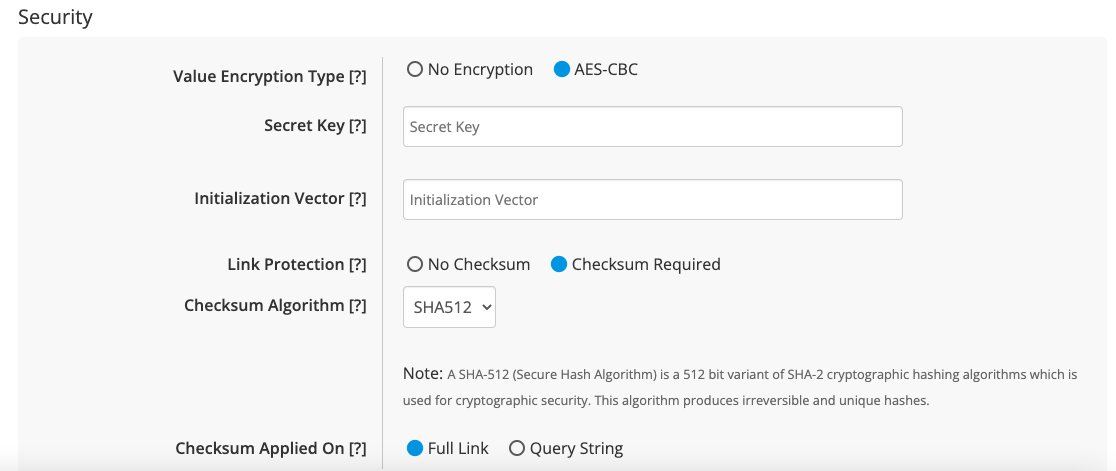
Step 4a: (Optional) Encrypt your Issuance Link
To protect sensitive information such as email addresses, names, and account IDs contained in your Pass Issuance Link, you have the option to encrypt the entire link or only specific variables within the link.
Step 5: Copy Your Pass Issuance Link
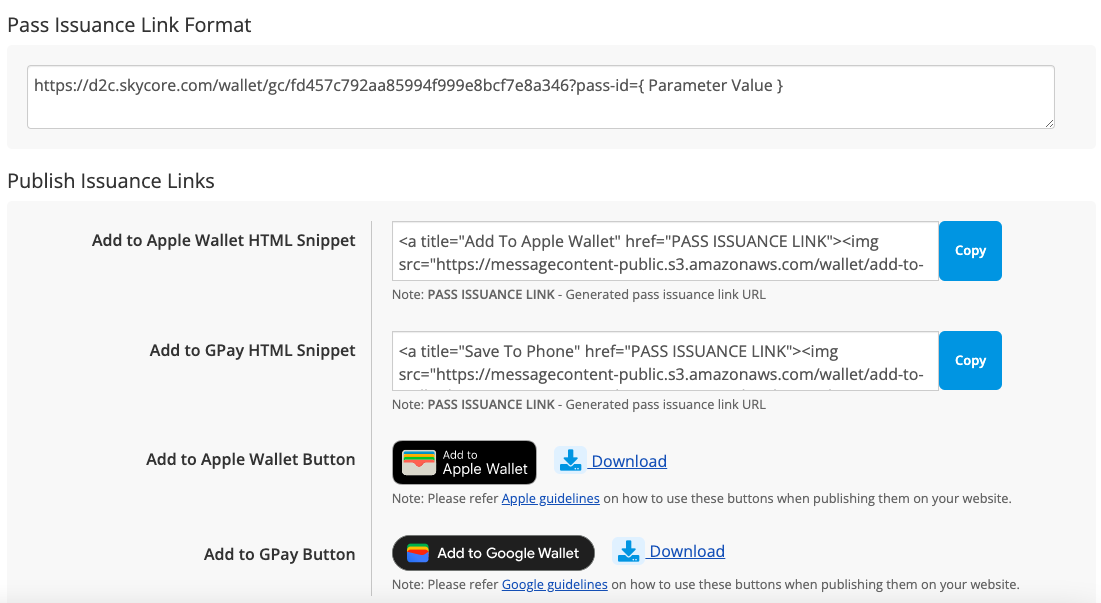
Once you have created your Pass Issuance Link with the necessary variables and encryption, save the link. To obtain the link, go to the Pass Issuance Link page and click on the “Get Link” button located under the “Link” column. Copy the link to use it in your email campaign at a later time. Make sure to replace the {Parameter Value} braces with personalized variables before sending
If you imported data into WalletThat, your link will look like this:
Example Link: https://d2c.walletthat.com/wallet/gc/502d8e5eb3f364526245828877537c8a?pass-id={ Parameter Value}
If you are using Klaviyo’s template tags to personalize your link, your link will look like this:
Example Link: https://d2c.walletthat.com/wallet/gc/502d8e5eb3f364526245828877537c8a?pass-id={ Parameter Value }&account-name={ Parameter Value }&account-id={ Parameter Value }&loyalty-points={ Parameter Value }
Klaviyo Platform Steps #
Step 1: Login to your Klaviyo Account
Step 2: Add Your Subscribers to an Audience List
To add your subscribers, go to the Audience tab of your Klaviyo account and create a list. It’s important to confirm that you have obtained consent to communicate with these leads. For assistance with managing contacts and lists, you can find more information here: How to Create & Add Subscribers
Step 3: Create an Email Campaign
Once you’re ready to distribute personalized Passes to your contact list, you can create an email campaign. If you need guidance on creating an email campaign using Klaviyo, you can find more information here: Create an Email Campaign
Step 4: Design Your Email Template
Once you have created your campaign, select your template layout and customize the design of your template. For further guidance on template customization, refer to the Klaviyo help section.: Getting Started with Templates
Step 5: Add Your Pass Issuance Link
After designing your email template, insert your Pass Issuance Link into the email body. Make sure to replace any personalized fields in the link with template tags from Klaviyo. You have the option to add the hyperlink directly in the email template, use Add to Wallet button images with HTML code that includes the issuance link, or upload a QR code image with the link embedded.
If you imported personalized data into WalletThat your link should look like this:
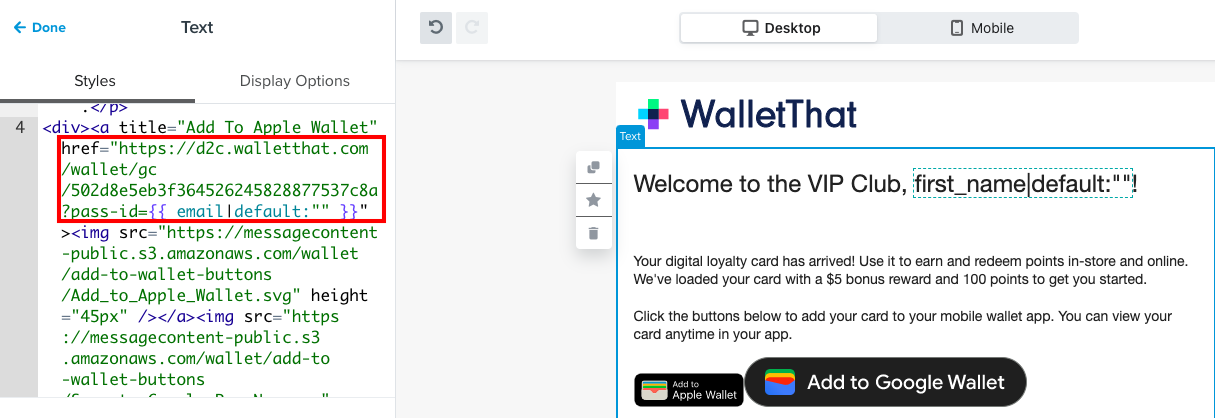
Example Link: https://d2c.walletthat.com/wallet/gc/502d8e5eb3f364526245828877537c8a?pass-id={{ email|default:”” }}
If you are using Klaviyo’s template tags your link should look like this:
Example Link: https://d2c.walletthat.com/wallet/gc/502d8e5eb3f364526245828877537c8a?pass-id={{ email|default:”” }}&account-name={{ first_name|default:”” }}&account-id={{ member_id|default:”” }}&loyalty-points={{ points|default:”” }}
Option 1: Add the Hyperlink
To add your issuance link in the email template, simply paste it in the desired location. To display shortened link text in the email, type the text in the email body, highlight it, click the Link button in the content settings, paste the issuance link, and click “Apply”
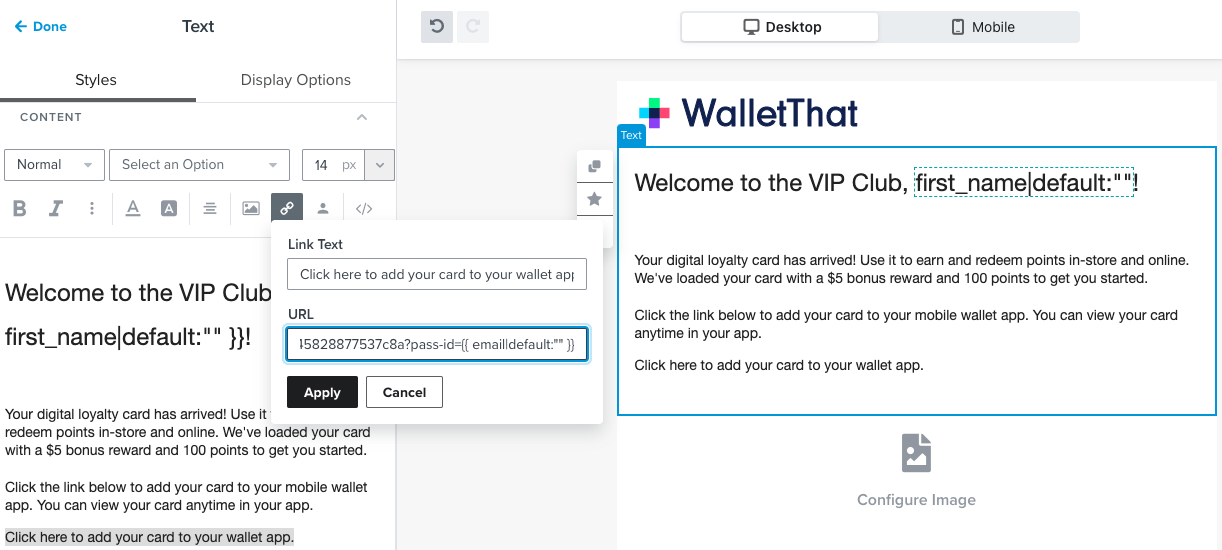
Image Description: Adding a text link
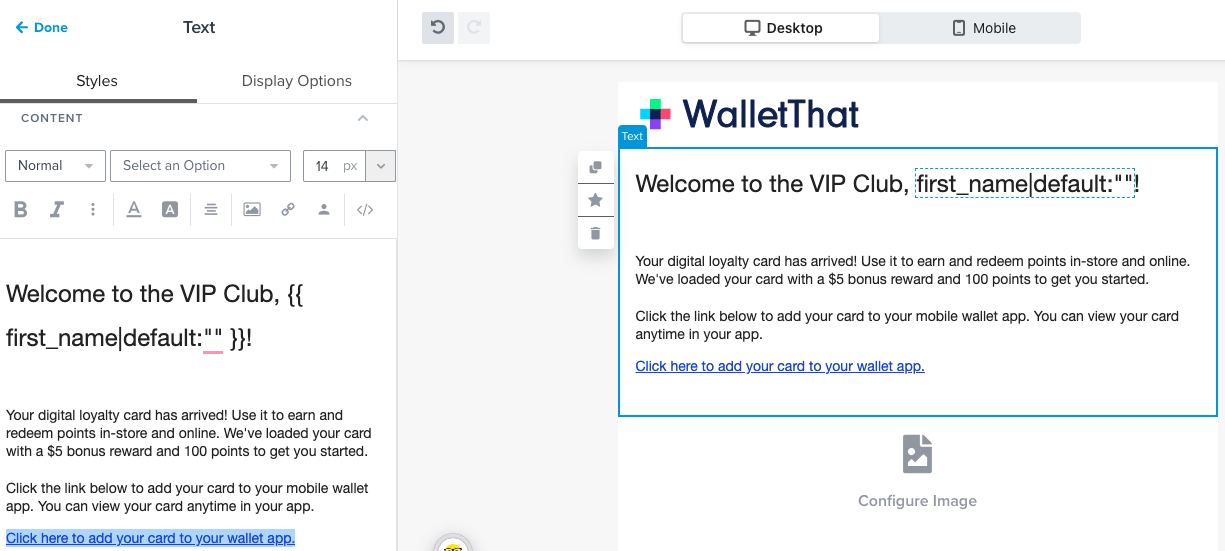
Image Description: What it should look like after adding text link
Option 2: Embed the Link Behind Add to Wallet Buttons using HTML Snippets
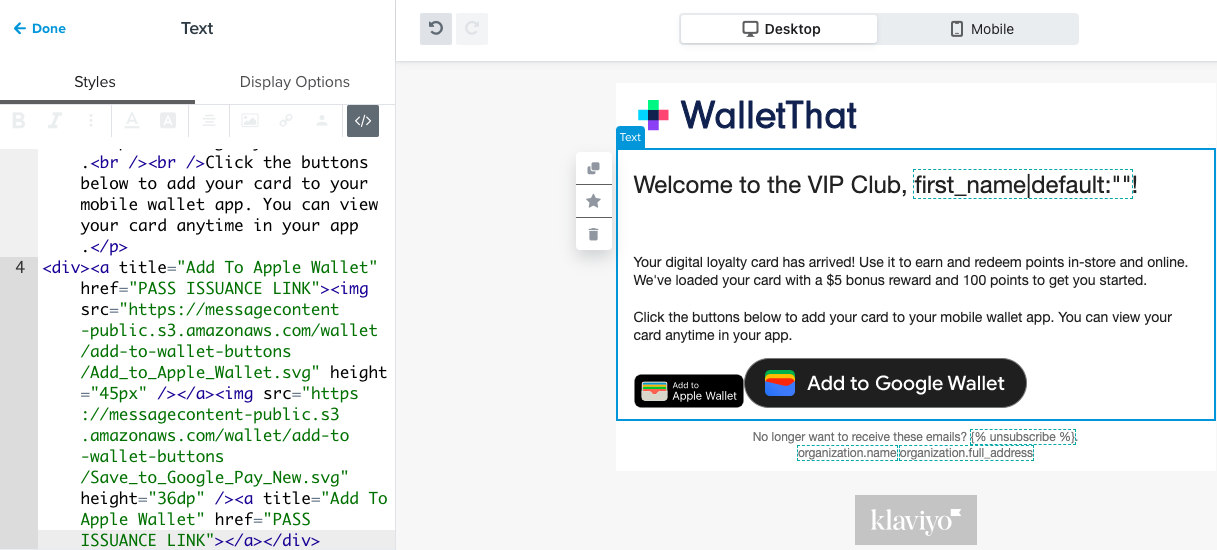
To include Add to Wallet buttons using HTML, access the content settings and click the “Source code” button. From the Pass Issuance Links page on WalletThat Platform, copy the HTML snippets for the Add to Wallet buttons. Then, paste these snippets in your template where you want the buttons to appear. Replace the “PASS ISSUANCE LINK” text within each HTML snippet with your Pass Issuance Link. For more guidance on editing source code in Klaviyo, refer to this help section article: Add Source Code
Option 3: Upload a QR Code with the Link Embedded
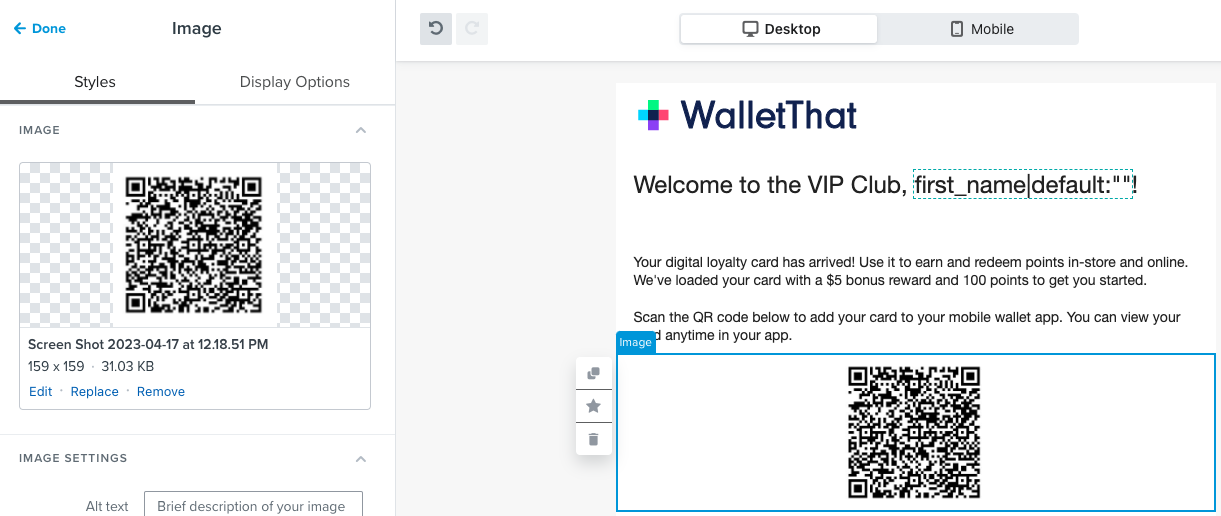
You can use a free online QR code generator to embed your issuance link behind a QR code. Simply paste your Pass Issuance Link into the URL field and save the QR code as an image. Then, upload the embedded QR code image to your email template. If you need assistance adding images to your template, refer to this help section article: How to Insert Images
Step 6: Review & Send Your Campaign
Once you have completed designing your email template, you can either send it immediately or schedule it to be sent at a later time. Check out this article for a comprehensive guide and some useful tips on how to send emails using Klaviyo: Schedule and Send Campaigns
