How to Create a Redemption Profile #
WalletThat's Redemption Profile Builder enables clients to create multiple profiles, each containing a set of valid redemption PINs and linked offers to be able to redeem Passes. Follow the instructions below to create and utilize redemption profiles.
Step 1: Create a New Profile
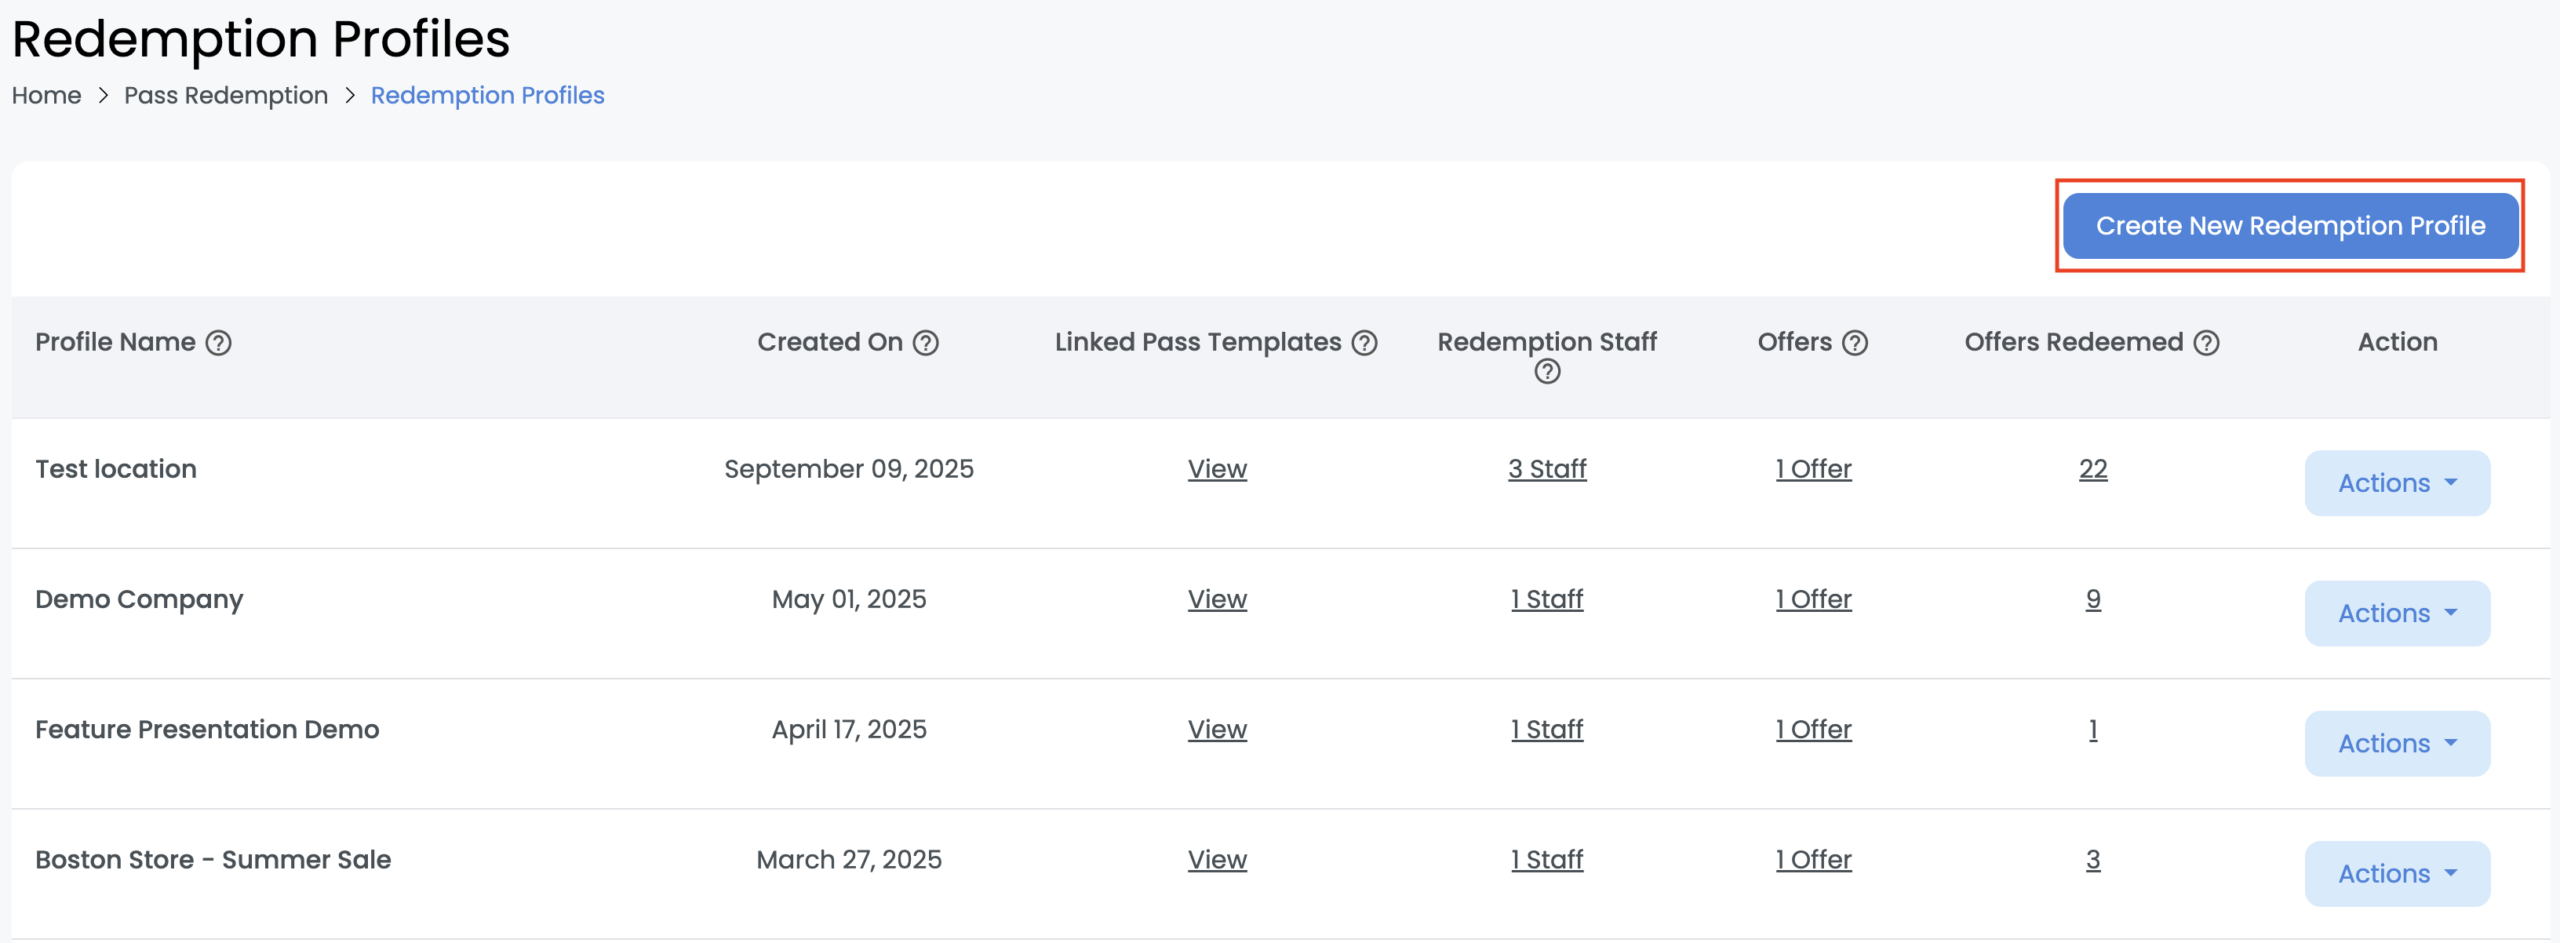
The Redemption Profiles page displays information about previously created profiles. You can create new profiles directly from this page by clicking on the "Create New Profile" button.
| Field | Description |
|---|---|
| Profile Name | This name is used internally to differentiate between multiple redemption profiles you have created. This is not displayed to the end user. |
| Created On | The date and time that the redemption profile was first created. |
| Linked Pass Templates | Click the "View" button to view all of the pass templates using this redemption profile. |
| Redemption Staff | The number of Redemption Staff members that have been added to the redemption profile who are authenticated to redeem passes. |
| Offers | The number of offers that have been added to the redemption profile. You can add up to 5 offers. |
| Offers Redeemed | The number of offers/coupons that have been redeemed using this redemption profile. This is a clickable link which will redirect you to the "Redemption History" page. |
| Action: View Profile Details | Clicking this action will show you a popup containing an overview of the date & time the profile was created on and updated on. |
| Action: Edit Redemption Profile | Clicking this action will open the redemption profile builder and enable you to edit existing redemption profile details. |
| Action: Delete Redemption Profile | Clicking this action will delete the redemption profile and no offers will continue to be redeemed using this profile. |
Step 2: Add Redemption Profile Details
| Field | Description |
|---|---|
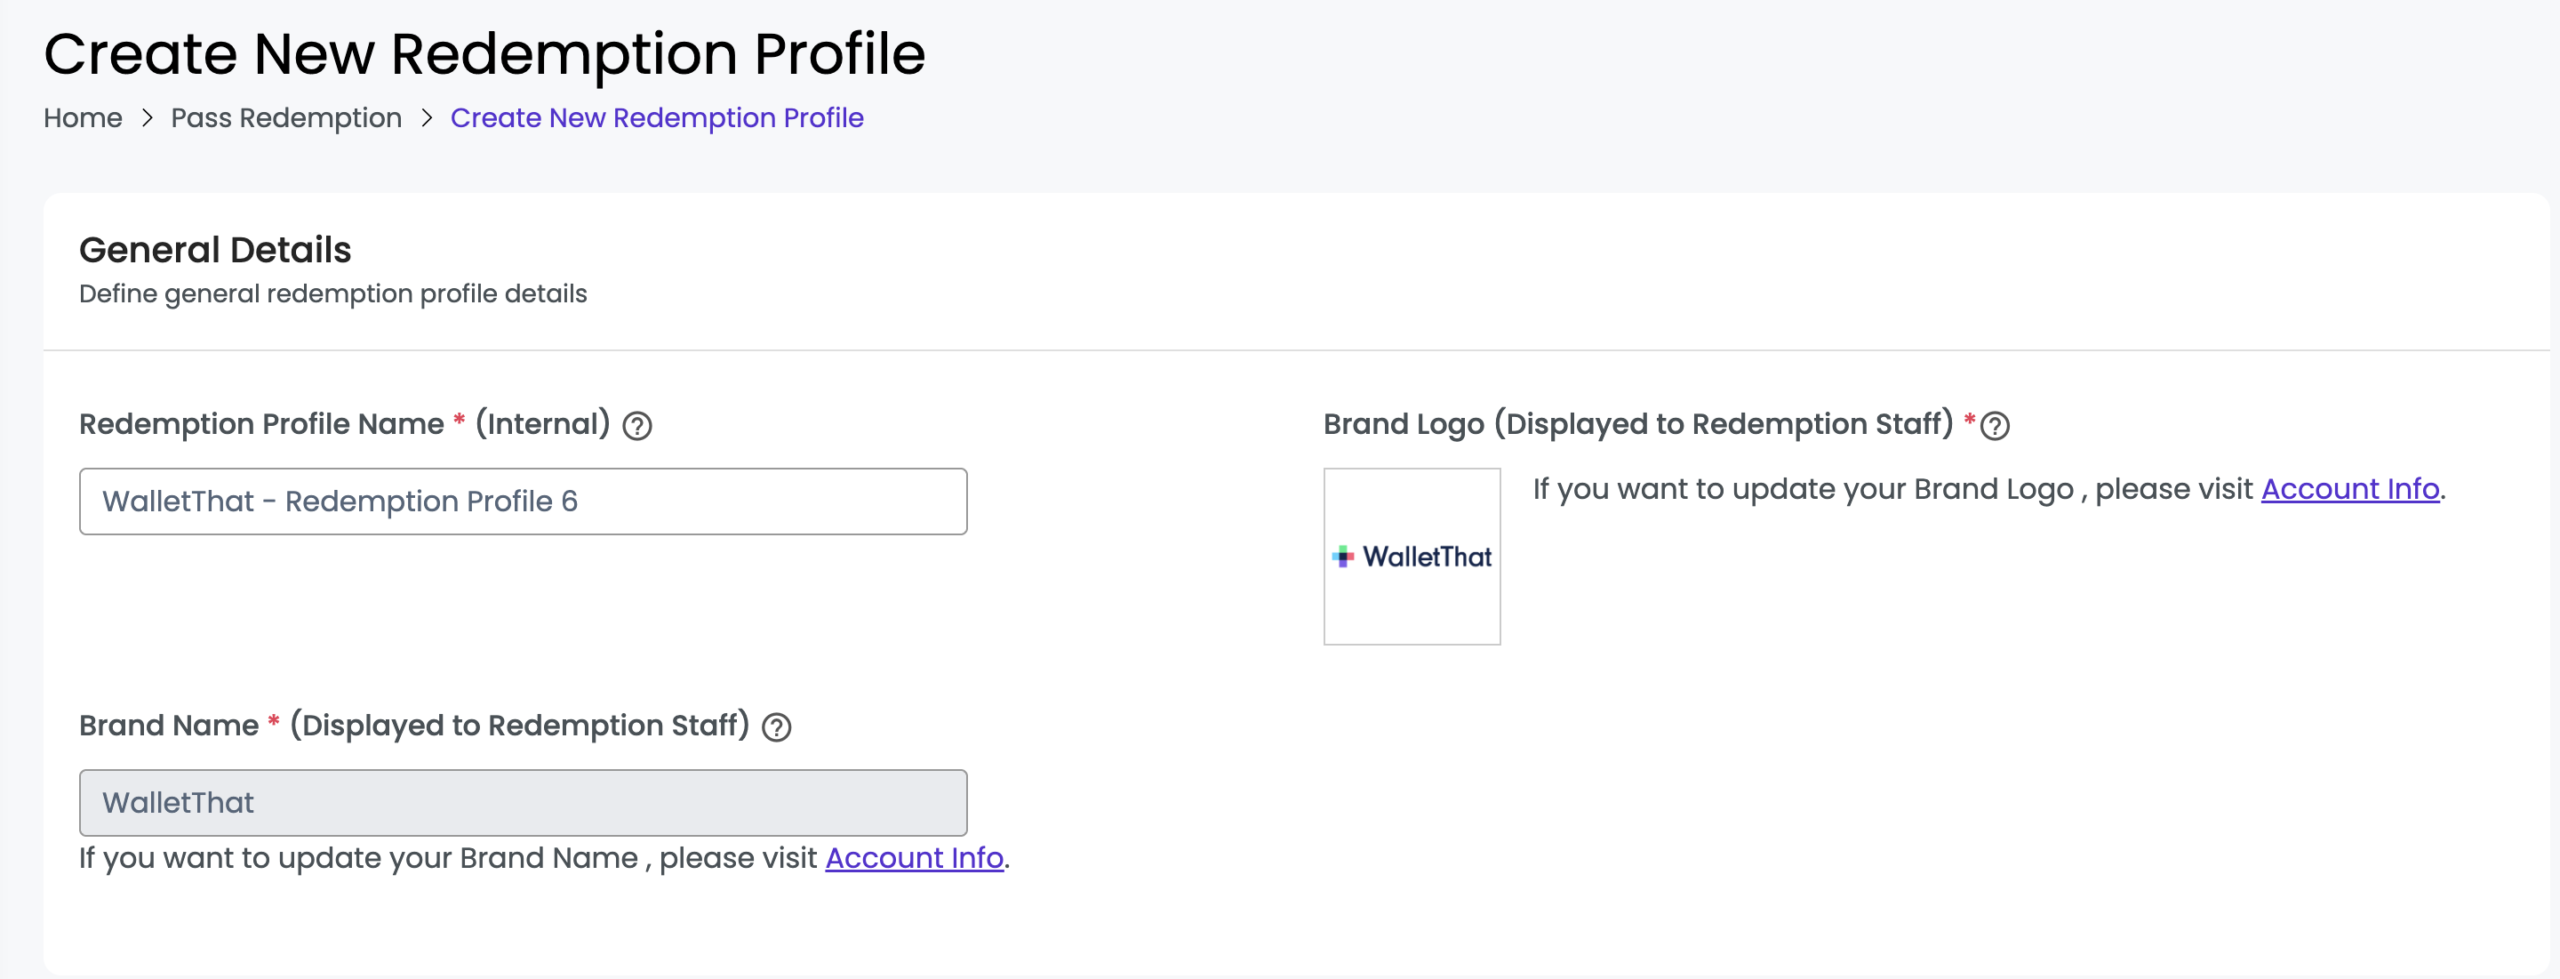
| Redemption Profile Name | The profile name is used only internally to differentiate between multiple redemption profiles you have created. |
| Brand Name | The Brand Name is displayed to Redemption Staff members when they are redeeming coupons. The brand name cannot be changed per profile but can be edited for the entire account on the account information page. |
| Brand Logo |
The brand logo is displayed to Redemption Staff members when they are redeeming coupons. The brand logo cannot be changed per profile but can be edited for the entire account on the account information page. Supported formats: JPEG, GIF, PNG, WEBP Upload size limit: 2 MB |
Step 3: Assign Redemption Staff
| Field | Description |
|---|---|
| Assign All Staff |
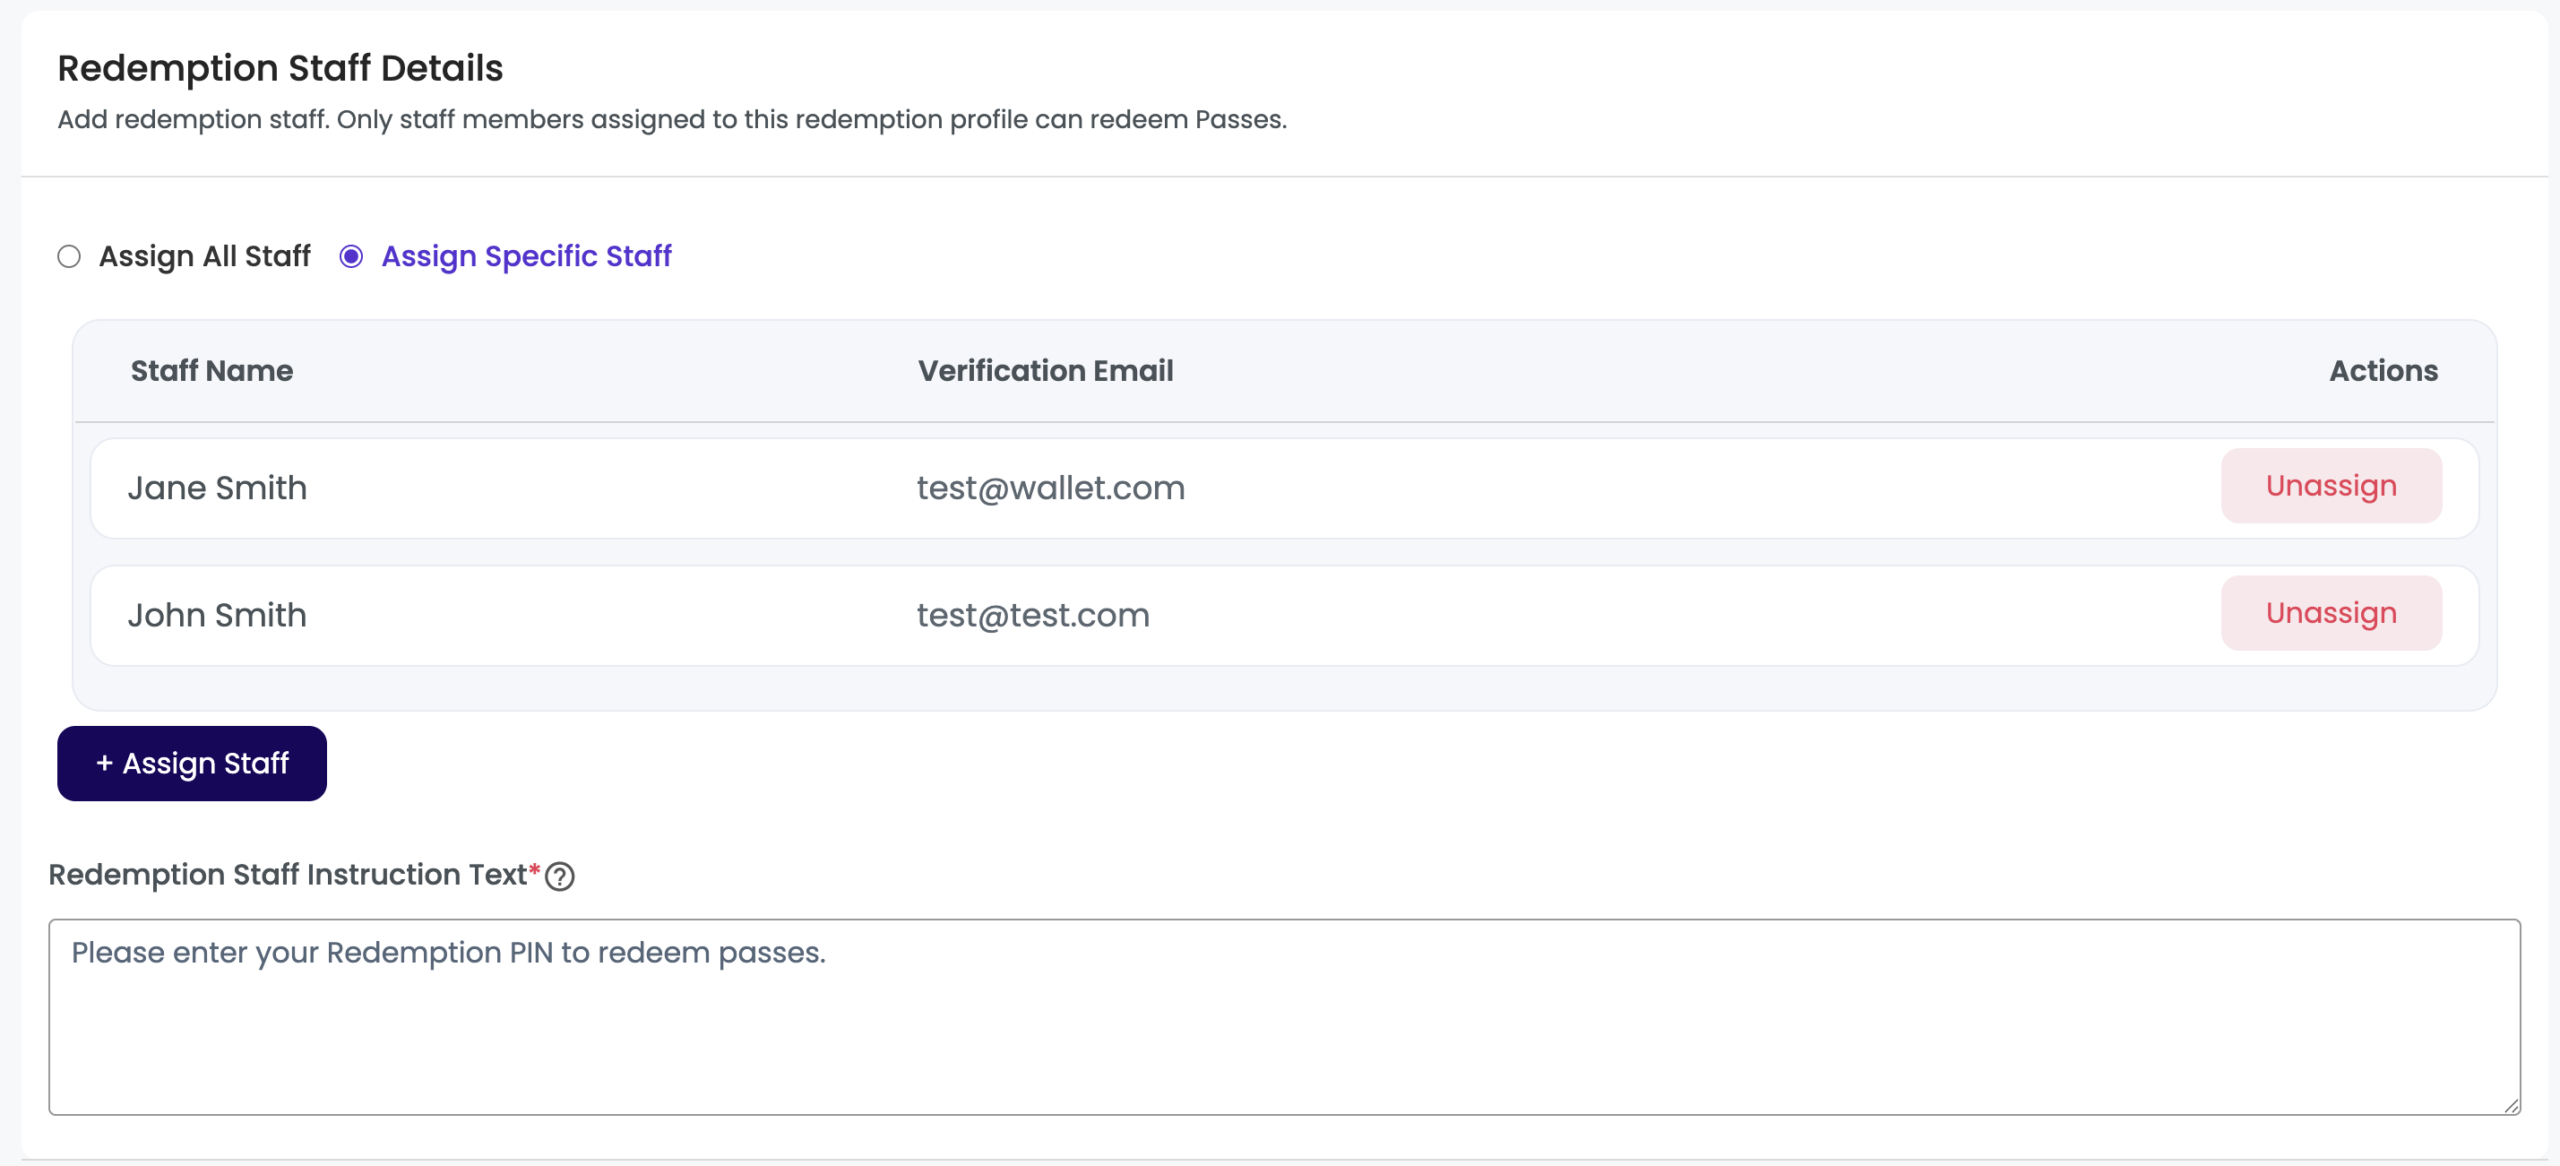
The assign all staff option will assign all redemption staff members to the profile. |
| Assign Specific Staff |
The assign specific staff option enables you to assign only specific staff members to the redemption profile. If no staff members have been assigned, click "Assign Staff" in the bottom right hand corner to assign staff members. |
| Assign Staff (Button) | Clicking this button, when assign specific staff is selected, will open a popup to assign additional staff members to the profile who were previously removed from the profile or not added. |
| Redemption Staff Instruction Text | Add instruction text to display to redemption staff when they are entering their last name & redemption PIN |
Step 4: Add Redemption Locations
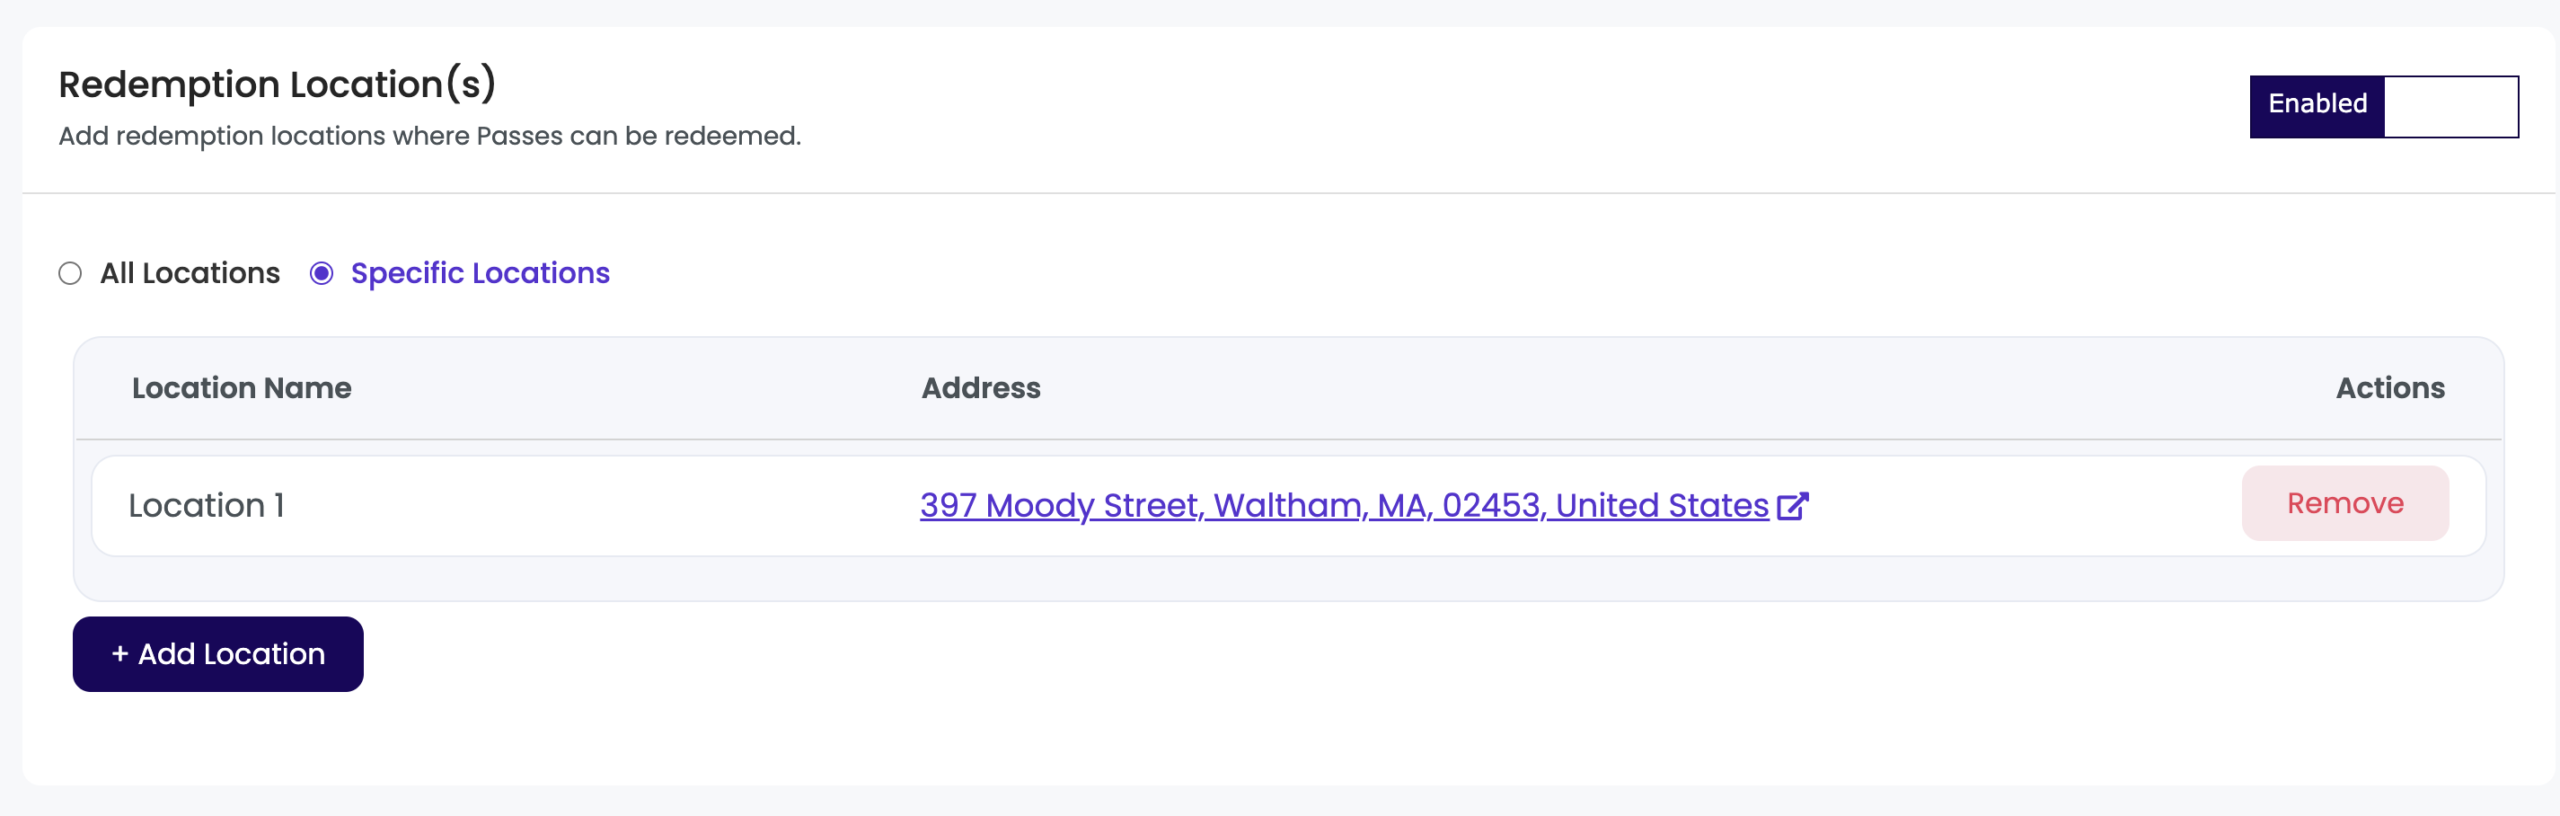
If geofencing is enabled, you will see a field to add geofence locations to the profile. If you need to create a new Geofence Location, you can do so on the Redemption Locations page.
| Field | Description |
|---|---|
| All Locations |
The all locations option will add all redemption locations previously created to the profile. |
| Specific Locations |
The specific locations option enables you to add only specific redemption locations to the redemption profile. If no locations have been added, click "Add Location" in the bottom right hand corner to add redemption locations |
| Add Location (Button) | Clicking this button, when specific locations selected, will open a popup to add additional locations to the profile which were previously removed from the profile or not added. |
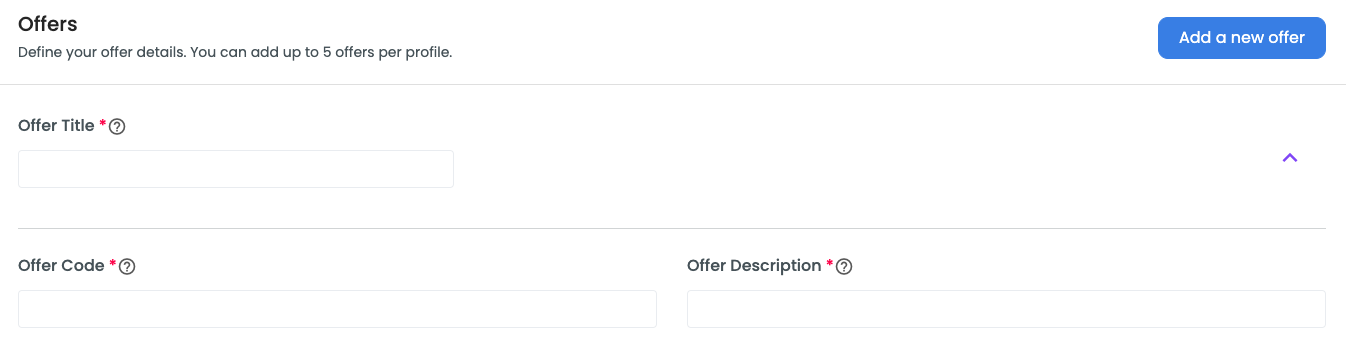
Step 5: Enter Offer Details
| Field | Description |
|---|---|
| Offer Title | This uniquely identifies each offer. This text will be displayed to the employee after their Redemption PIN is validated successfully. A maximum of 5 offers can be added in a single redemption profile. |
| Offer Name | Add an additional name for each offer. This text is not displayed to the employee. |
| Offer Code | The offer code which will be displayed to the employee to enter into the POS to redeem the coupon. |
| Offer Description | Add description text to display to employees regarding the offer. Ie. "20% off purchases of $20 or more". |
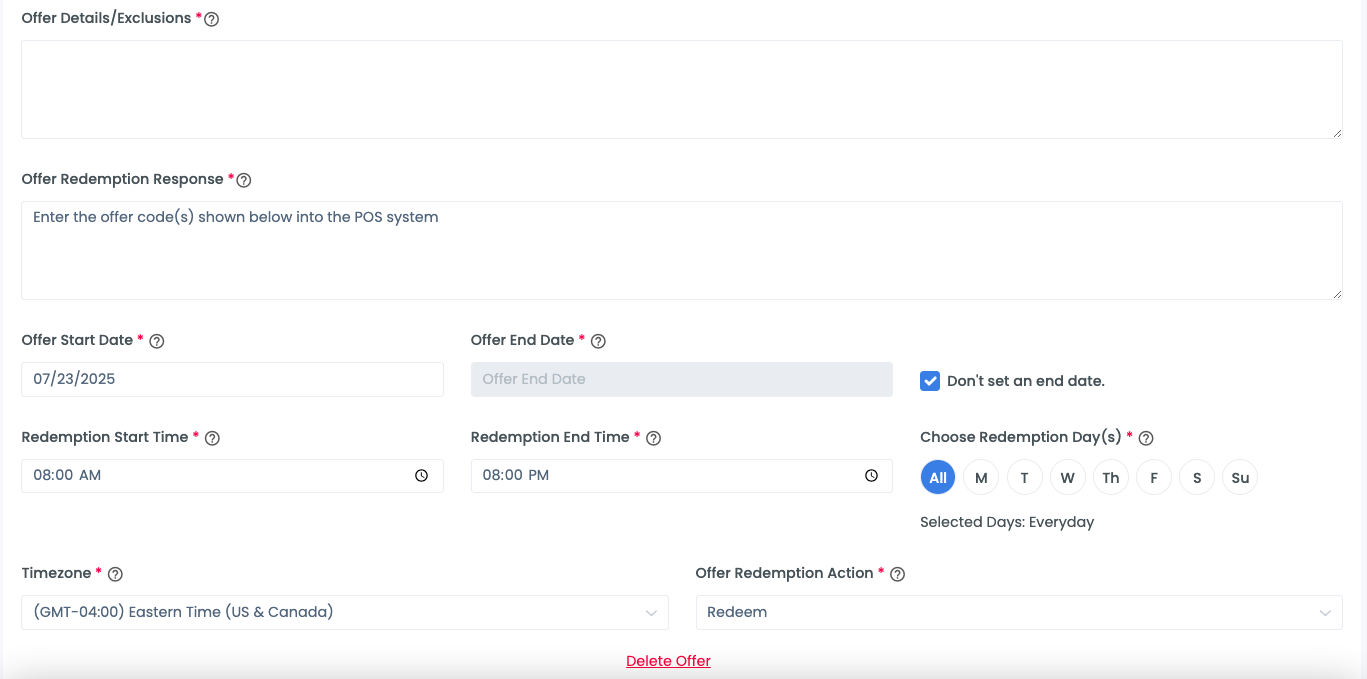
| Offer Details/Exclusions | Add offer details and exclusions to display to the employee before they redeem a coupon. Ie. "Coupon cannot be combined with other offers. One coupon per customer". |
| Offer Redemption Response | Enter text to be displayed to employees after they click "Redeem". Ie. "Enter the code below into the POS". |
| Offer Start Date | Choose the date that the offer becomes valid on. The offer will only be displayed to employees starting on this date. |
| Offer End Date | Choose a date that the offer will end on. The offer will not be displayed to employees after this date. |
| Don't set an end date | Check this box if you do not want the offer to have an end date. |
| Redemption Start Time | Set the time that employees can begin to redeem offers/coupons. |
| Redemption End Time | Set the time that employees cannot redeem offers/coupons after. |
| Choose Redemption Days | Choose the specific days on which employees can redeem offers/coupons. |
| Timezone | Choose the timezone for the redemption start & end times. |
| Redemption Action | Choose the action that you want to take place after the "Redeem" button is clicked by the employee. You may choose no action, voided, or redeemed. |