
Apple & Google Wallet Settings Overview
The Apple and Google Wallet Settings page is where you manage the certificates and console accounts that power your mobile wallet Passes. With the updated Apple and Google Wallet Settings, your Apple Wallet Certificates and Google Pay & Wallet Console Accounts are now displayed in two separate sections, making it easier to manage each independently.
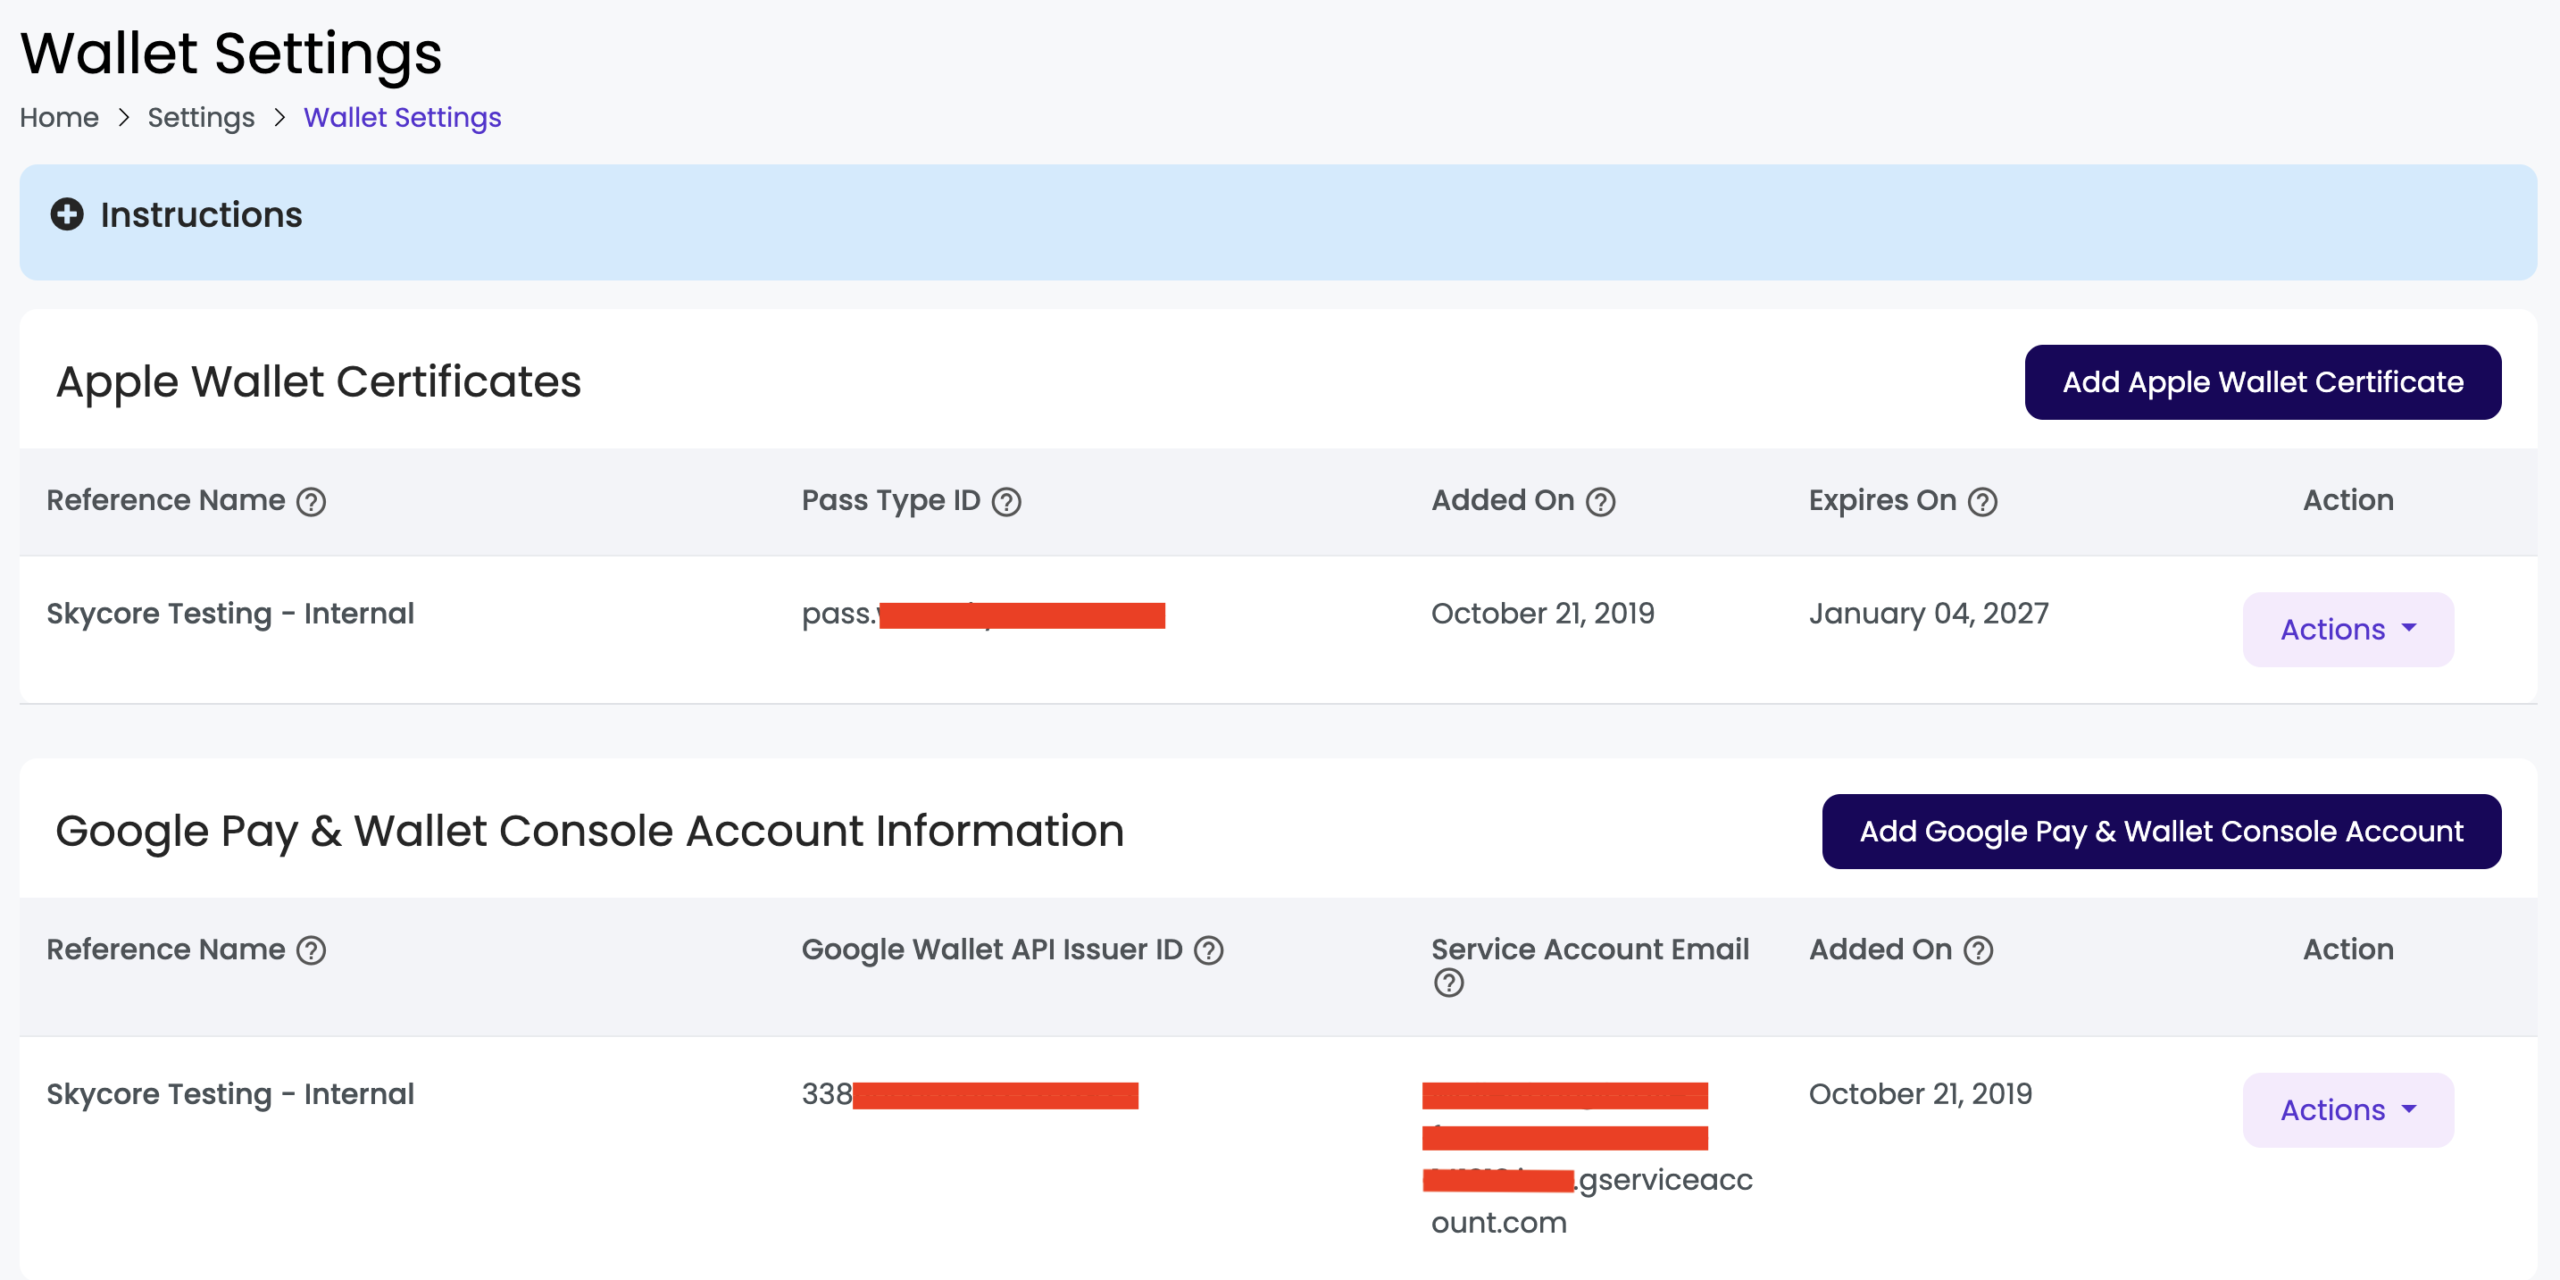
When you navigate to Apple and Google Wallet Settings, you will see two distinct listing sections:
- Apple Wallet Certificates — displays all Apple Pass Signing Certificates associated with your account.
- Google Pay & Wallet Console Accounts — displays all Google console accounts associated with your account.
Each section is independent. Apple certificates will only appear under the Apple section, and Google accounts will only appear under the Google section. There is no combined or mixed listing.
Navigating to Apple and Google Wallet Settings #
- Log in to your WalletThat account at app.walletthat.com.
- From the side navigation, go to Settings → Apple and Google Wallet Settings.
- You will see two sections on the page: Apple Wallet Certificates and Google Pay & Wallet Console Accounts.
Apple Wallet Certificates Section #
This section lists all Apple Pass Signing Certificates linked to your account. Each certificate entry displays a Reference Name, which is a unique identifier that helps you distinguish between multiple certificates if you have more than one. You can add new certificates here by clicking “Add Apple Certificate.”
Available actions for each Apple certificate:
- Edit — Update the certificate’s details or replace it with a renewed certificate.
- Remove — Remove the certificate from your account. Removing a certificate will prevent passes from being installed on Apple Wallet. You will be prompted to confirm before any removal takes place.
Tip: Need to create or renew an Apple Pass Signing Certificate? See our guide: Creating a Pass Type ID & Pass Signing Certificate.

| Setting | Description |
|---|---|
| Reference Name | The reference name is used for internal purposes to differentiate between multiple certificates on the user-interface. |
| Pass Type ID | This is the unique identifier for your Apple Certificate. |
| Added On | The date that your certificate was added on. |
| Expires On | The date that your certificate expires on. You will need to renew your certificate each year for the same Pass Type ID. |
| Action: Edit | Clicking “Edit” will enable you to edit certain details for your Apple Certificate. When you need to renew your certificate, you can click edit and upload your new certificate file (.cer or .p12). |
| Action: Remove | Clicking “Remove” will remove the certificate from your WalletThat account. This does not delete your certificate in your Apple Developer account. |
Generating a CSR on WalletThat (No Mac Required)
To create or renew an Apple Pass certificate, you first need a Certificate Signing Request (CSR). You can generate one from the Keychain app on a Mac — or generate one directly on WalletThat, with no Mac required.
- On the Apple & Google Wallet Settings page, click Generate CSR in the Apple Wallet Certificates section.
- Enter the Pass Type ID for the certificate (for example, pass.com.example.app). This must match the Pass Type ID registered in your Apple Developer account.
- Click Generate and Download CSR. WalletThat generates the key pair, stores the private key securely, and downloads the CSR file to your computer.
- Upload the CSR to your Apple Developer account under your Pass Type ID and download the Apple-signed certificate (.cer file).
- Back on WalletThat, click Add Apple Wallet Certificate (or Actions → Edit on an existing certificate to renew it). Under Upload Method, choose the .cer option (“I generated the CSR on this system”) and upload the .cer file. WalletThat pairs it with the stored private key and creates the .p12 bundle automatically — no password or Keychain export needed.
If your CSR was generated outside WalletThat (for example, on a Mac), choose the .p12 upload method instead and upload the .p12 bundle along with its password, as before.
Adding an Apple Certificate
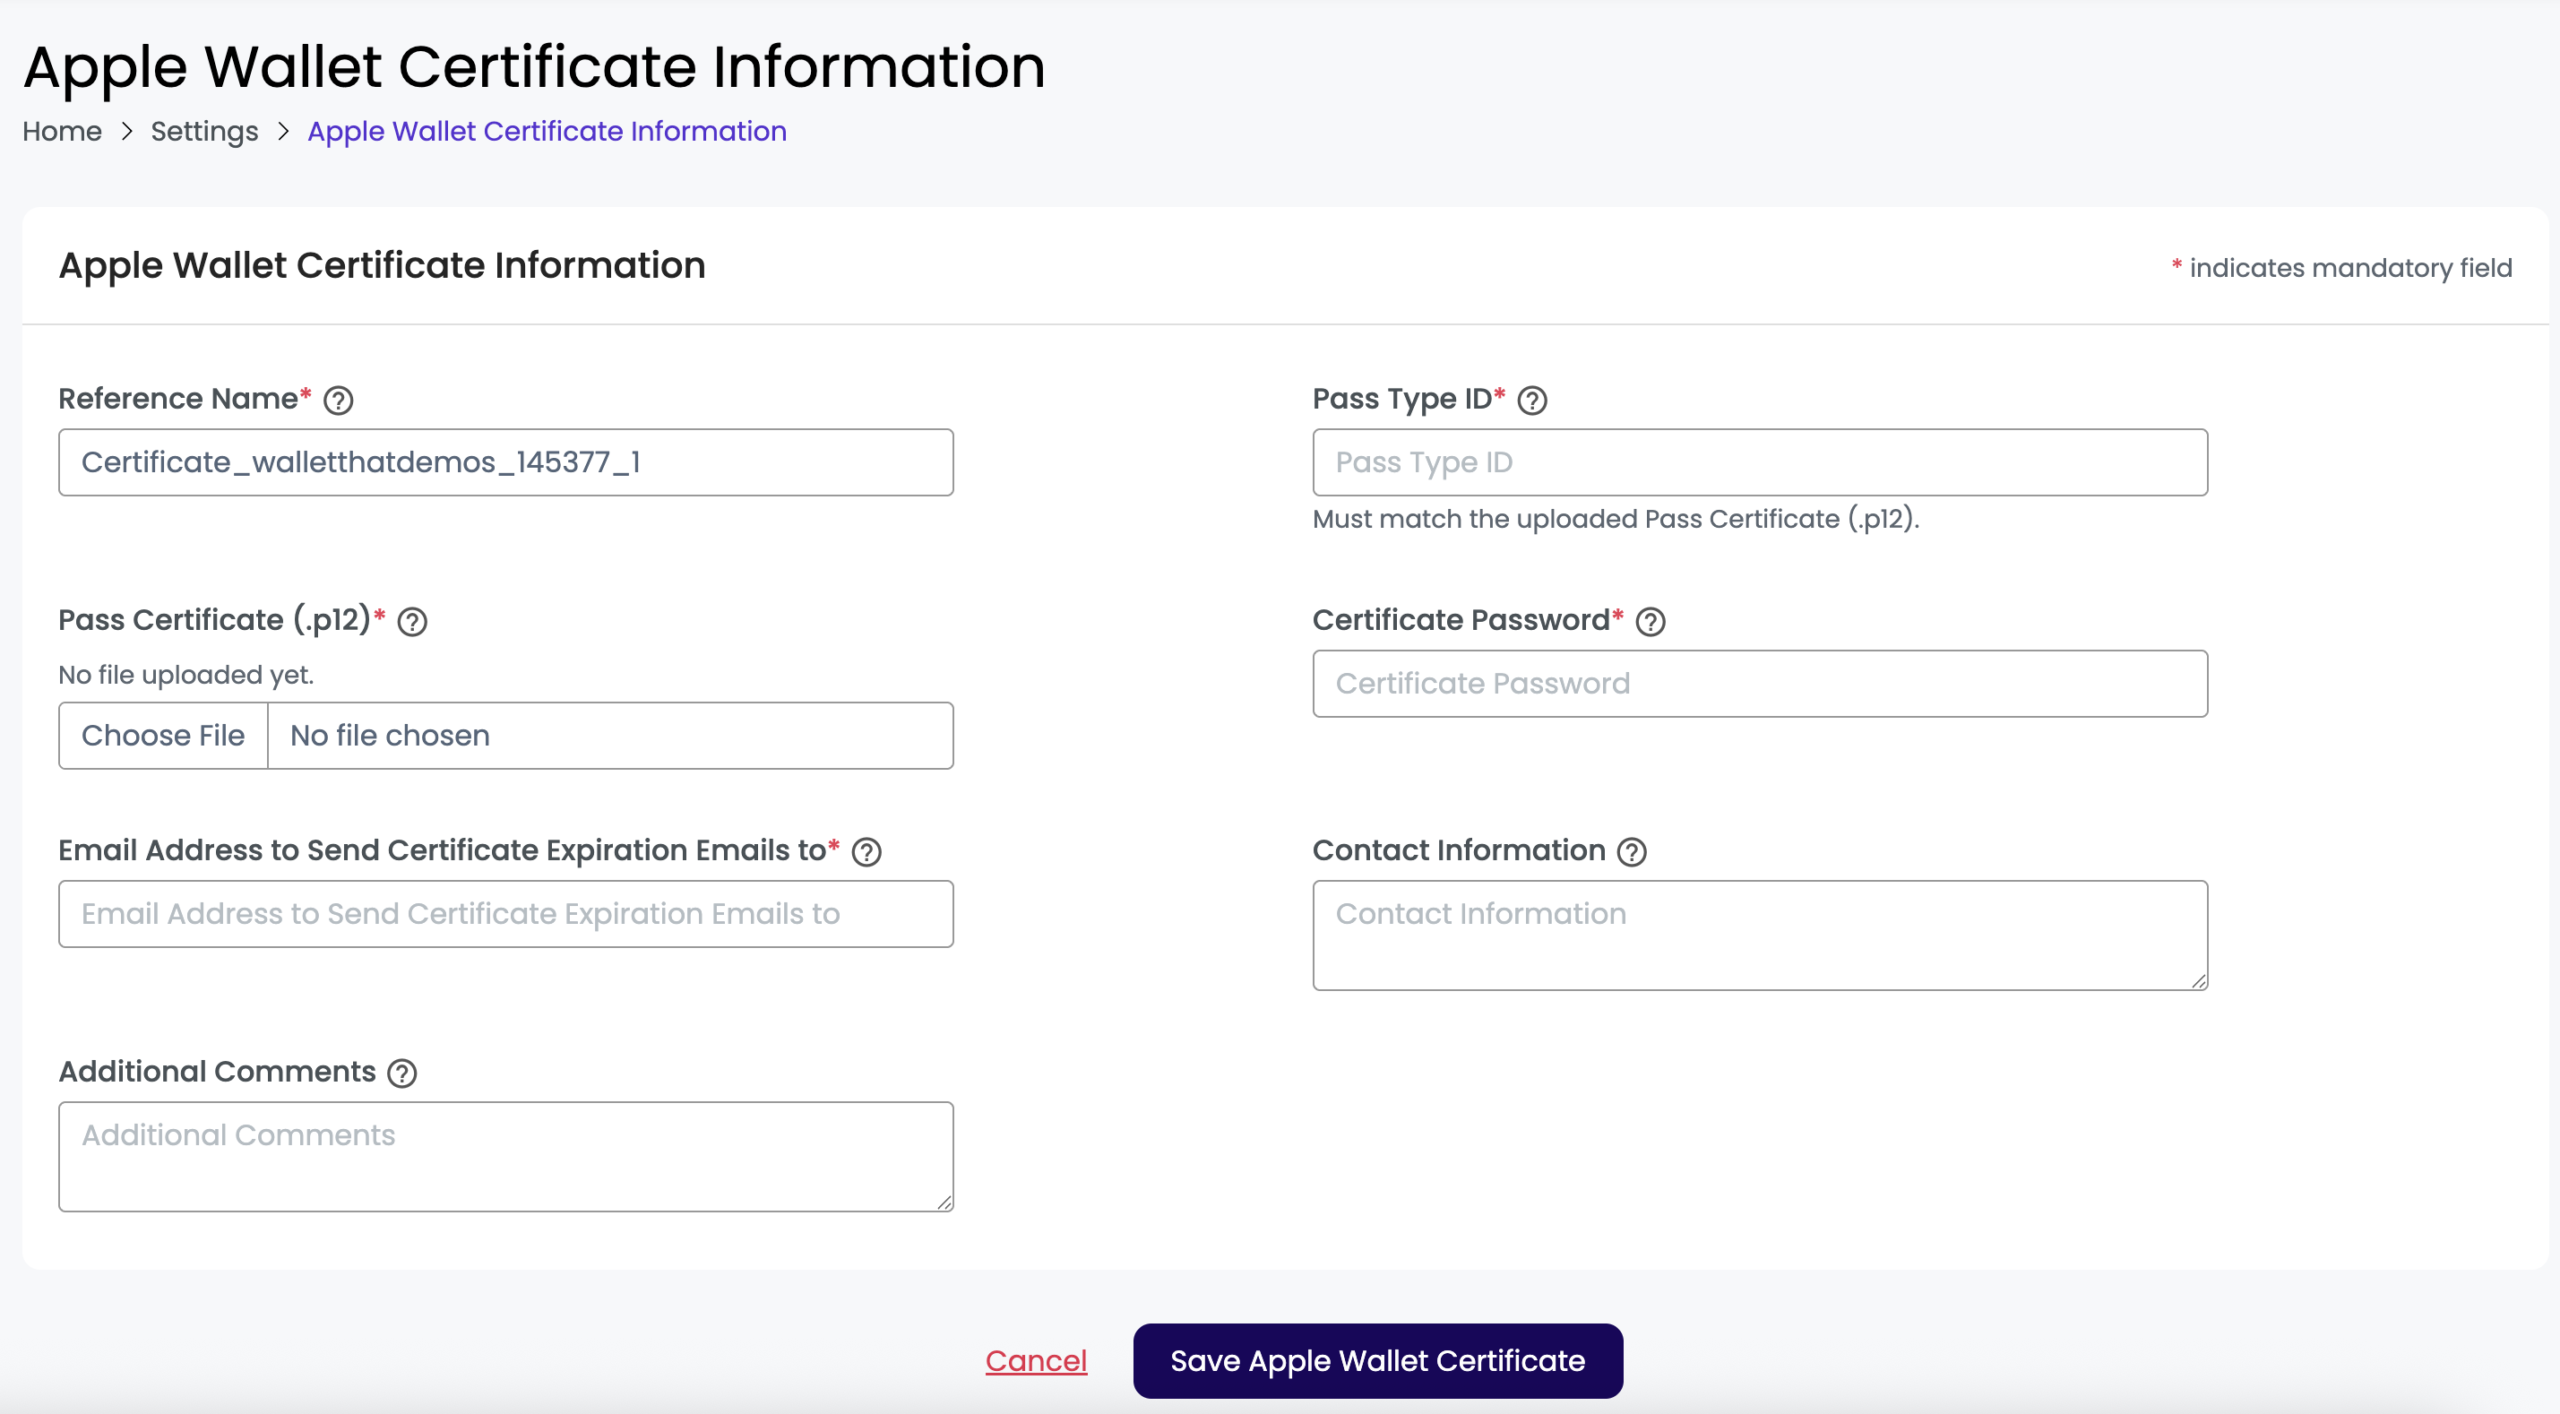
After clicking “Add Apple Wallet Certificate” on the Apple & Google Wallet Settings page, you will be prompted to upload your certificate. Choose the Upload Method that matches how your CSR was created: upload the Apple-signed .cer file if you generated the CSR on WalletThat, or upload the .p12 bundle along with its password if the CSR was generated elsewhere (for example, from the Keychain app on a Mac).
| Setting | Description |
|---|---|
| Reference Name | The reference name is used for internal purposes to differentiate between multiple certificates on the user-interface. This will be autogenerated but you can edit this if needed. |
| Pass Type ID | This is the unique identifier for your Apple Certificate. Create a Pass Type ID in the Apple Developer portal under Certificates, Identifiers & Profiles → Identifiers → Pass Type IDs. This must match the Pass Type ID for the .p12 file that you upload or you will receive an error. |
| Pass Certificate (.cer / .p12) | The certificate file to upload. If you generated the CSR on WalletThat, upload the Apple-signed .cer file downloaded from the Apple Developer website. Otherwise, upload the .p12 file that was generated from your Keychain app on your Mac. |
| Certificate Password | The password that you created while exporting your .p12 file from your Keychain app on your Mac. A password is only required when uploading a .p12 bundle; certificates issued from a WalletThat-generated CSR do not need one. |
| Email Address to Send Certificate Expiration Emails to | The email address that certificate expiration reminder emails will be sent to. This is required. |
| Brand Name | If set, the brand name will be displayed on the back of Apple Wallet Passes above the contact information field. This is optional. |
| End User Support Contact Information | Contact or support text shown to end users on the pass (for example, “Digitally Signed by WalletThat”). This is optional. |
| Action: Delete | Clicking “Delete” will delete the certificate from your WalletThat account. This does not delete your certificate in your Apple Developer account. |
Google Pay & Wallet Console Accounts Section #
This section lists all Google Pay & Wallet Console Accounts linked to your account. Each entry displays a Reference Name to help you identify and manage multiple Google accounts if applicable.
Available actions for each Google account:
- Edit — Update the account’s details or credentials.
- Remove — Remove the Google account from your account. Removing this will prevent passes from being installed on Google Wallet. You will be prompted to confirm before any removal takes place.
Tip: Need to create a Google Pay & Wallet Console Account? See our guide: Creating a Google Pay & Wallet Console Account
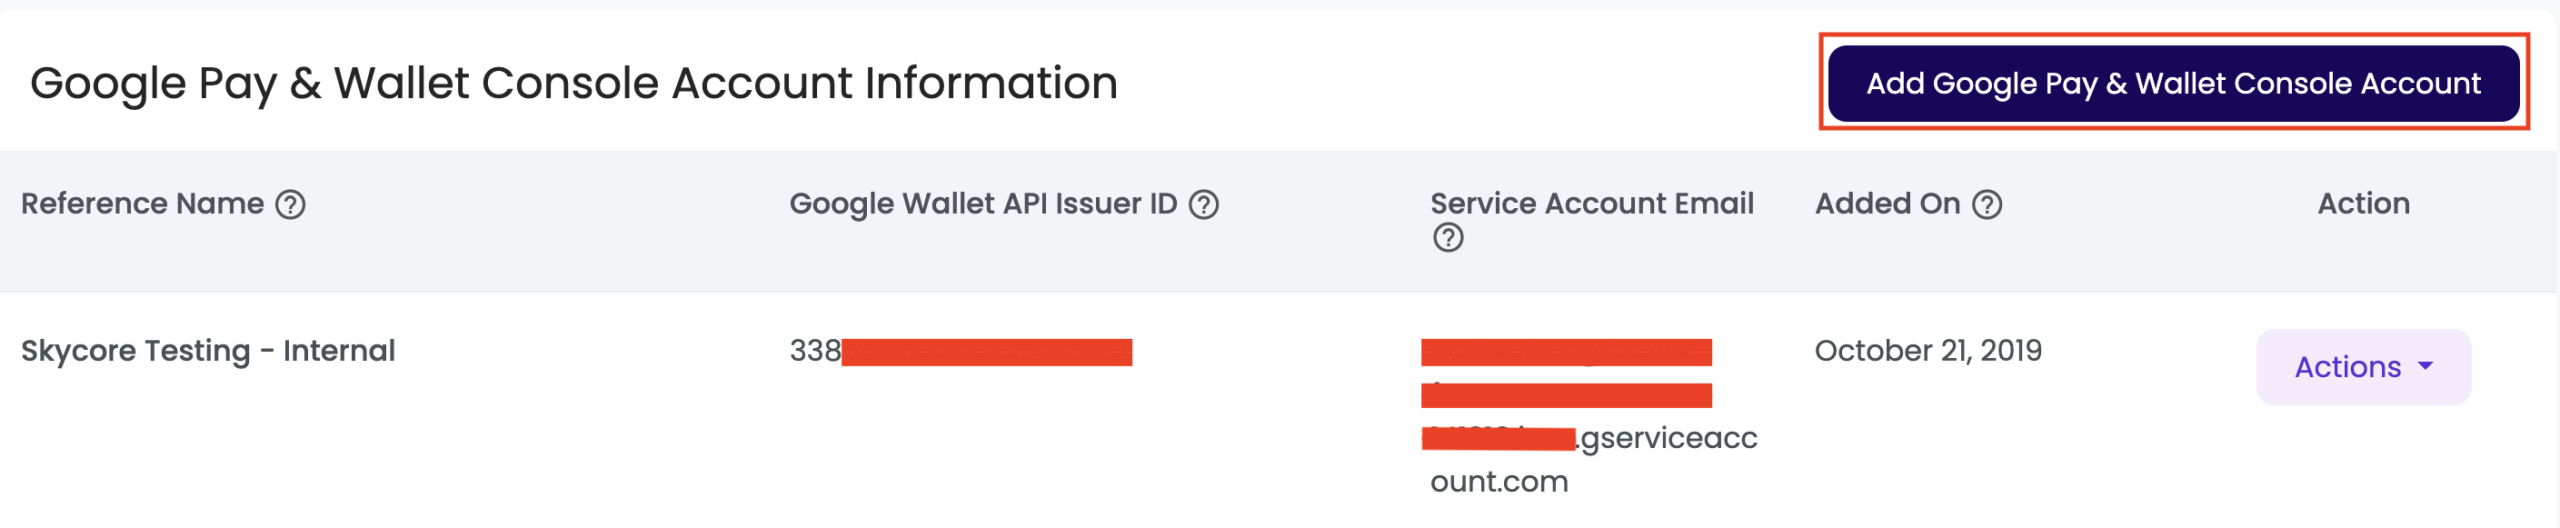
| Setting | Description |
|---|---|
| Reference Name | This is a unique identifier used to distinguish this Google Pay & Wallet Console Account from any other accounts you may have added. |
| Google Wallet API Issuer ID |
Your Google Wallet Issuer ID. You can find this in the Google Pay & Wallet Console by navigating to the Google Wallet API section. The Issuer ID is displayed at the top of the page. |
| Service Account Email | This is the service account email linked to your Google Pay & Wallet Console account. The standard service account email is: walletthataccounts@brave-frame-141219.iam.gserviceaccount.com |
| Added On | The date that your console account was added on. |
| Action: Edit | Clicking “Edit” will enable you to edit the Issuer ID. |
| Action: Remove | Clicking “Remove” will remove the console account from your WalletThat account. This does not delete your account in your account with Google. |
Adding a Google Pay & Wallet Console Account
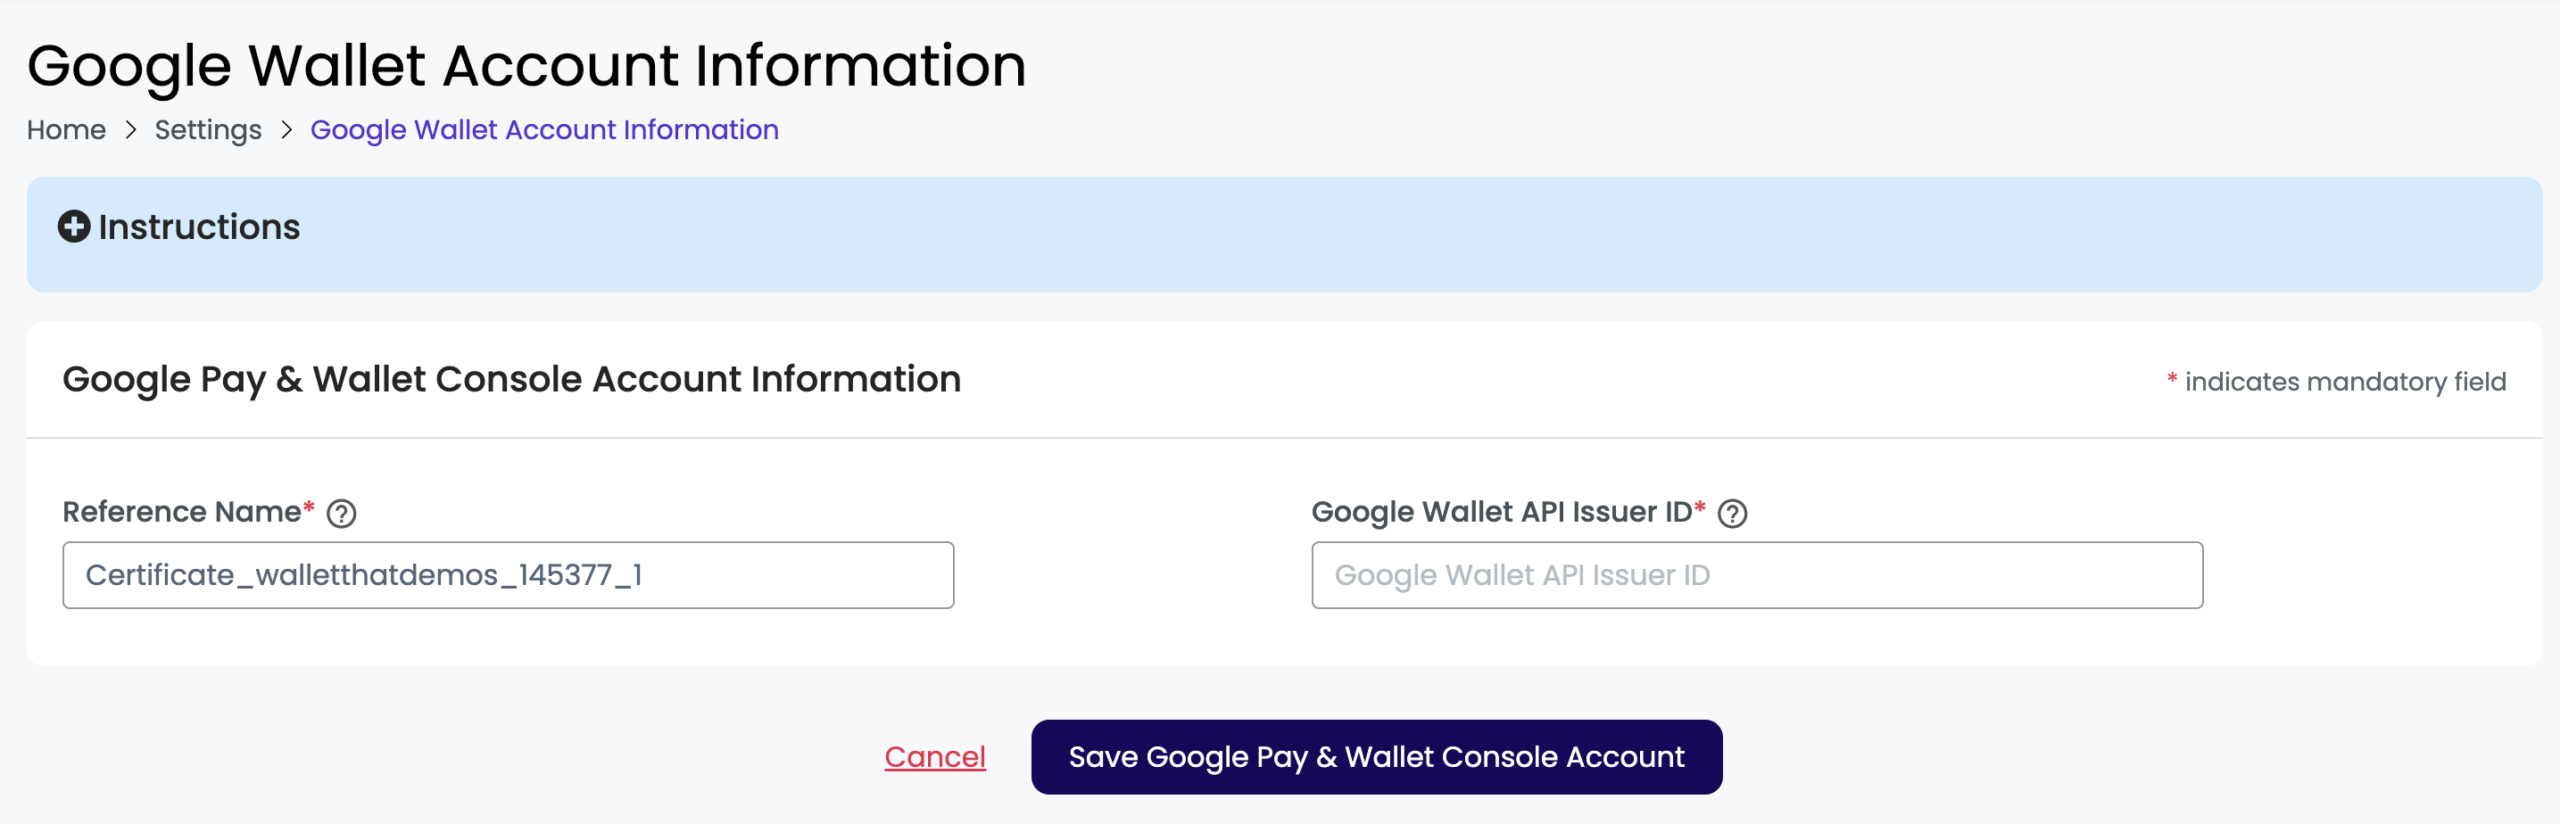
After clicking “Add Google Pay & Wallet Console Account” on the Apple & Google Wallet Settings page, you will be prompted to enter your Google Wallet API Issuer ID.
| Setting | Description |
|---|---|
| Reference Name | The reference name is used for internal purposes to differentiate between multiple certificates on the user-interface. This will be autogenerated but you can edit this if needed. |
| Google Wallet API Issuer ID |
Your Google Wallet Issuer ID. You can find this in the Google Pay & Wallet Console by navigating to the Google Wallet API section. The Issuer ID is displayed at the top of the page. |